
Data Science and ML (Part 27): Convolutional Neural Networks (CNNs) in MetaTrader 5 Trading Bots — Are They Worth It?

The pooling operation used in convolutional neural networks is a big mistake, and the fact that it works so well is a disaster.
Geoffrey Hinton
Contents
- What are Convolutional Neural Networks (CNNS)?
- Convolutional Layers
- Activation Functions
- Pooling Layers
- Fully Connected Layers
- Dropout Layers - Why use Convolutional Neural Networks (CNNs) for Financial Analysis and Trading Applications?
- Making a Convolutional Neural Network (CNN) in Python
- Creating a Convolutional Neural Network (CNN) based Trading Robot
- The Bottom Line
A basic understanding of Python programming language, Artificial Neural Networks, Machine learning and ONNX in MQL5 is required to understand the contents of this article fully.
What are Convolutional Neural Networks (CNNS)?
Convolutional Neural Networks (CNNs) are a class of deep learning algorithms specifically designed to process structured grid-like data, such as images, audio spectrograms, and time-series data. They are particularly well-suited for visual data tasks because they can automatically and adaptively learn spatial hierarchies of features from input data.
CNNs are the extended version of artificial neural networks (ANN). They are predominantly used to extract the feature from the grid-like matrix dataset. For example, visual datasets like images or videos where data patterns play an extensive role.
Convolutional neural networks have several key components such as; Convolutional layers, activation functions, pooling layers, fully connected layers, and dropout layers. To understand CNNs in depth, let us dissect each component and see what it's all about.

Convolutional Layers
These are the core building blocks of CNNs, it is where the majority of computation occurs. Convolutional layers are responsible for detecting local patterns in the input data, such as edges in images. This can be achieved through the use of filters (or kernels) that slide over the input data to produce feature maps.
A convolutional layer is a hidden layer that contains several convolution units in a convolutional neural network, that is used for feature extraction.
from tensorflow.keras.layers import Conv1D

model = Sequential()
model.add(Conv1D(filters=64, kernel_size=3, activation='relu', input_shape=(window_size, X_train.shape[2])))
Filters/Kernels
Filters (or kernels) are small learnable square matrices (usually of size 3x3, 5x5, etc.) that slide over the input data to detect local patterns.
How do they work?
They operate by moving across the input data and then perform element-wise multiplication between the filter values and the input values within the filter's current receptive field, followed by summing the results. This operation is what's called convolution.
During training, the network learns the optimal values of the filters. In early layers, filters typically learn to detect simple features like edges and textures meanwhile in deeper layers, filters can detect more complex patterns such as shapes and objects.
Consider a simple 3x3 filter and a 5x5 input image. The filter slides over the image, computing the convolution operation to produce a feature map.

Stride
This is another feature found in the convolution layer. The stride is the step size by which the filter moves across the input data. It determines how much the filter shifts at each step during the convolution process.
How do they work?
Stride of 1, the filter moves one unit at a time, resulting in a highly overlapping and detailed feature map. This produces a larger output feature map.
Stride of 2 or more, the filter skips units, resulting in a less detailed but smaller output feature map. This reduces the spatial dimensions of the output, effectively downsampling the input.
For example, If you have a 3x3 filter and a 5x5 input image with a stride of 1, the filter will move one pixel at a time, producing a 3x3 output feature map. With a stride of 2, the filter will move two pixels at a time, producing a 2x2 output feature map.
Padding
Padding involves adding extra pixels (usually zeros) around the border of the input data. This ensures that the filter fits properly and controls the spatial dimensions of the output feature map.
Types of padding
According to Keras, there are three types of padding. (case-sensitive)
- valid - no padding will be applied,
- same - pads the input so the output size matches the input size when strides=1.
- causal - used for temporal data to ensure the output at time step 𝑡 does not depend on future inputs.
Padding helps in preserving the spatial dimensions of the input data. Without padding, the output feature map shrinks with each convolutional layer, which might result in losing important edge information.
By adding padding, the network can learn edge features effectively and maintain the spatial resolution of the input.
Consider a 3x3 filter and a 5x5 input image. With valid padding (no padding), the output feature map will be 3x3. With the same padding, you might add a border of zeros around the input, making it 7x7. The output feature map will then be 5x5, preserving the input dimensions.
Below is the code for a convolution layer in Python.
from tensorflow.keras.models import Sequential
from tensorflow.keras.layers import Conv1D

model = Sequential()
model.add(Conv1D(filters=64,
                 kernel_size=3,
                 activation='relu',
                 strides=2,
                 padding='causal',
                 input_shape=(window_size, X_train.shape[2])
                )
         )
Activation Functions
As discussed in the article Neural Networks Demystified, an activation function is a mathematical function that takes an input and processes an output.
The Activation function is applied element-wise to introduce non-linearity into the model. Commonly used activation functions in CNNs include ReLU (Rectified Linear Unit), Sigmoid, and TanH.
Pooling Layers
Also known as desample layers, These layers are an essential part of CNNs as they are responsible for reducing the spatial dimension of the input data in terms of width and height while retaining the most important information.
How do they work?
Firstly, they divide the input data into overlapping regions or windows, then they apply an aggregation function such as Max pooling or Average pooling on each window to obtain a single value.
Max pooling takes the maximum value from a set of values within a filter region. It reduces the spatial dimensions of the data, which helps in reducing the computational load and the number of parameters.
Python
from tensorflow.keras.layers import Conv1D, MaxPooling1D

model = Sequential()
model.add(Conv1D(filters=64, kernel_size=3, activation='relu', input_shape=(window_size, X_train.shape[2])))
model.add(MaxPooling1D(pool_size=2))
MaxPooling1D(pool_size=2) This layer takes the maximum value from each 2-element window.

Average pooling takes the average value from a set of values within a filter region. Less commonly used than max pooling.
Python
from tensorflow.keras.layers import Conv1D, AveragePooling1D

model = Sequential()
model.add(Conv1D(filters=64, kernel_size=3, activation='relu', input_shape=(window_size, X_train.shape[2])))
model.add(AveragePooling1D(pool_size=2))
AveragePooling1D(pool_size=2) This layer takes the average value from each 2-element window.

Why use 1D Convolutional Layer?
There are Conv1D, Conv2D, and Conv3D layers for CNNs. The 1D convolution layer is one suitable for this type of problem since it is designed for one dimensional data, making it suitable for sequential or Time series data. Other Convolutional layers such as the Conv2D and the Conv3D are too complex for this kind of problem.
Fully Connected Layers
Neurons in a fully connected layer have connections to all activations in the previous layer. These layers are typically used towards the end of the network to perform classification or regression based on the features extracted by convolutional and pooling layers.
from tensorflow.keras.layers import Conv1D, MaxPooling1D, Flatten, Dense, Dropout

model = Sequential()
model.add(Conv1D(filters=64, kernel_size=3, activation='relu', input_shape=(window_size, X_train.shape[2])))
model.add(MaxPooling1D(pool_size=2))
model.add(Flatten())
model.add(Dense(100, activation='relu'))
model.add(Dropout(0.5))
model.add(Dense(units=len(np.unique(y)), activation='sigmoid'))  # For binary classification (e.g., buy/sell signal)

model.summary()
The Flatten Layer converts the 1D pooled feature map into a 1D vector, so it can be fed into the fully connected (dense) layers.
Dense Layers (Dense) are fully connected layers that are used for making final decisions based on the features extracted by the convolution and pooling layers. Dense layers are essentially the core component of traditional artificial neural networks (ANNs).

Dropout Layers
The Dropout layer acts as a mask, eliminating some neurons' contributions to the subsequent layer while maintaining the functionality of all other neurons. If we apply a Dropout layer to the input vector, some of its features are eliminated; however, if we apply it to a hidden layer, some hidden neurons are eliminated.
Since they avoid overfitting the training data, dropout layers are crucial in the training of CNNs. If they are absent, the first set of training samples has an excessively large impact on learning. As a result, traits that only show in later samples or batches would not be learned.
from tensorflow.keras.layers import Conv1D, MaxPooling1D, Flatten, Dense, Dropout

model = Sequential()
model.add(Conv1D(filters=64, kernel_size=3, activation='relu', input_shape=(window_size, X_train.shape[2])))
model.add(MaxPooling1D(pool_size=2))
model.add(Flatten())
model.add(Dense(100, activation='relu'))
model.add(Dropout(0.5))
model.add(Dense(units=len(np.unique(y)), activation='sigmoid'))  # For binary classification (e.g., buy/sell signal)

model.summary()
Why use Convolutional Neural Networks (CNNs) for Financial Analysis and Trading Appplications?
CNNs are widely used in image and video processing applications since that is what they are designed for. If you look at the above explanations you may be able to notice that I refer to using CNNs when working with image classifications and stuff.
Using Convolutional Neural Networks (CNNs) for tabular data, such as financial analysis, might seem unconventional compared to using other neural network types such as Feed Forward Neural Networks(FFNN), Recurrent Neural Networks (RNNs), Long Short-Term Memory (LSTMs), and Gated Recurrent Units (GRUs). However, there are several reasons and potential benefits outlined below for employing CNNs in this context.
01. CNNs are excellent at automatically extracting local patterns from data
03. They can be robust to noise and redundant features
04: CNNs can handle multivariate time series well
Now that we have valid reasons to use CNNs in trading applications, let us create one and train it, then we'll see how we can use a CNN in a Meta Trader 5 Expert Advisor(EA).
Making a Convolutional Neural Network (CNN) in Python
This involves several steps which are.
- Collecting the data
- Preparing data for a CNN model
- Training a CNN model
- Saving a CNN model to ONNX format
01: Collecting the Data
Using the data made for Time series forecasting we used in the previous articles.
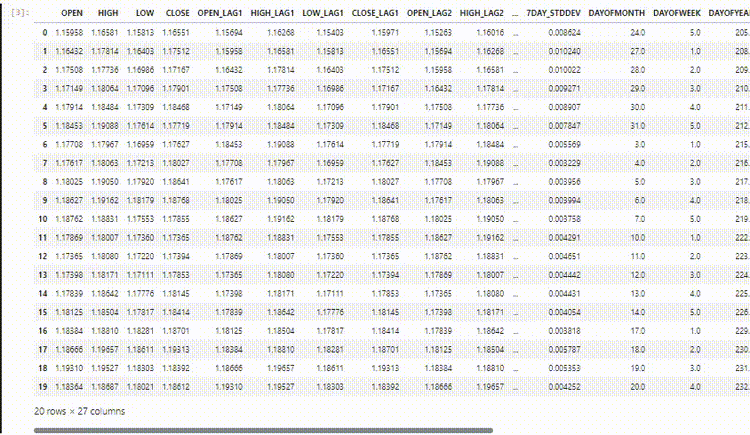
Now that we know that Convolutional Neural Networks (CNNs) are good at detecting patterns within high-dimensional data, without complicating the model we can choose some of the features I believe might have plenty of patterns that the CNN model can detect.
Python code
open_price = df['TARGET_OPEN']
close_price = df['TARGET_CLOSE']

# making the target variable

target_var = []
for i in range(len(open_price)):
    if close_price[i] > open_price[i]: # if the price closed above where it opened
        target_var.append(1) # bullish signal
    else:
        target_var.append(0) # bearish signal


new_df = pd.DataFrame({
    'OPEN': df['OPEN'],
    'HIGH': df['HIGH'],
    'LOW': df['LOW'],
    'CLOSE': df['CLOSE'],
    'TARGET_VAR': target_var
})

print(new_df.shape)
Shortly after preparing the target variable based on the TARGET_OPEN and TARGET_CLOSE which are open and close values respectively, collected one bar forward. We created a mini dataset version named new_df which only had 4 independent variables OPEN, HIGH, and LOW values, and one dependent variable named TARGET_VAR.
02: Preparing Data for A CNN Model
Firstly, we have to pre-process the input data by reshaping and aligning it into windows. This is very crucial when working with tabular data in CNNs, here is why.
Since the trading data is sequential, patterns often emerge over a series of time steps rather than a single point in time. By creating overlapping windows of data we can, capture temporal dependencies and provide context to the CNN model.
Also, CNNs expect input data to be in a specific shape. For 1D convolutional layers, the input shape typically needs to be (number of windows, window size, number of features). This shape resembles the one we use in time series analysis using Recurrent Neural Networks (RNNs) in the previous article. The preprocessing procedure we are about to do ensures that the data is in this format, making it suitable for a CNN model input.
# Example data preprocessing function

def preprocess_data(df, window_size):
    X, y = [], []
    for i in range(len(df) - window_size):
        X.append(df.iloc[i:i+window_size, :-1].values)
        y.append(df.iloc[i+window_size, -1])
    return np.array(X), np.array(y)


window_size = 10


X, y = preprocess_data(new_df, window_size)
print(f"x_shape = {X.shape}\ny_shape = {y.shape}")
Outputs
x_shape = (990, 10, 4)
y_shape = (990,)
Since our data was collected on a daily timeframe, the window size of 10 indicates that we will be training the CNN model to understand patterns within 10 days.
Then we have to split the data into training and testing samples.
# Split data into training and testing sets
X_train, X_test, y_train, y_test = train_test_split(X, y, test_size=0.2, shuffle=False)

# Standardize the data
scaler = StandardScaler()

X_train = scaler.fit_transform(X_train.reshape(-1, X_train.shape[-1])).reshape(X_train.shape)
X_test = scaler.transform(X_test.reshape(-1, X_test.shape[-1])).reshape(X_test.shape)

print(f"x_train\n{X_train.shape}\nx_test\n{X_test.shape}\n\ny_train {y_train.shape} y_test {y_test.shape}")
Outputs
x_train
(792, 10, 4)
x_test
(198, 10, 4)

y_train (792,) y_test (198,)
Lastly we have to one-hot-encode the target variable for this classification problem task.
from tensorflow.keras.utils import to_categorical

y_train_encoded = to_categorical(y_train)
y_test_encoded = to_categorical(y_test)

print(f"One hot encoded\n\ny_train {y_train_encoded.shape}\ny_test {y_test_encoded.shape}")
Outputs
One hot encoded

y_train (792, 2)
y_test (198, 2)
03: Training a CNN model
This is where most work gets done.
# Defining the CNN model

model = Sequential()
model.add(Conv1D(filters=64,
                 kernel_size=3,
                 activation='relu',
                 strides=2,
                 padding='causal',
                 input_shape=(window_size, X_train.shape[2])
                )
         )

model.add(MaxPooling1D(pool_size=2))
model.add(Flatten())
model.add(Dense(100, activation='relu'))
model.add(Dropout(0.5))
model.add(Dense(units=len(np.unique(y)), activation='softmax'))  # For binary classification (buy/sell signal)

model.summary()

# Compiling the model

optimizer = Adam(learning_rate=0.001)

model.compile(optimizer=optimizer, loss='categorical_crossentropy', metrics=['accuracy'])

# Training the model

early_stopping = EarlyStopping(monitor='val_loss', patience=10, restore_best_weights=True)

history = model.fit(X_train, y_train_encoded, epochs=100, batch_size=16, validation_split=0.2, callbacks=[early_stopping])

plt.figure(figsize=(7.5, 6))
plt.plot(history.history['loss'], label='Training Loss')
plt.plot(history.history['val_loss'], label='Validation Loss')
plt.xlabel('Epochs')
plt.ylabel('Loss')
plt.title('Training Loss Curve')
plt.legend()
plt.savefig("training loss cuver-cnn-clf.png")
plt.show()
Outputs
Model: "sequential_2"
┏━━━━━━━━━━━━━━━━━━━━━━━━━━━━━━━━━┳━━━━━━━━━━━━━━━━━━━━━━━━┳━━━━━━━━━━━━━━━┓
┃ Layer (type)                    ┃ Output Shape           ┃       Param # ┃
┡━━━━━━━━━━━━━━━━━━━━━━━━━━━━━━━━━╇━━━━━━━━━━━━━━━━━━━━━━━━╇━━━━━━━━━━━━━━━┩
│ conv1d_2 (Conv1D)               │ (None, 5, 64)          │           832 │
├─────────────────────────────────┼────────────────────────┼───────────────┤
│ max_pooling1d_2 (MaxPooling1D)  │ (None, 2, 64)          │             0 │
├─────────────────────────────────┼────────────────────────┼───────────────┤
│ flatten_2 (Flatten)             │ (None, 128)            │             0 │
├─────────────────────────────────┼────────────────────────┼───────────────┤
│ dense_4 (Dense)                 │ (None, 100)            │        12,900 │
├─────────────────────────────────┼────────────────────────┼───────────────┤
│ dropout_2 (Dropout)             │ (None, 100)            │             0 │
├─────────────────────────────────┼────────────────────────┼───────────────┤
│ dense_5 (Dense)                 │ (None, 2)              │           202 │
└─────────────────────────────────┴────────────────────────┴───────────────┘
Training stopped at the 34-th epoch.
40/40 ━━━━━━━━━━━━━━━━━━━━ 0s 3ms/step - accuracy: 0.5105 - loss: 0.6875 - val_accuracy: 0.4843 - val_loss: 0.6955
Epoch 32/100
40/40 ━━━━━━━━━━━━━━━━━━━━ 0s 3ms/step - accuracy: 0.5099 - loss: 0.6888 - val_accuracy: 0.5283 - val_loss: 0.6933
Epoch 33/100
40/40 ━━━━━━━━━━━━━━━━━━━━ 0s 3ms/step - accuracy: 0.4636 - loss: 0.6933 - val_accuracy: 0.5283 - val_loss: 0.6926
Epoch 34/100
40/40 ━━━━━━━━━━━━━━━━━━━━ 0s 3ms/step - accuracy: 0.5070 - loss: 0.6876 - val_accuracy: 0.5346 - val_loss: 0.6963

The model was approximately 57% of the time accurate on out-of-sample predictions.
y_pred = model.predict(X_test)

classes_in_y = np.unique(y)
y_pred_binary = classes_in_y[np.argmax(y_pred, axis=1)]

# Confusion Matrix
cm = confusion_matrix(y_test, y_pred_binary)
sns.heatmap(cm, annot=True, fmt='d', cmap='Blues')
plt.xlabel("Predicted Label")
plt.ylabel("True Label")
plt.title("Confusion Matrix")
plt.savefig("confusion-matrix CNN")  # Display the heatmap


print("Classification Report\n",
      classification_report(y_test, y_pred_binary))
Outputs
7/7 ━━━━━━━━━━━━━━━━━━━━ 0s 11ms/step
Classification Report
               precision    recall  f1-score   support

           0       0.53      0.24      0.33        88
           1       0.58      0.83      0.68       110

    accuracy                           0.57       198
   macro avg       0.55      0.53      0.50       198
weighted avg       0.55      0.57      0.52       198
Our CNN model is good enough for an Expert Advisor. But, before we can start coding an EA, let us save the CNN model we have trained in ONNX format.
04: Saving a CNN model to ONNX format.
The process is fairly simple, We have to save the CNN model in the .onnx format, and the scaling technique parameters in binary files.
import tf2onnx

onnx_file_name = "cnn.EURUSD.D1.onnx"

spec = (tf.TensorSpec((None, window_size, X_train.shape[2]), tf.float16, name="input"),)
model.output_names = ['outputs']

onnx_model, _ = tf2onnx.convert.from_keras(model, input_signature=spec, opset=13)

# Save the ONNX model to a file
with open(onnx_file_name, "wb") as f:
    f.write(onnx_model.SerializeToString())


# Save the mean and scale parameters to binary files
scaler.mean_.tofile(f"{onnx_file_name.replace('.onnx','')}.standard_scaler_mean.bin")
scaler.scale_.tofile(f"{onnx_file_name.replace('.onnx','')}.standard_scaler_scale.bin")
Creating a Convolutional Neural Network (CNN) based Trading Robot
Inside an Expert Advisor, the first thing we have to do is to include the ONNX-formatted model and the Standard Scaler binary files as resources.
MQL5 | ConvNet EA.mq5
#resource "\\Files\\cnn.EURUSD.D1.onnx" as uchar onnx_model[]
#resource "\\Files\\cnn.EURUSD.D1.standard_scaler_scale.bin" as double scaler_stddev[]
#resource "\\Files\\cnn.EURUSD.D1.standard_scaler_mean.bin" as double scaler_mean[]
We have to initialize them both, the scaler and the onnx model.
#include <MALE5\Convolutioal Neural Networks(CNNs)\Convnet.mqh>
#include <MALE5\preprocessing.mqh>

CConvNet cnn;
StandardizationScaler scaler;
//+------------------------------------------------------------------+
//|                                                                  |
//+------------------------------------------------------------------+

input group "cnn";
input uint cnn_data_window = 10;
//this value must be the same as the one used during training in a python script

vector classes_in_y = {0,1}; //we have to assign the classes manually | it is essential that their order is preserved as they can be seen in python code, HINT: They are usually in ascending order
//+------------------------------------------------------------------+
//| Expert initialization function                                   |
//+------------------------------------------------------------------+
int OnInit()
  {
//---

   if (!cnn.Init(onnx_model)) //Initialize the ONNX model
     return INIT_FAILED;

//--- Initializing the scaler with values loaded from binary files

   scaler = new StandardizationScaler(scaler_mean, scaler_stddev); //load the scaler

   return(INIT_SUCCEEDED);
  }
That is enough to get the model up and running. Let us make the function to extract data similarly to the way the independent variables were used during training. We used four variables OHLC values from the previous closed bar to 10 bars prior which was the window size the timeframe must be preserved (A daily timeframe).
input group "cnn";
input uint cnn_data_window = 10;
//this value must be the same as the one used during training in a python script

input ENUM_TIMEFRAMES timeframe = PERIOD_D1;
input int magic_number = 1945;
input int slippage = 50;
matrix GetXVars(int bars, int start_bar=1)
 {
   vector open(bars),
          high(bars),
          low(bars),
          close(bars);

//--- Getting OHLC values

   open.CopyRates(Symbol(), timeframe, COPY_RATES_OPEN, start_bar, bars);
   high.CopyRates(Symbol(), timeframe, COPY_RATES_HIGH, start_bar, bars);
   low.CopyRates(Symbol(), timeframe, COPY_RATES_LOW, start_bar, bars);
   close.CopyRates(Symbol(), timeframe, COPY_RATES_CLOSE, start_bar, bars);

//---

   matrix data(bars, 4); //we have 10 inputs from cnn | this value is fixed

//--- adding the features into a data matrix

   data.Col(open, 0);
   data.Col(high, 1);
   data.Col(low, 2);
   data.Col(close, 3);

   return data;
 }
Now that we have a function to collect the independent variables, we can finalize our trading strategy.
void OnTick()
  {
//---

   if (NewBar()) //Trade at the opening of a new candle
    {
      matrix input_data_matrix = GetXVars(cnn_data_window); //get data for the past 10 days(default)
      input_data_matrix = scaler.transform(input_data_matrix); //applying StandardSCaler to the input data

      int signal = cnn.predict_bin(input_data_matrix, classes_in_y); //getting trade signal from the RNN model

      Comment("Signal==",signal);

   //---

      MqlTick ticks;
      SymbolInfoTick(Symbol(), ticks);

      if (signal==1) //if the signal is bullish
       {
          if (!PosExists(POSITION_TYPE_BUY)) //There are no buy positions
           {
             if (!m_trade.Buy(lotsize, Symbol(), ticks.ask, 0, 0)) //Open a buy trade
               printf("Failed to open a buy position err=%d",GetLastError());

             ClosePosition(POSITION_TYPE_SELL); //close opposite trade
           }
       }
      else if (signal==0) //Bearish signal
        {
          if (!PosExists(POSITION_TYPE_SELL)) //There are no Sell positions
            if (!m_trade.Sell(lotsize, Symbol(), ticks.bid, 0, 0)) //open a sell trade
               printf("Failed to open a sell position err=%d",GetLastError());

               ClosePosition(POSITION_TYPE_BUY);
        }
      else //There was an error
        return;
    }
  }
The strategy is simple. Upon receiving a particular signal, let's say a buy signal we open a buy trade with no stop loss and take profit values, we then close the opposite signal and vice versa for a sell signal.
Finally, I tested this strategy on a symbol it was trained on which is EURUSD, for ten years. From 2014.01.01 to 2024.05.27 On a 4-Hour chart on Open Prices of every bar.

The results from the Strategy tester outcome were outstanding.


The EA made accurate predictions 58% of all time as a result the CNN-based EA made $503 net profit.
The Bottom Line
Despite being made specifically for image and video processing, when adopted to handle tabular data such as the forex data we gave it, Convolutional Neural Networks(CNN) can do a decent job detecting patterns and use them to make predictions in the forex market.
As can be seen from the strategy tester report, the CNN-based EA has made decent predictions. I bet many traditional models designed for tabular data such as Linear regression, Support Vector Machine, Naive Bayes, etc. cannot achieve this predictive accuracy considering the CNN model was given only 4 independent variables (OHLC). In my experience, not many models can become this good given a few variables.
Best regards.
Track development of machine learning models and much more discussed in this article series on this GitHub repo.
Attachments Table
| File name | File type | Description & Usage |
|---|---|---|
| ConvNet EA.mq5 | Expert Advisor | Trading robot for loading the CNN model in ONNX format and testing the final trading strategy in MetaTrader 5. |
| cnn.EURUSD.D1.onnx | ONNX | CNN model in ONNX format. |
| cnn.EURUSD.D1.standard_scaler_mean.bin cnn.EURUSD.D1.standard_scaler_scale.bin | Binary files | Binary files for the Standardization scaler |
| preprocessing.mqh | An Include file | A library which consists of the Standardization Scaler |
| ConvNet.mqh | An Include file | A library for loading and deploying CNN model in ONNX format |
| cnn-for-trading-applications-tutorial.ipynb | Python Script/Jupyter Notebook | Consists all the python code discussed in this article |
Sources & References
- Convolutional Neural Network-based a novel Deep Trend Following Strategy for Stock Market Trading (https://ceur-ws.org/Vol-3052/paper2.pdf)
- What are Convolutional Neural Networks (CNNs)? (https://youtu.be/QzY57FaENXg)
- Converting tabular data into images for deep learning with convolutional neural networks (https://www.nature.com/articles/s41598-021-90923-y)
- Image kernels (https://setosa.io/ev/image-kernels/)
- Pooling Methods in Deep Neural Networks, a Review(https://arxiv.org/pdf/2009.07485)
- Free trading apps
- Over 8,000 signals for copying
- Economic news for exploring financial markets
You agree to website policy and terms of use
Published article Machine Learning and Data Science (Part 27): convolutional neural networks (CNNs) in trading robots for MetaTrader 5:
Author: Omega J Msigwa
5.5 trades per year on H4 is not enough. Very little.
This is the most concise explanation of CNN applied to trading that I've ever seen and for the most part, in plain language and diagrams. Then it's reduced into MQL5 code. Note that the code is not limited to the H4 timeframe.
Well done, Sir!👍