
GIT: What is it?

Introduction
In this article, we will deviate a little from our main topic. Let's take a short break from the topic of our replay/simulator system and get acquainted with a tool that is a must for all programmers. If you are not familiar with it, you should definitely read this article and adopt this tool as it can really make solving problems easier and faster for any programmer.
We will mainly focus on beginners who strive to become qualified professionals. Unfortunately, the tool I am going to show you isn't as easy to use on Windows 11 as it is on Windows 10, so if you're a Windows user, it's preferable (at least as of this writing) to use version 10.
The tool we are going to talk about is GIT. Originally designed for LINUX, it is ideal for those who want to program and develop new applications. Although at the moment the MQL5 editor does not directly integrate with it, this will in no way prevent us from using this tool. There are a few necessary steps you need to take in order to benefit from GIT.
If you are already familiar with it or use it in your work, the article will not add anything new to your knowledge, and may be of interest only out of curiosity. But if you don't know GIT and are constantly programming, sooner or later, you will encounter a situation that will discourage you from continuing to develop a particular application. We are talking about an error that can be accidentally made while editing the code and which you can notice only after a few days or weeks. Believe me, this kind of thing is much more common than it seems, and GIT can help avoid it.
What is GIT?
GIT is a program or as I call it a tool that allows us to track and catalog, in a simple and very efficient way, versions of an application we are developing. But this is not a user manual, I'm not going to do something like that. Mainly because there is already a huge amount of educational materials on the topic. The vast majority of such guides are aimed at editors that integrate natively with GIT, as is the case with Visual Studio. But since MetaEditor does not have this, special settings will be required in order to be able to work correctly with GIT together with MQL5.
Once you've made the necessary changes, you can use any of the existing GIT tutorials to learn more. This article should have been written earlier, but I simply did not realize that among the readers there were so many beginners who aspire to become professionals. Such people have a lot of difficulty in improving because they do not know the right methods and means to take an application and modify it, while learning in the process. The main thing here is not modifying the application but knowing how to document the process, learn from your mistakes and thus improve. As I mentioned, GIT is a very good way to learn and document your programming experience. This is quite simple and understandable – you just need to implement the steps that I will show.
To realize the full power of this tool, take any application, such as our replay/simulator system, and modify it to find out whether your hypothesis works or not. Over time, it becomes difficult to understand what has been changed. Especially if changes must occur at different points. It is very difficult to do this without using the appropriate tool. Ultimately, you can become confused by these changes and lose all desire to learn and become a professional. But GIT will do it for you. You can modify the application and immediately test all the changes made. If your hypothesis is correct, you will be able to obtain a final document that will indicate exactly what was changed. Isn't this fantastic? At the learning stage, I myself had to do everything manually. But with GIT, you can see all the changes, as they will be highlighted.
GIT is based on a very simple concept, similar, in its basic form, to a linked change list, like a daily planner or diary. It is created as you take notes. We'll look at how to take them later. But in a broader sense, it will be a graph. Being a graph, it can take any form, giving us different directions in the same implementation. Where each of the directions will allow the development of correlated ideas. If you have never seen or don't know what a graph is, you can get an idea of it by looking at the image below:

At every point in the graph, we have a value known as a NODE. The lines connecting these values are called EDGES. This is an example of a simple graph. However, it can be much more complex. I advise you to study graph theory, it's worth it, especially if you really want to become a professional. But don't start with graphs right away. Start with lists, then learn trees, and then move on to graphs. This is a more consistent way of learning.
Let's start with the basics
The most basic part is actually downloading the latest version of GIT. To do this, follow the link git-scm.com, and you will also find the documentation there. Most of this material has already been translated. If there is anything that is not quite clear, you can find plenty of people who will explain the topics you need. Just search and study. So here I just want to show the basics for those who don't know GIT.
If you are a Windows user, all you have to do is click on the area shown in the image below:

At the time of writing this article, this is the most current version. After downloading the latest version of GIT, you will need to install it on your computer. The installation can be done with the default configuration, however I am making a small change which can be seen in the image below:

This is not a required step. You can change the default editor later. But since I like to use NotePad++, I instruct GIT to use it. If you later decide to use a different editor, simply change the GIT global variable. This variable is CORE.EDITOR (please see the documentation for further details). So, after installing GIT, you need to configure it. But don't worry, it's quite simple and I'll explain everything clearly so you have an idea where to start. When you are done installing GIT, you will have access to what is marked in the image below:

These are the two options that are missing in Windows 11. This is why I recommend using Windows 10. In fact, these settings can be activated in Windows 11, but you will need to follow some steps that are beyond the scope of this article. Note: we won't need these options. However, their presence greatly simplifies the work and makes it more enjoyable. If you select Git GUI Here, the following window will appear:

Here you can open, clone or create a repository. But we want to use GIT together with MQL5, so we don't click anywhere yet. Don't pay attention to the Git Bash Here option. We're focusing on the GUI here, but there are plenty of resources explaining how to use BASH, just search the internet. Since the idea is to introduce you to GIT, I will use the simplest part of it, which is the GUI. However, everything that is done in one interface can be done in another; this is a matter of habit. To begin, open MetaEditor and click on the area marked in the image below:

The following window will appear:

Now you need to allow the display of hidden files and folders. This will allow you to make a local GIT backup. You can also use GITHUB. But here I want to be as simple as possible. So use File Explorer and change the following setting:

Check the highlighted option, click Apply and then OK. Now you can see the folder that will be created by GIT. Since we don't have a repository yet, the folder won't be displayed. You need to right-click again and select Git GUI Here, then click Create New Repository and the following window will open:

Now select Browse and another one will open:

Click Select Folder, and you will see the following:

After you click Create, you will see the following result:

This folder, which is highlighted in the image above, is exactly what we wanted to create. Once this folder is created, a new window will open, as shown in the image below.

Now notice that the marked area contains EX5 files. These files are applications that can be run in MetaTrader 5. But we don't want these files to pollute the search. To remove this and any other file type, we will have to make a small adjustment. This should be done for the repository we are setting up. You can make changes globally if you want since GIT allows you to work in both directions. To clean up these unnecessary files, you don't need to delete them. All you need to do is shown in the image below:

Pay attention to the path and file that needs to be changed. Now open the file. You will first see the following content:
# git ls-files --others --exclude-from=.git/info/exclude
# Lines that start with '#' are comments.
# For a project mostly in C, the following would be a good set of
# exclude patterns (uncomment them if you want to use them):
# *.[oa]
# *~
Original content of the 'exclude' file
You can remove this content as it consists only of comments. But in any case, you will need to add several lines to it. In this case, all files with the EX5 extension should not be displayed, as well as some other things. So change the file as shown below. Please see the documentation for further details. Then save the file.

This tells GIT that certain file types should be ignored in this repository. But the filter should be where I showed. The filtering system has many options, so I advise you to study the documentation. The better the filtering, the easier the next stage will be. After saving the file, return to the GIT GUI window and click the RESCAN button shown in the image below. Note that files with the EX5 extension are no longer displayed. Scroll the screen and compare with what it was before you edited the file.

So far, we haven't done anything special. We just told GIT where the repository would be and what it should filter. Important note: when you save something, you do not need to save everything that is in the MQL5 folder. Just save the .GIT folder, and everything GIT tracks will be saved. This saves a lot of space. But as mentioned above, you can save everything in the cloud via GITHUB. The saved content will be exactly the repository in the .GIT folder.
But when will we start saving things in GIT? Calm down, my dear reader, we are almost there. There are still a few small details to be configured. To make these final settings, select the command marked in the image below:

A new window will appear. This window can be seen below where have something seemingly duplicate. But it is not duplicate. Look closely.

As you can see, it has two things marked: one on the right, one on the left. In the one on the left, we will configure data about this repository, and in the one on the right, will perform global configuration, that is, for any repository created. You can set up one or the other, or even both if you want. But I suggest making the configuration global so that you don't have to do it every time. Therefore, enter your details in the shown fields. With this we finish setting up the most basic things and move on to the next topic.
Creating the first COMMIT
Now that we have completed the basic setup, there are a few more things you need to understand. In GIT, a file can be in three main states.
- The first is called COMMITTED, when the file with all its data is securely stored in the repository.
- The second state is MODIFIED, when the file has been modified, but the changes made have not yet been saved in the repository.
- The third and final state is STAGED, where we tell GIT that the file is ready to be saved in the repository.
To better understand what each of these conditions means, take a look at the image below. We have a file ExpertMACD.mq5, which is in the UNSTAGED state, that is, GIT does not track it.

Let's have GIT start tracking changes to this file. To do this, click on it. Notice that in the right area, we can see the current contents of the file:

At the top of the file contents, you can see the word UNTRACKED, which means the file is not yet tracked by GIT. To make GIT look at the file, you need to use the following:

Using it or using the CTRL+T keyboard shortcut, we will get what is shown in the image below:

Look how things have changed. Now the word STAGED FOR COMMIT appears at the top of the file contents, that is, it is in the third state and is ready to be saved. If there is no need to add this file, just select it and press CTRL+U, which will exit STAGED mode and return to UNTRACKED mode. Note: the file can be deleted in other ways; more details about this can be found in the documentation. Here I want to keep things as simple as possible.
So let's put all together in a header file. We get the following:

Now you can create the first COMMIT by simply clicking on the COMMIT button. However, it is recommended, and would be extremely appropriate, to add a message to the commit before pressing the COMMIT button. This will make it easier to find and understand the changes later.

The image above shows what the comment to a commit might be. After this, you can click the COMMIT button, and GIT will start tracking the specified files. The result will be like this:

The marked area shows that GIT has successfully created a COMMIT and will now start tracking those files. You can now close the GIT GUI window. Work on your code, test it and change it to your liking, and when you're done and have a stable version, you'll need to ask GIT to update the repository. To avoid confusion, let's discuss this in another option.
Actualizing the repository
In many cases, it is easier to actualize a repository using BASH, but I'll show you how to do it through the GIT GUI. To do this, use the button shown in the image below:

Once you click it, GIT will check where and what was changed in the tracked file. And it will be shown again as UNSTAGED. You can see it in the image above. Note that the file is in a MODIFIED state. In the file contents window, GIT shows what has been changed. The change is shown in green. You can change this color if you wish. But since I am only touching on the basics here, it is up to you to make such changes.
Now it's up to you to decide whether to accept and save the current modification or ignore it. Because, if necessary, GIT can return a file to its previous state. Think of it as of options present in Windows, as restoring points. For this reason, it is important to accompany each new COMMIT with an explanatory message.
Now let's accept the changes and save them. See what happens after we add the appropriate comment and press the COMMIT button:

Why? The reason is that the changes are not in the STAGED state, that is, not yet ready for GIT to document them, but are in the MODIFIED state. To add files that are in the MODIFIED state to the STAGED state, simply press CTRL+I. But there is a detail which can be seen in the image below:

If you select YES, all files, in this case all 403 files, will be added to the STAGED state. But since we only want to add files that are tracked and that have been modified, we need to click NO. Then we get the following result:

You can now click the COMMIT button, and GIT will document the changes. By now, it should be clear that GIT only documents files in the STAGED state in the repository. All other files will be ignored. Well, this topic was easy. Next, what if we want to revert the changes because the code is messed up? How can GIT help us do this? Let's move on to the next topic.
Reverting changes...
It's very easy to undo changes you've already made and restore what GIT has documented in the repository. You need to perform the same steps that were described in the previous section. So we should see changes as shown in the image below:

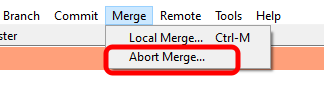
Notice that we have a new change highlighted in the image above. But we want to cancel it, and we ask GIT to do it. The request is made using the keyboard shortcut CTRL+J or, if it's more convenient to you, as shown below:

GIT will always ask you to confirm your action. This can be seen in the image below:

If you confirm, GIT will restore the file with the contents at the top of the repository. If the file is open in MetaEditor, you will notice that MetaEditor will ask you to reload the file. After reloading, you will see that the changes have been removed by GIT. Understanding the process described is very important for understanding the next topic.
Reverting code to a more stable version
Perhaps this is one of the most useful things: going back to a version in which the code was more stable. Doing this without using GIT is very difficult, and in some cases impossible, which means you have to remove all the code and start from scratch. However, with GIT everything is very simple and clear. To return to such a version, you can use one of the options shown below:

This will open the following window:

Now let's see why it is always important to add explanatory comments to commits. They make it easier to understand changes and find a stable version. This way you can view all versions and select exactly the one you want to restore. After selecting the version, you need to right-click and select the marked item:

Once this is done, a new window will open. Here you need to be careful. If you DO NOT WANT to remove anything from the repository, select the option shown below:

As a result of this action, we get the following:

Please note that the repository's top has changed. This is exactly what we need because the top of the repository demonstrates what we can restore in code. Now go back to the GUI window and select the option shown below:

This will move all the code at the top of the repository, which is now an older version, into the appropriate files. Note: if a file has been deleted, GIT will recreate it. This is why it is so important to understand what the top of the repository is. Without this, you will not be able to return to the previous version. Before the changes can be applied, you will need to confirm the action as shown below:

Now we know how to go back to an earlier version. Now, what if you've rolled back too far? How to go back to a newer version? To avoid confusion, let's look at this in a new topic.
Reverting to a newer version within the repository
Sometimes, when we roll back to a more stable version, we go too far and have to roll back to a newer version. To illustrate this, let's create a third level. Since using only two levels, it is impossible to understand how to do this through the GUI. With BASH you can do this directly by simply sending a command to GIT. But I want to show you how to do it through the GUI. So let's say we have the following scenario given below.

Now we have three levels. Let's go back to the first level so that the result is as shown below. This is done by following the steps described in the previous topic.

Imagine that in this place we have rolled back too much. Then we need to go up to the second level to check if the code works. What to do in this case? It's interesting and there are several ways to fix this. Never panic. Before we learn how to do this, let's look at a small detail that may be important. If you look in the .GIT folder, you may see a file that was not there before. See the image below.

The contents of this file is a HASH, which is used for recovering the data available in the GIT repository in case of a serious error. You can see the HASH by looking at the content shown below:

We will not go into details of using HASH files here, since all this is in the documentation, and there are also many detailed guides on the Internet. Let's get back to the question of how to get data located at the second level. We need to select the second level and make it the top of the repository. It's always like that. However, be careful not to select the HARD mode by mistake, always give preference to using the SOFT-mode. As shown in the image below.

By properly selecting the options, you will get the following result:

This allows you to access the most recent code. This is how you can navigate between the versions that GIT stores in our repository. But let's assume that you want to remove and discard the latest changes. To do this, you should choose the following:

The result will be as follows:

There is one more command to consider. Suppose you downloaded or want to restore the entire repository from a backup. The reason doesn't matter, you just want to restore the latest version found in the repository before deleting it from disk. You can do this file by file, but you can also use the option shown in the image below:
When you select this option, the entire contents of the repository will be restored. As if by magic, all files and directories will appear again. Use this option whenever you need to restore an entire repository saved as a backup. This will allow you to quickly get back to working on your project.
Final conclusions
In this article, I have shown the most basic aspects required to use GIT. I hope this article will serve as an incentive for further learning and self-improvement. Because different tools exist, and you should not wait for someone to come and show you how to use them. You must always be ready to learn new things. And don't think that GIT is just what I showed here. It is a much greater tool that can help you a lot. At least I hope that I was able to spark your interest in GIT.
Translated from Portuguese by MetaQuotes Ltd.
Original article: https://www.mql5.com/pt/articles/12516
 Features of Custom Indicators Creation
 Features of Experts Advisors
- Free trading apps
- Over 8,000 signals for copying
- Economic news for exploring financial markets
You agree to website policy and terms of use
https://forge.mql5.io
A new editor with an integrated Git repository is coming soon.
https://forge.mql5.io
A new editor with an integrated Git repository will be released soon.
🎆🎆🤩🤩🥳🥳👍
https://forge.mql5.io
A new editor with an integrated Git repository is coming soon.
Current projects lack the ability to add more than one mq5 file to a project. It is often necessary that both EA and indicator use the same mqh files within one project.
CI/CD pipeline is interesting to look at. Especially new testing tools, if they are planned.