
Building a Candlestick Trend Constraint Model (Part 10): Strategic Golden and Death Cross (EA)

Introduction
In this article, we delve into the integration of the Strategic Golden and Death Cross strategies into the Trend Constraint Expert Advisor, unlocking the potential of these time-tested moving average crossover techniques. Our goal is to enhance trend-following capabilities in algorithmic trading by automating these strategies, ensuring precision, consistency, and seamless compatibility with broader trading systems.
Many traders face challenges in effectively identifying and capitalizing on strong bullish and bearish trends. While the Golden Cross, signaling bullish momentum, and the Death Cross, indicating bearish sentiment, have demonstrated their value in manual trading, their lack of automation often results in missed opportunities and inconsistent execution.
By incorporating the Golden and Death Cross strategies into an automated Expert Advisor, traders can systematically execute reversal signals without the limitations imposed on other trend-following strategies. Unlike constrained strategies that depend on daily market sentiment, these crossover strategies operate independently to identify and act on reversals as they occur. This ensures that potential turning points are captured earlier, enhancing responsiveness and overall trading performance while maintaining alignment with broader trend strategies.
Core Content:
- Understanding the Golden and Death Cross strategy
- Analyzing its relevance within the broader context of trend-following
- Adaptation to Trend Constraining Conditions
- Implementation of the strategy using MQL5
- Initial Strategy Testing
- Merging the new strategy in the Trend Constraint
- Testing and optimization Results
- Conclusion
Understanding the Golden and Death Cross strategy
The Golden Cross and Death Cross strategy are pivotal concepts in technical analysis used for signaling potential bullish or bearish market trends based on moving average crossovers. A Golden Cross occurs when a shorter-term moving average, typically the 50-day moving average, crosses above a longer-term moving average, often the 200-day moving average. This event is considered a strong bullish signal, suggesting that a long-term upward trend might be starting. Investors and traders might see this as an opportunity to buy or hold stocks, anticipating an increase in price.
Conversely, the Death Cross is the opposite scenario where the shorter-term moving average falls below the longer-term moving average, signaling a potential bearish trend. This is seen as a warning that the market might enter a sustained decline. The Death Cross can prompt investors to sell or short sell, or at least to exercise caution, as it hints at weakening market conditions. Both these signals are not only used for direct trading decisions but also for broader market sentiment analysis, although they are not infallible and should be used with other indicators or forms of analysis to confirm trends.
Analyzing its relevance within the broader context of trend-following
In the broader context of trend-following strategies, the Golden Cross and Death Cross serve as foundational tools for identifying the initiation and potential reversal of market trends. Trend-following is a strategy where traders aim to profit from sustained movements in market prices by aligning their trades with the direction of the established trend. Here's how the Golden and Death Cross fit into this paradigm:
1. Trend Identification: The primary function of these crossovers is to provide clear signals for the onset of new trends. The Golden Cross signals the beginning of an uptrend, prompting trend followers to enter long positions or increase their exposure. Conversely, the Death Cross indicates the start of a downtrend, suggesting it's time to exit long positions or consider short selling.
2. Confirmation of Trends: These signals act as confirmations within trend-following strategies. A trend follower might use these crossovers alongside other indicators like price action, volume, or momentum indicators to verify that a trend is indeed developing. This multi-indicator approach helps in reducing false signals, which is crucial in trend-following, where the goal is to ride the trend for as long as possible.
3. Risk Management: In trend-following, managing risk is key, since trends can reverse or pause unexpectedly. The Golden and Death Crosses can be used for setting stop-loss levels or for deciding when to reduce or increase position sizes. For instance, a break below the moving averages after a Golden Cross might suggest tightening stops or reducing exposure.
4. Long-term Perspective: These signals are inherently long-term due to the use of longer moving average periods, aligning well with the trend-following philosophy of capturing the big moves in the market rather than short-term fluctuations. This long-term focus helps in filtering out market noise and focusing on significant price movements.
5. Adaptability: While traditionally set with 50-day and 200-day moving averages, the strategy can be adapted for different time frames or market conditions. In fast-moving markets, traders might use shorter periods for quicker signals, whereas in more stable markets, longer periods might be preferred to avoid being whipsawed by minor corrections.
However, the relevance of the Golden and Death Cross within trend-following can be critically analyzed as follows:
- Lag: One of the main criticisms is the lag associated with Moving Averages. By the time these crossovers occur, significant parts of the trend might already have played out, potentially reducing the profitability of trades based solely on these signals.
- False Signals: Trend-following inherently carries the risk of false breakouts or premature trend reversals. The Golden and Death Crosses are not immune to this, and thus, they should be part of a broader strategy that includes other forms of analysis or confirmation signals.
- Market Environment: Their effectiveness can vary significantly with market conditions. In trending markets, these signals can be highly effective, but in range-bound or choppy markets, they might lead to numerous false starts
Adaptation to Trend Constraining Conditions
In long-term strategies, imposing excessive constraints may limit their potential. For instance, consider a scenario where the daily market sentiment is bearish. A golden cross signal appearing on lower timeframes within the same day might indicate a potential reversal, suggesting the market could turn bullish. When such reversals occur, other constrained strategies often adapt to the emerging trend sentiment, aligning with the new market direction.
To capitalize on this dynamic, the death cross and golden cross strategies can be incorporated into the Trend Constraint EA as independent modules. By doing so, the EA can maximize its performance by capturing reversal entries that align with the newly emerging trend.
This approach ensures:
- Flexibility Across Timeframes: The EA can detect short-term reversals (e.g., golden crosses) and align them with broader market movements, enhancing adaptability.
- Improved Entry Points: Identifying shifts in trend sentiment early enables the EA to take strategic positions, minimizing lag in responding to market changes.
- Synergy Between Strategies: Integrating the golden and death cross strategies independently allows the EA to harness their strengths without overriding the primary trend-following mechanisms.
By adopting this dual-layered approach, the Trend Constraint EA gains the ability to effectively navigate market reversals while maintaining long-term profitability. Let’s now proceed to the next stage, where we will implement and integrate this strategy.
Implementation of the strategy using MQL5
In my development approach, when creating a multi-strategy EA, I always design each strategy as an independent EA first. This allows for focused testing and refinement before merging it into a single, unified codebase. Following this method, we will first break down and develop the Strategic Golden and Death Cross EA independently before integrating it into the main Expert Advisor.
As usual, open your MetaEditor 5 application from your desktop, or press F4 in your MetaTrader 5 terminal to launch it directly. Follow the development steps outlined below. For beginners, it's recommended to type the code manually instead of copying and pasting, as this helps reinforce the skill and deepen your understanding.
We will start with our Golden and Death Cross here:
Header and Metadata:
This is the topmost part of the program, we begin by defining the metadata to ensure clarity and professionalism. The metadata identifies the program as the Strategic Golden & Death Cross EA, including copyright details, a description, and the version number. This step helps us organize the project and ensures that our work is properly attributed when deployed in MetaTrader 5. By setting up the metadata this way, we establish a professional and well-documented foundation for our EA.
//+------------------------------------------------------------------+
//|                       Strategic Golden & Death Cross EA.mq5      |
//|                           Copyright 2024, Clemence Benjamin      |
//|        https://www.mql5.com/en/users/billionaire2024/seller      |
//+------------------------------------------------------------------+
#property copyright "Clemence Benjamin"
#property description "GOLDEN AND DEATH CROSS"
#property version "1.0"
Includes and Trade Object Initialization:
To simplify trade execution, we include the MQL5 trade library with #include<Trade\Trade.mqh>. This library provides access to powerful trading functions. We instantiate the CTrade class as trade, enabling the EA to handle operations like buying, selling, and closing positions without manually implementing these routines. This reduces complexity and makes the code more reliable. With this setup, we can focus on the strategy and rely on the trade management library for executing our orders.
#include<Trade\Trade.mqh>;
CTrade trade;
Input Parameters:
We start by defining user-adjustable parameters to make the EA flexible and customizable.
For example:
- LotSize allows us to control the trade volume.
- Slippage specifies acceptable price deviations during execution.
- FastEMAPeriod and SlowEMAPeriod define the periods of the moving averages that form the backbone of the Golden and Death Cross strategy.
input double LotSize = 1.0;            // Trade volume (lots)
input int Slippage = 20;               // Slippage in points
input int TimerInterval = 10000;       // Timer interval in seconds
input double TakeProfitPips = 100;     // Take Profit in pips
input double StopLossPips = 50;        // Stop Loss in pips
input int FastEMAPeriod = 50;          // Fast EMA period (default 50)
input int SlowEMAPeriod = 200;         // Slow EMA period (default 200)
By setting these parameters, we allow users to adjust the EA according to their specific trading conditions.
Initialization and Timer Setup:
Let’s make sure the EA initializes properly. In the OnInit() function, we add a check to verify whether enough bars exist to calculate the slow EMA. If not, the EA logs an error and stops execution. This ensures the strategy runs only when sufficient data is available.
int OnInit()
{
   //--- create timer
   EventSetTimer(TimerInterval);

   //--- Check if there are enough bars for EMA calculation
   if(Bars(_Symbol,PERIOD_CURRENT)<SlowEMAPeriod)
   {
      Print("Not enough bars for EMA calculation");
      return(INIT_FAILED);
   }
   return(INIT_SUCCEEDED);
}
Additionally, we use EventSetTimer() to call the OnTimer() function periodically, executing the trading logic. The OnDeinit() function ensures the timer is deactivated when the EA is removed, freeing up resources.
void OnDeinit(const int reason)
{
   //--- delete timer
   EventKillTimer();
}
Trading Logic in OnTimer():
Now, let’s get into the core of the strategy within the OnTimer() function:
EMA Calculation:
We begin by creating handles for the fast and slow EMAs using iMA() and retrieving their values with CopyBuffer(). These EMAs are essential for detecting entry signals.
int fastEMAHandle = iMA(_Symbol, PERIOD_CURRENT, FastEMAPeriod, 0, MODE_EMA, PRICE_CLOSE);
int slowEMAHandle = iMA(_Symbol, PERIOD_CURRENT, SlowEMAPeriod, 0, MODE_EMA, PRICE_CLOSE);

double fastEMAArray[], slowEMAArray[];
CopyBuffer(fastEMAHandle, 0, 0, 2, fastEMAArray);
CopyBuffer(slowEMAHandle, 0, 0, 2, slowEMAArray);
Market Data Retrieval:
Next, we retrieve important market data such as the ask, bid, and point size to ensure precise calculations for stop-loss and take-profit.
double point = SymbolInfoDouble(_Symbol, SYMBOL_POINT);
double ask = SymbolInfoDouble(_Symbol, SYMBOL_ASK);
double bid = SymbolInfoDouble(_Symbol, SYMBOL_BID);
Entry Signals:
Here, we define conditions for opening buy and sell trades. A Golden Cross (fast EMA crosses above slow EMA) signals a buy, while a Death Cross (fast EMA crosses below slow EMA) signals a sell.
if(fastEMAArray[0] > slowEMAArray[0] && fastEMAArray[1] <= slowEMAArray[1]) // Death Cross
{
   double sl = NormalizeDouble(ask + StopLossPips * point, _Digits);
   trade.Sell(LotSize, _Symbol, ask, sl);
}
else if(fastEMAArray[0] < slowEMAArray[0] && fastEMAArray[1] >= slowEMAArray[1]) // Golden Cross
{
   double sl = NormalizeDouble(bid - StopLossPips * point, _Digits);
   trade.Buy(LotSize, _Symbol, bid, sl);
}
Exit Signals:
Let's ensure existing positions are closed when the opposite signal appears here. This keeps the strategy aligned with changing market conditions.
if((PositionGetInteger(POSITION_TYPE) == POSITION_TYPE_BUY && fastEMAArray[0] < slowEMAArray[0]) ||
   (PositionGetInteger(POSITION_TYPE) == POSITION_TYPE_SELL && fastEMAArray[0] > slowEMAArray[0]))
{
   trade.PositionClose(PositionGetInteger(POSITION_TICKET));
}
Error Handling:
Now, we add error-handling routines to log any issues with trade execution or position closing, which helps with debugging and ensures smooth performance.
if(!trade.Sell(LotSize, _Symbol, ask, sl))
{
   Print("Sell order error: ", GetLastError());
}
Here is our full code:
//+------------------------------------------------------------------+
//|                          Golden & Death Cross Strategy.mq5       |
//|                           Copyright 2024, Clemence Benjamin      |
//|        https://www.mql5.com/en/users/billionaire2024/seller      |
//+------------------------------------------------------------------+

#property copyright "Clemence Benjamin"
#property description "GOLDEN AND DEATH CROSS"
#property version "1.0"


//+------------------------------------------------------------------+
//| Includes                                                         |
//+------------------------------------------------------------------+
#include<Trade\Trade.mqh>;
CTrade trade;

//+------------------------------------------------------------------+
//| Input parameters                                                 |
//+------------------------------------------------------------------+
input double LotSize = 1.0;            // Trade volume (lots)
input int Slippage = 20;               // Slippage in points
input int TimerInterval = 1000;          // Timer interval in seconds
input double StopLossPips = 1500;        // Stop Loss in pips
input int FastEMAPeriod = 50;          // Fast EMA period (default 50)
input int SlowEMAPeriod = 200;         // Slow EMA period (default 200)

//+------------------------------------------------------------------+
//| Expert initialization function                                   |
//+------------------------------------------------------------------+
int OnInit()
  {
   //--- create timer
   EventSetTimer(TimerInterval);

   //--- Check if there are enough bars to calculate the EMA
   if(Bars(_Symbol,PERIOD_CURRENT)<SlowEMAPeriod)
     {
      Print("Not enough bars for EMA calculation");
      return(INIT_FAILED);
     }
   return(INIT_SUCCEEDED);
  }
//+------------------------------------------------------------------+
//| Expert deinitialization function                                 |
//+------------------------------------------------------------------+
void OnDeinit(const int reason)
  {
   //--- delete timer
   EventKillTimer();
  }
//+------------------------------------------------------------------+
//| Expert timer function                                            |
//+------------------------------------------------------------------+
void OnTimer()
{
   bool hasPosition = PositionSelect(_Symbol);

   int fastEMAHandle = iMA(_Symbol, PERIOD_CURRENT, FastEMAPeriod, 0, MODE_EMA, PRICE_CLOSE);
   int slowEMAHandle = iMA(_Symbol, PERIOD_CURRENT, SlowEMAPeriod, 0, MODE_EMA, PRICE_CLOSE);

   if(fastEMAHandle < 0 || slowEMAHandle < 0)
   {
      Print("Failed to create EMA handles. Error: ", GetLastError());
      return;
   }

   double fastEMAArray[], slowEMAArray[];
   if(CopyBuffer(fastEMAHandle, 0, 0, 2, fastEMAArray) <= 0 ||
      CopyBuffer(slowEMAHandle, 0, 0, 2, slowEMAArray) <= 0)
   {
      Print("Failed to copy EMA data. Error: ", GetLastError());
      return;
   }

   double point = SymbolInfoDouble(_Symbol, SYMBOL_POINT);
   double ask = SymbolInfoDouble(_Symbol, SYMBOL_ASK);
   double bid = SymbolInfoDouble(_Symbol, SYMBOL_BID);

   if(!hasPosition)
   {
      if(fastEMAArray[0] > slowEMAArray[0] && fastEMAArray[1] <= slowEMAArray[1]) // Death Cross
      {

         double sl = NormalizeDouble(ask + StopLossPips * point, _Digits);
         if(!trade.Sell(LotSize, _Symbol, ask, sl ))
            Print("Buy order error ", GetLastError());
         else
            Print("Buy order opened with TP ", " and SL ", StopLossPips, " pips");
      }
      else if(fastEMAArray[0] < slowEMAArray[0] && fastEMAArray[1] >= slowEMAArray[1]) // Golden Cross
      {

         double sl = NormalizeDouble(bid - StopLossPips * point, _Digits);
         if(!trade.Buy(LotSize, _Symbol, bid, sl ))
            Print("Sell order error ", GetLastError());
         else
            Print("Sell order opened with TP ",  " and SL ", StopLossPips, " pips");
      }
   }
   else
   {
     if((PositionGetInteger(POSITION_TYPE) == POSITION_TYPE_BUY && fastEMAArray[0] < slowEMAArray[0]) ||
         (PositionGetInteger(POSITION_TYPE) == POSITION_TYPE_SELL && fastEMAArray[0] > slowEMAArray[0]))
    {
         ulong ticket = PositionGetInteger(POSITION_TICKET);
         if(!trade.PositionClose(ticket))
            Print("Failed to close position (Ticket: ", ticket, "). Error: ", GetLastError());
         else
            Print("Position closed : ", ticket);
      }
   }
}

//+------------------------------------------------------------------+
Initial Strategy Testing
After successfully compiling the code, we are now ready to test the performance of our strategy using the Strategy Tester. Below are images of the test results before we integrated the strategy into the Trend Constraint Expert Advisor.

Strategy Tester Settings: Boom 500 Index

Input Settings: Boom 500 Index
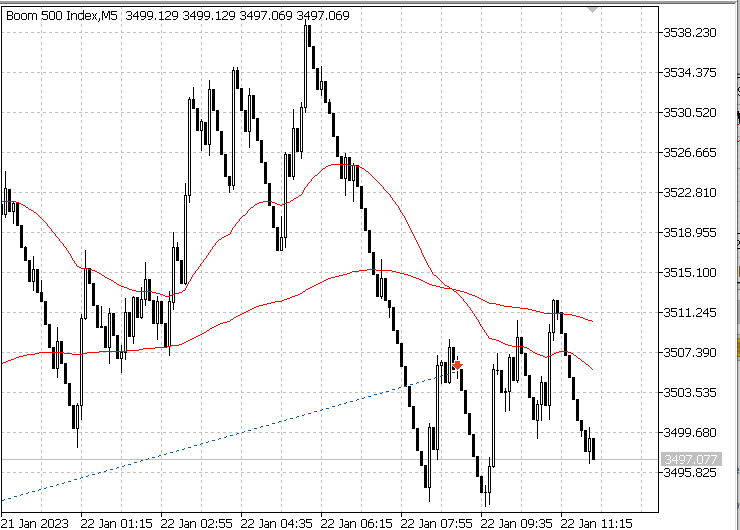
Boom 500 Index M5: Testing Golden & Death Cross Strategy
From the initial test, the order execution logic is working smoothly, but there is a need to improve the exit strategy. From manual observation in the strategy tester, I noticed many positions that could have secured a profit but ended up closing at small profits or even losses. This occurred because reversals presented crossovers after significant drawdowns, limiting the profits. During market consolidation, many false crossovers led to losses. To avoid such large drawdowns, the exit strategy needs enhancement.
Merging the new strategy in the Trend Constraint
Finally, we have reached the goal of creating a Multiple Strategy Expert Advisor by integrating the strategy we developed earlier. To refresh your memory of the existing strategies, you can revisit (Part 9). Here’s a list of the strategies that have already been integrated:
- Trend Following
- Donchian Channel Breakout
- Divergence Strategy
Today, we are adding the fourth strategy, which, as I explained earlier, works independently and is free from constraint conditions, allowing it to capture all reversal opportunities. To achieve this, we will modify the current Trend Constraint Expert by adding a Boolean switch for the new Golden and Death Cross strategy. Additionally, we will refactor other code sections into relevant functions of the main code.
To prevent conflicts with other terms already present in the main program, we added a unique prefix to the variables associated with the Golden and Death Cross strategy. For example, we renamed LotSize to GDC_LotSize = 1.0; to ensure clarity and avoid confusion
Below is the complete, error-free code. The new additions and modifications are clearly highlighted for better understanding and clarity.
//+------------------------------------------------------------------+
//|                                      Trend Constraint Expert.mq5 |
//|                                Copyright 2024, Clemence Benjamin |
//|             https://www.mql5.com/en/users/billionaire2024/seller |
//+------------------------------------------------------------------+
#property copyright "Copyright 2024, Clemence Benjamini"
#property link      "https://www.mql5.com/en/users/billionaire2024/seller"
#property version   "1.03"

#include <Trade\Trade.mqh>
CTrade trade;

// Input parameters for controlling strategies
input bool UseTrendFollowingStrategy = false;   // Enable/Disable Trend Following Strategy
input bool UseBreakoutStrategy = false;         // Enable/Disable Breakout Strategy
input bool UseDivergenceStrategy = false;       // Enable/Disable Divergence Strategy
input bool UseGoldenDeathCrossStrategy = true;  // Enable/Disable Golden/Death Cross Strategy

// Input parameters for Golden/Death Cross Strategy
input double GDC_LotSize = 1.0;            // Trade volume (lots) for Golden Death Cross
input int GDC_Slippage = 20;               // Slippage in points for Golden Death Cross
input int GDC_TimerInterval = 1000;        // Timer interval in seconds for Golden Death Cross
input double GDC_StopLossPips = 1500;      // Stop Loss in pips for Golden Death Cross
input int GDC_FastEMAPeriod = 50;          // Fast EMA period for Golden Death Cross
input int GDC_SlowEMAPeriod = 200;         // Slow EMA period for Golden Death Cross

int GDC_fastEMAHandle, GDC_slowEMAHandle;  // Handles for EMA indicators in Golden Death Cross

// Global variables
double prevShortMA, prevLongMA;

// Input parameters for Trend Constraint Strategy
input int    RSI_Period = 14;            // RSI period
input double RSI_Overbought = 70.0;     // RSI overbought level
input double RSI_Oversold = 30.0;       // RSI oversold level
input double Lots = 0.1;                // Lot size
input double StopLoss = 100;            // Stop Loss in points
input double TakeProfit = 200;          // Take Profit in points
input double TrailingStop = 50;         // Trailing Stop in points
input int    MagicNumber = 12345678;    // Magic number for the Trend Constraint EA
input int    OrderLifetime = 43200;     // Order lifetime in seconds (12 hours)

// Input parameters for Breakout Strategy
input int InpDonchianPeriod = 20;       // Period for Donchian Channel
input double RiskRewardRatio = 1.5;     // Risk-to-reward ratio
input double LotSize = 0.1;             // Default lot size for trading
input double pipsToStopLoss = 15;       // Stop loss in pips for Breakout
input double pipsToTakeProfit = 30;     // Take profit in pips for Breakout

// Input parameters for Divergence Strategy
input int DivergenceMACDPeriod = 12;    // MACD Fast EMA period
input int DivergenceSignalPeriod = 9;   // MACD Signal period
input double DivergenceLots = 1.0;      // Lot size for Divergence trades
input double DivergenceStopLoss = 300;   // Stop Loss in points for Divergence
input double DivergenceTakeProfit = 500; // Take Profit in points for Divergence
input int DivergenceMagicNumber = 87654321;     // Magic number for Divergence Strategy
input int DivergenceLookBack = 8;       // Number of periods to look back for divergence
input double profitLockerPoints  = 20;  // Number of profit points to lock

// Indicator handle storage
int rsi_handle;
int handle;                             // Handle for Donchian Channel
int macd_handle;

double ExtUpBuffer[];                   // Upper Donchian buffer
double ExtDnBuffer[];                   // Lower Donchian buffer
double ExtMacdBuffer[];                 // MACD buffer
double ExtSignalBuffer[];               // Signal buffer
int globalMagicNumber;

//+------------------------------------------------------------------+
//| Expert initialization function                                   |
//+------------------------------------------------------------------+
int OnInit()
{
    prevShortMA = 0.0;
    prevLongMA = 0.0;
    // Initialize RSI handle
    rsi_handle = iRSI(_Symbol, PERIOD_CURRENT, RSI_Period, PRICE_CLOSE);
    if (rsi_handle == INVALID_HANDLE)
    {
        Print("Failed to create RSI indicator handle. Error: ", GetLastError());
        return INIT_FAILED;
    }

    // Create a handle for the Donchian Channel
    handle = iCustom(_Symbol, PERIOD_CURRENT, "Free Indicators\\Donchian Channel", InpDonchianPeriod);
    if (handle == INVALID_HANDLE)
    {
        Print("Failed to load the Donchian Channel indicator. Error: ", GetLastError());
        return INIT_FAILED;
    }

    // Initialize MACD handle for divergence
    globalMagicNumber = DivergenceMagicNumber;
    macd_handle = iMACD(_Symbol, PERIOD_CURRENT, DivergenceMACDPeriod, 26, DivergenceSignalPeriod, PRICE_CLOSE);
    if (macd_handle == INVALID_HANDLE)
    {
        Print("Failed to create MACD indicator handle for divergence strategy. Error: ", GetLastError());
        return INIT_FAILED;
    }


    if(UseGoldenDeathCrossStrategy)
{
    // Check if there are enough bars to calculate the EMA
    if(Bars(_Symbol, PERIOD_CURRENT) < GDC_SlowEMAPeriod)
    {
        Print("Not enough bars for EMA calculation for Golden Death Cross");
        return INIT_FAILED;
    }
    GDC_fastEMAHandle = iMA(_Symbol, PERIOD_CURRENT, GDC_FastEMAPeriod, 0, MODE_EMA, PRICE_CLOSE);
    GDC_slowEMAHandle = iMA(_Symbol, PERIOD_CURRENT, GDC_SlowEMAPeriod, 0, MODE_EMA, PRICE_CLOSE);
    if(GDC_fastEMAHandle < 0 || GDC_slowEMAHandle < 0)
    {
        Print("Failed to create EMA handles for Golden Death Cross. Error: ", GetLastError());
        return INIT_FAILED;
    }
}

    // Resize arrays for MACD buffers
    ArrayResize(ExtMacdBuffer, DivergenceLookBack);
    ArrayResize(ExtSignalBuffer, DivergenceLookBack);

    Print("Trend Constraint Expert initialized.");
    return INIT_SUCCEEDED;
}

//+------------------------------------------------------------------+
//| Expert deinitialization function                                 |
//+------------------------------------------------------------------+
void OnDeinit(const int reason)
{
    IndicatorRelease(rsi_handle);
    IndicatorRelease(handle);
    IndicatorRelease(macd_handle);
    Print("Trend Constraint Expert deinitialized.");
}

//+------------------------------------------------------------------+
//| Check Golden/Death Cross Trading Logic                           |
//+------------------------------------------------------------------+
void CheckGoldenDeathCross()
{
    double fastEMAArray[2], slowEMAArray[2];
    double point = SymbolInfoDouble(_Symbol, SYMBOL_POINT);
    double ask = SymbolInfoDouble(_Symbol, SYMBOL_ASK);
    double bid = SymbolInfoDouble(_Symbol, SYMBOL_BID);

    if(CopyBuffer(GDC_fastEMAHandle, 0, 0, 2, fastEMAArray) <= 0 ||
       CopyBuffer(GDC_slowEMAHandle, 0, 0, 2, slowEMAArray) <= 0)
    {
        Print("Failed to copy EMA data for Golden Death Cross. Error: ", GetLastError());
        return;
    }

    bool hasPosition = PositionSelect(_Symbol);

    if(!hasPosition)
    {
        if(fastEMAArray[0] > slowEMAArray[0] && fastEMAArray[1] <= slowEMAArray[1]) // Death Cross
        {
            double sl = NormalizeDouble(ask + GDC_StopLossPips * point, _Digits);
            if(!trade.Sell(GDC_LotSize, _Symbol, ask, sl ))
                Print("Sell order error for Golden Death Cross ", GetLastError());
            else
                Print("Sell order opened for Golden Death Cross with SL ", GDC_StopLossPips, " pips");
        }
        else if(fastEMAArray[0] < slowEMAArray[0] && fastEMAArray[1] >= slowEMAArray[1]) // Golden Cross
        {
            double sl = NormalizeDouble(bid - GDC_StopLossPips * point, _Digits);
            if(!trade.Buy(GDC_LotSize, _Symbol, bid, sl ))
                Print("Buy order error for Golden Death Cross ", GetLastError());
            else
                Print("Buy order opened for Golden Death Cross with SL ", GDC_StopLossPips, " pips");
        }
    }
    else
    {
        if((PositionGetInteger(POSITION_TYPE) == POSITION_TYPE_BUY && fastEMAArray[0] < slowEMAArray[0]) ||
           (PositionGetInteger(POSITION_TYPE) == POSITION_TYPE_SELL && fastEMAArray[0] > slowEMAArray[0]))
        {
            ulong ticket = PositionGetInteger(POSITION_TICKET);
            if(!trade.PositionClose(ticket))
                Print("Failed to close position for Golden Death Cross (Ticket: ", ticket, "). Error: ", GetLastError());
            else
                Print("Position closed for Golden Death Cross: ", ticket);
        }
    }
}

//+------------------------------------------------------------------+
//| Check Trend Following Strategy                                   |
//+------------------------------------------------------------------+
void CheckTrendFollowing()
{
   if (PositionsTotal() >= 2) return; // Ensure no more than 2 orders from this strategy

    double rsi_value;
    double rsi_values[];
    if (CopyBuffer(rsi_handle, 0, 0, 1, rsi_values) <= 0)
    {
        Print("Failed to get RSI value. Error: ", GetLastError());
        return;
    }
    rsi_value = rsi_values[0];

    double ma_short = iMA(_Symbol, PERIOD_CURRENT, 50, 0, MODE_EMA, PRICE_CLOSE);
    double ma_long = iMA(_Symbol, PERIOD_CURRENT, 200, 0, MODE_EMA, PRICE_CLOSE);

    bool is_uptrend = ma_short > ma_long;
    bool is_downtrend = ma_short < ma_long;

    if (is_uptrend && rsi_value < RSI_Oversold)
    {
        double currentPrice = SymbolInfoDouble(_Symbol, SYMBOL_BID);
        double stopLossPrice = currentPrice - StopLoss * _Point;
        double takeProfitPrice = currentPrice + TakeProfit * _Point;

        // Corrected Buy method call with 6 parameters
        if (trade.Buy(Lots, _Symbol, 0, stopLossPrice, takeProfitPrice, "Trend Following Buy"))
        {
            Print("Trend Following Buy order placed.");
        }
    }
    else if (is_downtrend && rsi_value > RSI_Overbought)
    {
        double currentPrice = SymbolInfoDouble(_Symbol, SYMBOL_ASK);
        double stopLossPrice = currentPrice + StopLoss * _Point;
        double takeProfitPrice = currentPrice - TakeProfit * _Point;

        // Corrected Sell method call with 6 parameters
        if (trade.Sell(Lots, _Symbol, 0, stopLossPrice, takeProfitPrice, "Trend Following Sell"))
        {
            Print("Trend Following Sell order placed.");
        }
    }
}

//+------------------------------------------------------------------+
//| Check Breakout Strategy                                          |
//+------------------------------------------------------------------+
void CheckBreakoutTrading()
{
    if (PositionsTotal() >= 2) return; // Ensure no more than 2 orders from this strategy

    ArrayResize(ExtUpBuffer, 2);
    ArrayResize(ExtDnBuffer, 2);

    if (CopyBuffer(handle, 0, 0, 2, ExtUpBuffer) <= 0 || CopyBuffer(handle, 2, 0, 2, ExtDnBuffer) <= 0)
    {
        Print("Error reading Donchian Channel buffer. Error: ", GetLastError());
        return;
    }

    double closePrice = iClose(_Symbol, PERIOD_CURRENT, 0);
    double lastOpen = iOpen(_Symbol, PERIOD_D1, 1);
    double lastClose = iClose(_Symbol, PERIOD_D1, 1);

    bool isBullishDay = lastClose > lastOpen;
    bool isBearishDay = lastClose < lastOpen;

    if (isBullishDay && closePrice > ExtUpBuffer[1])
    {
        double stopLoss = closePrice - pipsToStopLoss * _Point;
        double takeProfit = closePrice + pipsToTakeProfit * _Point;
        if (trade.Buy(LotSize, _Symbol, 0, stopLoss, takeProfit, "Breakout Buy") > 0)
        {
            Print("Breakout Buy order placed.");
        }
    }
    else if (isBearishDay && closePrice < ExtDnBuffer[1])
    {
        double stopLoss = closePrice + pipsToStopLoss * _Point;
        double takeProfit = closePrice - pipsToTakeProfit * _Point;
        if (trade.Sell(LotSize, _Symbol, 0, stopLoss, takeProfit, "Breakout Sell") > 0)
        {
            Print("Breakout Sell order placed.");
        }
    }
}

//+------------------------------------------------------------------+
//| Check Divergence Trading                                         |
//+------------------------------------------------------------------+
bool CheckBullishRegularDivergence()
{
    double priceLow1 = iLow(_Symbol, PERIOD_CURRENT, 2);
    double priceLow2 = iLow(_Symbol, PERIOD_CURRENT, DivergenceLookBack);
    double macdLow1 = ExtMacdBuffer[2];
    double macdLow2 = ExtMacdBuffer[DivergenceLookBack - 1];

    return (priceLow1 < priceLow2 && macdLow1 > macdLow2);
}

bool CheckBullishHiddenDivergence()
{
    double priceLow1 = iLow(_Symbol, PERIOD_CURRENT, 2);
    double priceLow2 = iLow(_Symbol, PERIOD_CURRENT, DivergenceLookBack);
    double macdLow1 = ExtMacdBuffer[2];
    double macdLow2 = ExtMacdBuffer[DivergenceLookBack - 1];

    return (priceLow1 > priceLow2 && macdLow1 < macdLow2);
}

bool CheckBearishRegularDivergence()
{
    double priceHigh1 = iHigh(_Symbol, PERIOD_CURRENT, 2);
    double priceHigh2 = iHigh(_Symbol, PERIOD_CURRENT, DivergenceLookBack);
    double macdHigh1 = ExtMacdBuffer[2];
    double macdHigh2 = ExtMacdBuffer[DivergenceLookBack - 1];

    return (priceHigh1 > priceHigh2 && macdHigh1 < macdHigh2);
}

bool CheckBearishHiddenDivergence()
{
    double priceHigh1 = iHigh(_Symbol, PERIOD_CURRENT, 2);
    double priceHigh2 = iHigh(_Symbol, PERIOD_CURRENT, DivergenceLookBack);
    double macdHigh1 = ExtMacdBuffer[2];
    double macdHigh2 = ExtMacdBuffer[DivergenceLookBack - 1];

    return (priceHigh1 < priceHigh2 && macdHigh1 > macdHigh2);
}

void CheckDivergenceTrading()
{
    if (!UseDivergenceStrategy) return;

    // Check if no position is open or if less than 3 positions are open
    int openDivergencePositions = CountOrdersByMagic(DivergenceMagicNumber);
    if (openDivergencePositions == 0 || openDivergencePositions < 3)
    {
        int barsAvailable = Bars(_Symbol, PERIOD_CURRENT);
        if (barsAvailable < DivergenceLookBack * 2)
        {
            Print("Not enough data bars for MACD calculation.");
            return;
        }

        int attempt = 0;
        while(attempt < 6)
        {
            if (CopyBuffer(macd_handle, 0, 0, DivergenceLookBack, ExtMacdBuffer) > 0 &&
                CopyBuffer(macd_handle, 1, 0, DivergenceLookBack, ExtSignalBuffer) > 0)
                break;

            Print("Failed to copy MACD buffer, retrying...");
            Sleep(1000);
            attempt++;
        }
        if(attempt == 6)
        {
            Print("Failed to copy MACD buffers after ", attempt, " attempts.");
            return;
        }

        if(TimeCurrent() == iTime(_Symbol, PERIOD_CURRENT, 0))
        {
            Print("Skipping trade due to incomplete bar data.");
            return;
        }

        double currentClose = iClose(_Symbol, PERIOD_CURRENT, 0);
        double dailyClose = iClose(_Symbol, PERIOD_D1, 0);
        double dailyOpen = iOpen(_Symbol, PERIOD_D1, 0);
        bool isDailyBullish = dailyClose > dailyOpen;
        bool isDailyBearish = dailyClose < dailyOpen;

        // Only proceed with buy orders if D1 is bullish
        if (isDailyBullish)
        {
            if ((CheckBullishRegularDivergence() && ExtMacdBuffer[0] > ExtSignalBuffer[0]) ||
                CheckBullishHiddenDivergence())
            {
                ExecuteDivergenceOrder(true);
            }
        }

        // Only proceed with sell orders if D1 is bearish
        if (isDailyBearish)
        {
            if ((CheckBearishRegularDivergence() && ExtMacdBuffer[0] < ExtSignalBuffer[0]) ||
                CheckBearishHiddenDivergence())
            {
                ExecuteDivergenceOrder(false);
            }
        }
    }
    else
    {
        Print("Divergence strategy: Maximum number of positions reached.");
    }
}

void ExecuteDivergenceOrder(bool isBuy)
{
    // Ensure the magic number is set for the trade
    trade.SetExpertMagicNumber(DivergenceMagicNumber);

    double currentPrice = isBuy ? SymbolInfoDouble(_Symbol, SYMBOL_ASK) : SymbolInfoDouble(_Symbol, SYMBOL_BID);
    double stopLossPrice = isBuy ? currentPrice - DivergenceStopLoss * _Point : currentPrice + DivergenceStopLoss * _Point;
    double takeProfitPrice = isBuy ? currentPrice + DivergenceTakeProfit * _Point : currentPrice - DivergenceTakeProfit * _Point;

    if (isBuy)
    {
        if (trade.Buy(DivergenceLots, _Symbol, 0, stopLossPrice, takeProfitPrice, "Divergence Buy"))
        {
            Print("Divergence Buy order placed.");
        }
    }
    else
    {
        if (trade.Sell(DivergenceLots, _Symbol, 0, stopLossPrice, takeProfitPrice, "Divergence Sell"))
        {
            Print("Divergence Sell order placed.");
        }
    }
}

int CountOrdersByMagic(int magic)
{
    int count = 0;
    for (int i = 0; i < PositionsTotal(); i++)
    {
        ulong ticket = PositionGetTicket(i);
        if (PositionSelectByTicket(ticket))
        {
            if (PositionGetInteger(POSITION_MAGIC) == magic)
            {
                count++;
            }
        }
    }
    return count;
}

//+------------------------------------------------------------------+
//| Profit Locking Logic                                             |
//+------------------------------------------------------------------+
void LockProfits()
{
    for (int i = PositionsTotal() - 1; i >= 0; i--)
    {
        ulong ticket = PositionGetTicket(i);
        if (PositionSelectByTicket(ticket))
        {
            double entryPrice = PositionGetDouble(POSITION_PRICE_OPEN);
            double currentProfit = PositionGetDouble(POSITION_PROFIT);
            double currentPrice = PositionGetDouble(POSITION_PRICE_CURRENT);

            // Convert profit to points
            double profitPoints = MathAbs(currentProfit / _Point);

            // Check if profit has exceeded 100 points
            if (profitPoints >= 100)
            {
                double newStopLoss;

                if (PositionGetInteger(POSITION_TYPE) == POSITION_TYPE_BUY)
                {
                    newStopLoss = entryPrice + profitLockerPoints * _Point; // 20 points above entry for buys
                }
                else if (PositionGetInteger(POSITION_TYPE) == POSITION_TYPE_SELL)
                {
                    newStopLoss = entryPrice - profitLockerPoints * _Point; // 20 points below entry for sells
                }
                else
                {
                    continue; // Skip if not a buy or sell position
                }

                // Modify stop loss only if the new stop loss is more protective
                double currentStopLoss = PositionGetDouble(POSITION_SL);
                if (PositionGetInteger(POSITION_TYPE) == POSITION_TYPE_BUY)
                {
                    if (currentStopLoss < newStopLoss || currentStopLoss == 0)
                    {
                        if (trade.PositionModify(ticket, newStopLoss, PositionGetDouble(POSITION_TP)))
                        {
                            Print("Profit locking for buy position: Stop Loss moved to ", newStopLoss);
                        }
                    }
                }
                else // POSITION_TYPE_SELL
                {
                    if (currentStopLoss > newStopLoss || currentStopLoss == 0)
                    {
                        if (trade.PositionModify(ticket, newStopLoss, PositionGetDouble(POSITION_TP)))
                        {
                            Print("Profit locking for sell position: Stop Loss moved to ", newStopLoss);
                        }
                    }
                }
            }
        }
    }
}
//+------------------------------------------------------------------+
//| Expert tick function                                             |
//+------------------------------------------------------------------+
void OnTick()
{
    if (UseTrendFollowingStrategy)
        CheckTrendFollowing();
    if (UseBreakoutStrategy)
        CheckBreakoutTrading();
    if (UseDivergenceStrategy)
        CheckDivergenceTrading();
    if(UseGoldenDeathCrossStrategy)
        CheckGoldenDeathCross();

}
Testing and Optimization Results

Trend Constraint Expert: Adding to chart at default settings

Golden and Death Cross Strategy visualized as part of other strategies in the Strategy Tester
Conclusion
It is possible to continually expand our EA code, but doing so can make it increasingly complex and resource-intensive to process. This highlights the need to advance our resource management techniques. The integration of AI models into these concepts is particularly beneficial, as they can handle these complexities effectively. In this project, we successfully integrated one of the most popular strategies for managing reversal opportunities—the Golden and Death Cross strategy—within the Trend Constraint Expert Advisor.
The foundational stages, we covered from Part(1) up to now, laid the groundwork for this EA. However, to achieve optimal results, the EA model must be refined by optimizing various settings and modifying specific structural features. This approach makes it a valuable educational and experimental tool. Please note that this EA does not guarantee profitability; it is intended solely for educational and research purposes.
In the upcoming parts, I plan to refine the established strategies further and introduce machine learning techniques to enhance the EA's capabilities and performance.
Warning: All rights to these materials are reserved by MetaQuotes Ltd. Copying or reprinting of these materials in whole or in part is prohibited.
This article was written by a user of the site and reflects their personal views. MetaQuotes Ltd is not responsible for the accuracy of the information presented, nor for any consequences resulting from the use of the solutions, strategies or recommendations described.


- Free trading apps
- Over 8,000 signals for copying
- Economic news for exploring financial markets
You agree to website policy and terms of use