
Introduction
The Expert Advisor Crash Deriv is designed to operate on any symbol and with any leverage. For this example, we will use the Crash 1000 index, which is known for its significant price drops, creating unique trading opportunities. This EA uses a combination of technical indicators and advanced strategies to identify and capitalize on these drops, thus ensuring maximum efficiency and profitability in its operations. Crash Deriv is optimized to run on the H1 timeframe and offers multiple settings that allow it to adapt to different market conditions and risk profiles.
Step 1: Open the Strategy Tester
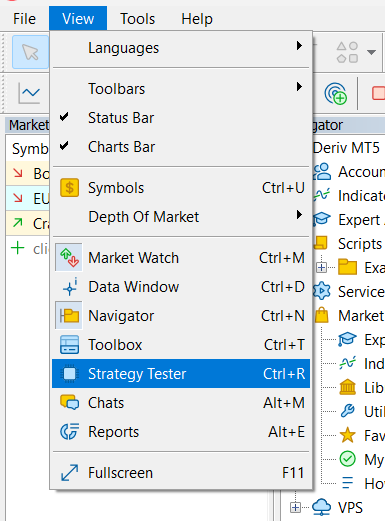
- Open MetaTrader 5.
- Go to the "View" tab in the top menu.
- Select "Strategy Tester" or press Ctrl+R to open the strategy tester.
Step 2: Configure the Settings Tab
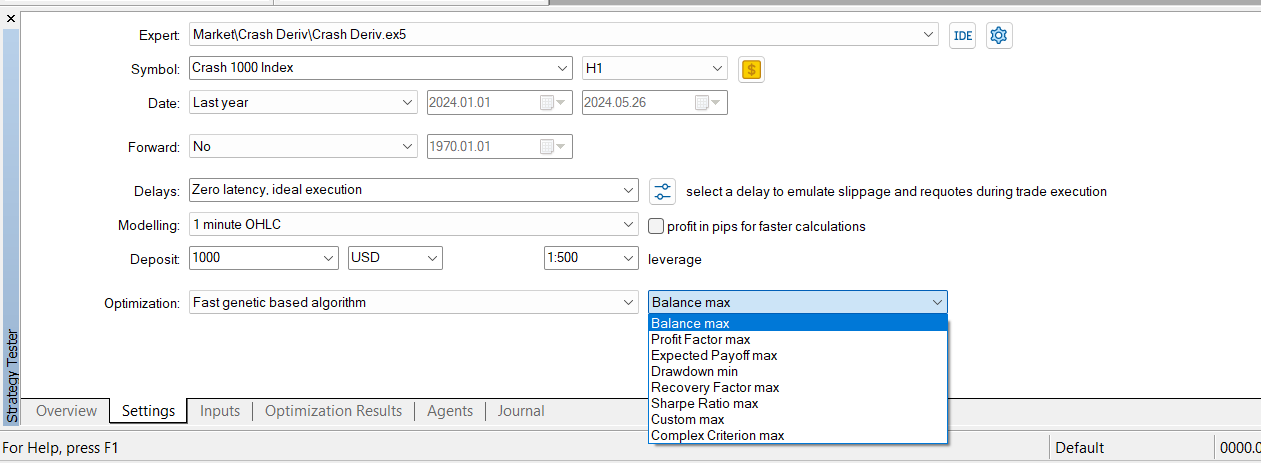
- Select the Expert Advisor: Make sure the EA "Crash Deriv" is selected.
- Symbol: For this example, select "Crash 1000 Index".
- Timeframe: Select H1.
- Date Range: Select the desired date range. For this example, we selected "Last year" covering from 2024.01.01 to 2024.05.26.
- Modeling: Select "1 minute OHLC" for a balance between accuracy and speed.
- Initial Deposit: Set the initial deposit, e.g., 1000 USD.
- Leverage: Select the leverage of your broker, e.g., 1:500.
- Optimization: Select "Fast genetic based algorithm" and choose an optimization criterion. You can select from several criteria:
- Complex Criterion Max (recommended for optimal balance).
- Balance Max (for more aggressive configurations).
- Minimum Drawdown (for safer configurations).
Step 3: Configure the Inputs Tab
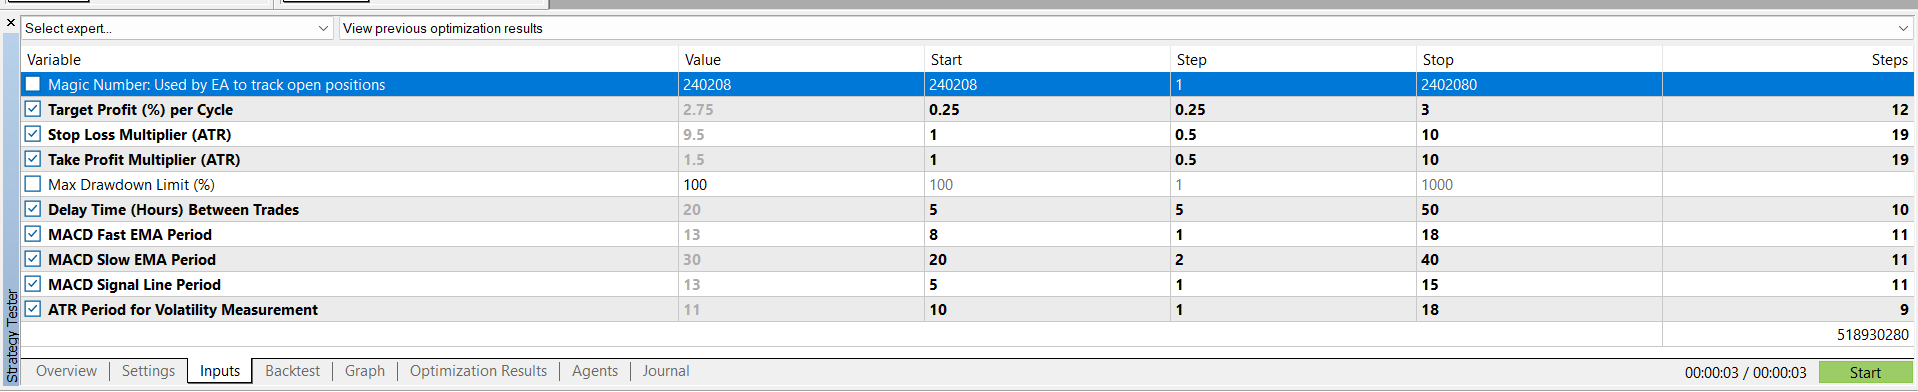
Before starting optimization, it is important to understand the parameters to be used. Below, each relevant parameter is described:
- Magic Number: Used by the EA to track open positions.
- Target Profit (%) per Cycle: Percentage of profit target per cycle.
- Start: 0.25
- Step: 0.25
- Stop: 3
- Stop Loss Multiplier (ATR): Multiplier for the stop loss based on ATR.
- Start: 1
- Step: 0.5
- Stop: 10
- Take Profit Multiplier (ATR): Multiplier for the take profit based on ATR.
- Start: 1
- Step: 0.5
- Stop: 10
- Max Drawdown Limit (%): Maximum drawdown limit allowed. This value should be manually specified by the user as it indicates the maximum percentage of capital they are willing to risk.
- Delay Time (Hours) Between Trades: Waiting time between trades in hours.
- Start: 5
- Step: 5
- Stop: 50
- MACD Fast EMA Period: Fast EMA period of the MACD.
- Start: 8
- Step: 1
- Stop: 18
- MACD Slow EMA Period: Slow EMA period of the MACD.
- Start: 20
- Step: 2
- Stop: 40
- MACD Signal Line Period: Signal line period of the MACD.
- Start: 5
- Step: 1
- Stop: 15
- ATR Period for Volatility Measurement: ATR period for volatility measurement.
- Start: 10
- Step: 1
- Stop: 18
Step 4: Start the Optimization
- Review the parameters: Make sure all parameters are configured correctly.
- Press the "Start" button to start the optimization.
- Monitor the results in the Optimization Results tab.
Step 5: Results Analysis
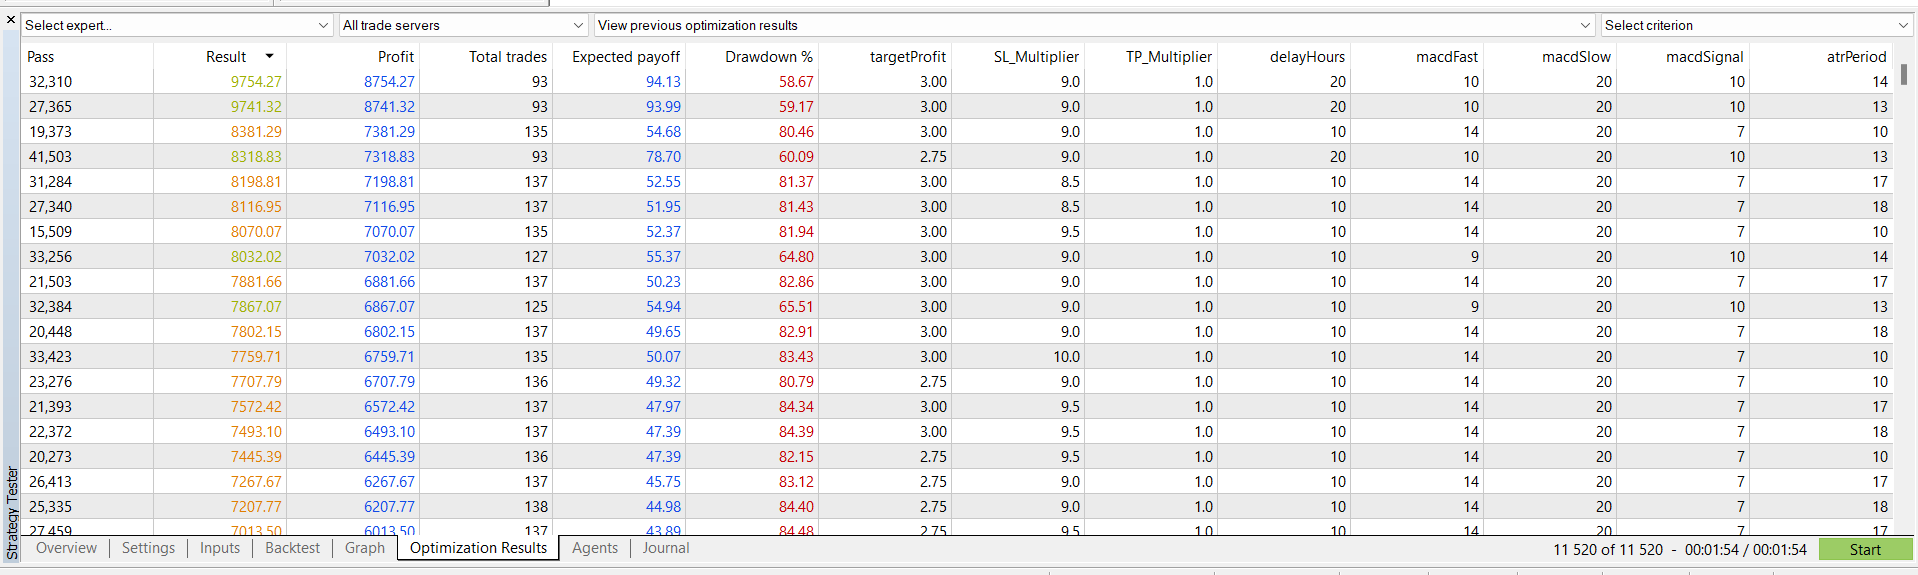
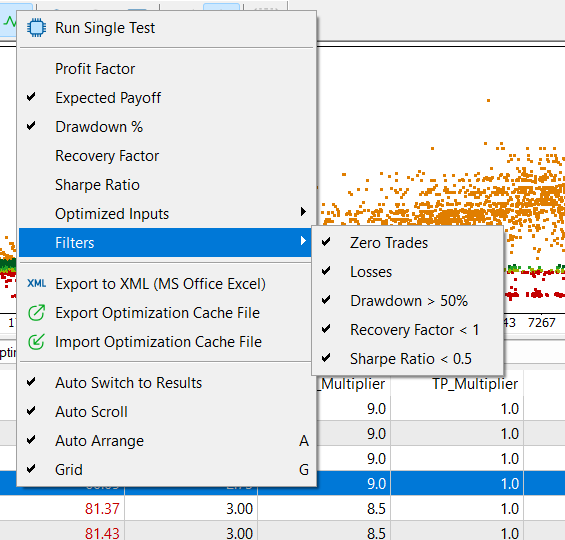
- View the results: Use the Optimization Results tab to review the different passes and their results.
- Filter results: You can apply filters to eliminate undesired configurations. For example, eliminate results with a drawdown over 50% or a Sharpe Ratio below 0.5.
- Select the best configuration: Based on the balance between profit, expected payoff, drawdown, number of trades, and other relevant criteria.
Step 6: Perform Individual Tests
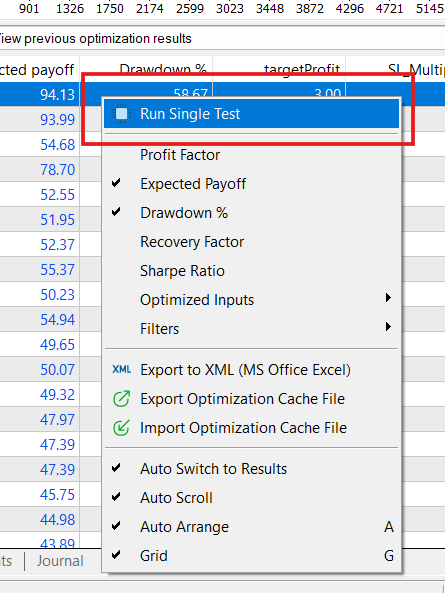
- Select the best configuration: Once the optimal configuration is selected, perform individual tests to confirm its performance.
- Run a single test: Right-click on the selected result and choose Run Single Test to run a test with the specific configuration.
Graphical Analysis of Results
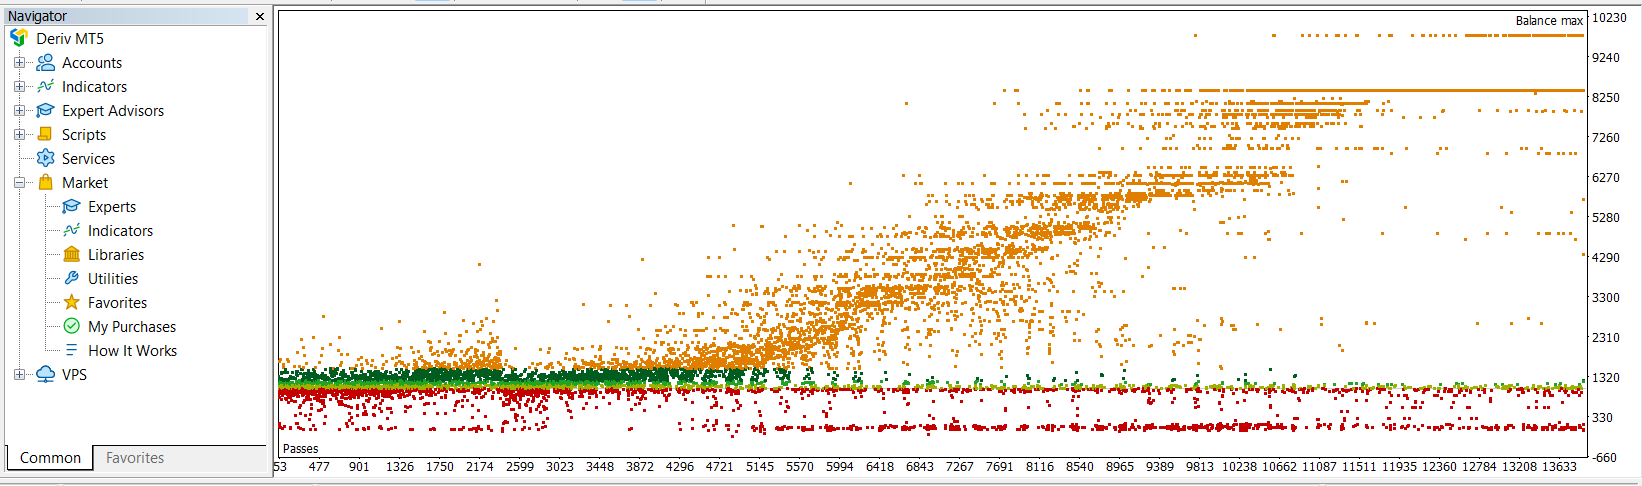
In the optimization results graph, each point represents a combination of parameters tested during optimization. The height of each point indicates the value of the selected optimization criterion (e.g., maximum balance). The highest points on the graph represent the configurations that achieved the best results according to the selected criterion.
Conclusion
Optimizing the Expert Advisor Crash Deriv will allow you to adjust the EA's parameters to your specific needs and preferred trading style. Remember that optimization is an ongoing process and may require periodic adjustments to adapt to changing market conditions.
For more details and to download the EA, visit the Crash Deriv product page.
With these steps, you will be better prepared to maximize the effectiveness of your Expert Advisor and improve your trading results.
Additional Resources
Telegram channel https://t.me/+geAsOlnUtsZmMzQx
Explore all of our Expert Advisors and enhance your trading experience by visiting our MQL5 profile.
For trading, we recommend using this broker.


