Creating a ticker tape panel: Basic version

Introduction
Some people may find price tape panels that are built into some platforms and that display individual asset quotes pretty cool. If you don't know what I'm talking about, check out the gif below:
In some cases, such things can be very useful. So here I will show how to implement such an element inside the MetaTrader 5 platform using 100% MQL5 programming. Many may consider the material in this article as something rather simple. But I guarantee that if you understand the concepts presented here, you will be able to create things much more complex.
Furthermore, I will write other articles in which I will further develop this panel so that it becomes an extremely useful tool for those who want to trade and follow other information in real time.
I must admit that the idea for this article was proposed from one of the members of this community. This idea is quite interesting to implement and develop and it can also be a very useful resource for many, which is why I decided to show how to create the code for such a panel.
Planning
It is not too complicated to create such a panel. In fact, it is very easy to implement, compared to other code types. However, before proceeding to the implementation, let us plan some things that will significantly affect which direction we take for creating the panel. Since the idea is to have a panel displaying an asset and its price without having big difficulties from the very beginning, please not the following: I will show here how to create a very basic system, which however will serve as a starting point for something more complex, sophisticated and elaborate.
The first thing to think about is how to deal with the list of assets that will be displayed on the panel. Will this be a fixed list with a preselected set of assets? Or will we insert symbol one at a time while implementing the system?
This is probably the most difficult part, since sometimes you may want to have assets you are interested in, while in other times you may want to observe the assets that are in your portfolio. Therefore, it may be better to use one file containing all the assets that you want to be displayed in the quote panel. So, we will use a FILE that contains the assets to display.
Now another problem arises: how can a resource be represented? It seems like a small thing, but it's actually very important to think about. We can use an Expert Advisor, a script, an indicator, or a service, although the latter one doesn't seem like an obvious solution. As for me, I personally prefer using a service. However, if we choose it to implement the panel, we will have too many complicated details and difficulties which would make the development of the panel a complicated and time-consuming process. Therefore, we are limited to two practical options to implement the panel: put it in an EA or in an indicator. But why can't we use a script?
The reason is simple: if the user decides to change the timeframe, he will eventually have to close the script. So, every time the chart changes, the trader will have to run the script again. As I have said, this is going to be a 100% MQL5 solution. We could think of some way around using external programming solution, but we have a different purpose here.
So, we have two options left: an Expert Advisor and an indicator. I don't like the idea of using an EA, as I prefer to use the EAs for their intended purposes, i.e. to send and control orders. Therefore, there is only one solution left: to use an indicator.
There are still other questions that need to be considered and planned, but we already can get started with this preliminary plan. So, let's get started.
Basic principles
Let's start by creating the indicator file:
#property copyright "Daniel Jose"
#property description "Program for a panel of quotes."
#property description "It creates a band that displays asset prices."
#property description "For details on how to use it visit:\n"
#property description "https://www.mql5.com/ru/articles/10941"
#property link "https://www.mql5.com/ru/articles/10941"
#property indicator_separate_window
#property indicator_plots 0
//+------------------------------------------------------------------+
int OnInit()
{
        return INIT_SUCCEEDED;
}
//+------------------------------------------------------------------+
int OnCalculate(const int rates_total, const int prev_calculated, const int begin, const double &price[])
{
        return rates_total;
}
//+------------------------------------------------------------------+
void OnTimer()
{
}
//+------------------------------------------------------------------+
void OnChartEvent(const int id, const long &lparam, const double &dparam, const string &sparam)
{
}
//+------------------------------------------------------------------+
void OnDeinit(const int reason)
{
}
//+------------------------------------------------------------------+
Although the indicator code is completely clean, which means it will not do anything particular, we already have some idea of what will come ahead. For example, we will use a separate indicator window and we will need to handle more events than with a classical indicator, such as OnTime which normally does not appear in indicators. Do not forget the following: We will not plot anything at all, as everything that the indicator will create will be done by the indicator.
We usually start with some ready code, but in this particular article, I want to show everything at a slightly different level of detail so that the reader can use the material as a source for research and study.
You're probably already thinking about how many different things we will need to implement to make everything work. It is true in a sense, but there will be not that many things. The first thing to think about is how to manage the chart. For that we have a class. Although many have seen this class in my previous articles, here it will have a slightly different look, since we will need to use much less things. So, no I'm presenting the C_Terminal class to all who do not know it. The class is in the header file C_Terminal.mqh. Its code is quite simple — see it below:
#property copyright "Daniel Jose"
//+------------------------------------------------------------------+
class C_Terminal
{
//+------------------------------------------------------------------+
        private :
                struct st00
                {
                        long    ID;
                        int     Width,
                                Height,
                                SubWin;
                }m_Infos;
//+------------------------------------------------------------------+
        public  :
//+------------------------------------------------------------------+
                void Init(const int WhatSub)
                        {
                                ChartSetInteger(m_Infos.ID = ChartID(), CHART_EVENT_OBJECT_DELETE, m_Infos.SubWin = WhatSub, true);
                                Resize();
                        }
//+------------------------------------------------------------------+
inline long Get_ID(void)   const { return m_Infos.ID; }
inline int GetSubWin(void) const { return m_Infos.SubWin; }
inline int GetWidth(void)  const { return m_Infos.Width; }
inline int GetHeight(void) const { return m_Infos.Height; }
//+------------------------------------------------------------------+
                void Resize(void)
                        {
                                m_Infos.Width = (int) ChartGetInteger(m_Infos.ID, CHART_WIDTH_IN_PIXELS);
                                m_Infos.Height = (int) ChartGetInteger(m_Infos.ID, CHART_HEIGHT_IN_PIXELS);
                        }
//+------------------------------------------------------------------+
inline string ViewDouble(double Value)
                        {
                                Value = NormalizeDouble(Value, 8);
                                return DoubleToString(Value, ((Value - MathFloor(Value)) * 100) > 0 ? 2 : 0);
                        }
//+------------------------------------------------------------------+
                void Close(void)
                        {
                                ChartSetInteger(m_Infos.ID, CHART_EVENT_OBJECT_DELETE, m_Infos.SubWin, false);
                        }
//+------------------------------------------------------------------+
};
//+------------------------------------------------------------------+
Yes, this is the entire code we need. Although the class is actually much larger, here I have shown only the necessary parts as I don't want to fill the article with extra materials.
So, for those of you who don't know what this class does, let's take a quick look at some of its parts. Since we want MetaTrader 5 to inform us about any attempt to delete an object, we need to declare it here and then capture the sizes of the window we use. Here we are actually creating an extra level of abstraction to help ourselves with programming.
This is not a mandatory thing and thus you can implement it in a different way. However, thanks to this abstraction level, where we hide anything that is not actually being assembled, we have some calls to access class data. At the end of the class, we should avoid the generation of events while the indicator will start to remove objects, that is why we use this function. There is a point in the code where we need to create formatting — we will do it here in order to keep everything related to the terminal in one class.
Things were quite simple up to this point. Further they are becoming more complicated, so be careful.
Implementing the main objects
As strange as it may seem, we are going to use only two objects in the basic model of the panel. Since I am using the model that you could see in my earlier series Developing a trading Expert Advisor from scratch which was published in the MQL5.community, I will take the model for that series. That series provides all the details explaining how everything works, but I will provide here some brief description of the system operation. So, even if you do not know how MetaTrader 5 handles objects, you will not get lost.
So, let's start with the base object class, the code of which is as follows:
#property copyright "Daniel Jose"
//+------------------------------------------------------------------+
#include "..\Auxiliar\C_Terminal.mqh"
//+------------------------------------------------------------------+
class C_Object_Base
{
        public  :
//+------------------------------------------------------------------+
virtual void Create(string szObjectName, ENUM_OBJECT typeObj)
                        {
                                ObjectCreate(Terminal.Get_ID(), szObjectName, typeObj, Terminal.GetSubWin(), 0, 0);
                                ObjectSetInteger(Terminal.Get_ID(), szObjectName, OBJPROP_SELECTABLE, false);
                                ObjectSetInteger(Terminal.Get_ID(), szObjectName, OBJPROP_SELECTED, false);
                                ObjectSetInteger(Terminal.Get_ID(), szObjectName, OBJPROP_BACK, true);
                                ObjectSetString(Terminal.Get_ID(), szObjectName, OBJPROP_TOOLTIP, "\n");
                                ObjectSetInteger(Terminal.Get_ID(), szObjectName, OBJPROP_BACK, false);
                                ObjectSetInteger(Terminal.Get_ID(), szObjectName, OBJPROP_CORNER, CORNER_LEFT_UPPER);
                        };
//+------------------------------------------------------------------+
                void PositionAxleX(string szObjectName, int X)
                        {
                                ObjectSetInteger(Terminal.Get_ID(), szObjectName, OBJPROP_XDISTANCE, X);
                        };
//+------------------------------------------------------------------+
                void PositionAxleY(string szObjectName, int Y, int iArrow = 0)
                        {
                                int desl = (int)ObjectGetInteger(Terminal.Get_ID(), szObjectName, OBJPROP_YSIZE);
                                ObjectSetInteger(Terminal.Get_ID(), szObjectName, OBJPROP_YDISTANCE, (iArrow == 0 ? Y - (int)(desl / 2) : (iArrow == 1 ? Y : Y - desl)));
                        };
//+------------------------------------------------------------------+
virtual void SetColor(string szObjectName, color cor)
                        {
                                ObjectSetInteger(Terminal.Get_ID(), szObjectName, OBJPROP_COLOR, cor);
                        }
//+------------------------------------------------------------------+
                void Size(string szObjectName, int Width, int Height)
                        {
                                ObjectSetInteger(Terminal.Get_ID(), szObjectName, OBJPROP_XSIZE, Width);
                                ObjectSetInteger(Terminal.Get_ID(), szObjectName, OBJPROP_YSIZE, Height);
                        };
//+------------------------------------------------------------------+
};
The code is simple and compact. This provides the level of abstraction so that we can use much less code later. Here we have a virtual function, which is responsible for creating any object in a very generic way. But since we will use only one object in this basic model, you might think that that this function is a bit of waste of time. This is not true, and is you look at the code in the EA's order system, you will understand what I am talking about.
We have two other functions to position the object on the chart. We also have a function that is used to change the color of the object, which, like the object creation function, is virtual. We need it because some objects have complex color pattern. And finally, we have a function that adjust the object dimensions.
Although it seems silly, by the creation of this abstraction level will help us in the future, since all objects will be handled in a unique way, no matter what the object is. This provides some advantages, which, however, we will leave for another time. So, let's see which object will be selected to create the panel. We will choose OBJ_EDIT. Its full code is shown below:
#property copyright "Daniel Jose"
//+------------------------------------------------------------------+
#include "C_Object_Base.mqh"
//+------------------------------------------------------------------+
#define def_ColorNegative       clrCoral
#define def_ColoPositive        clrPaleGreen
//+------------------------------------------------------------------+
class C_Object_Edit : public C_Object_Base
{
        public  :
//+------------------------------------------------------------------+
                template < typename T >
                void Create(string szObjectName, color corTxt, color corBack, T InfoValue)
                        {
                                C_Object_Base::Create(szObjectName, OBJ_EDIT);
                                ObjectSetString(Terminal.Get_ID(), szObjectName, OBJPROP_FONT, "Lucida Console");
                                ObjectSetInteger(Terminal.Get_ID(), szObjectName, OBJPROP_FONTSIZE, 10);
                                ObjectSetInteger(Terminal.Get_ID(), szObjectName, OBJPROP_ALIGN, ALIGN_LEFT);
                                ObjectSetInteger(Terminal.Get_ID(), szObjectName, OBJPROP_COLOR, corTxt);
                                ObjectSetInteger(Terminal.Get_ID(), szObjectName, OBJPROP_BGCOLOR, corBack);
                                ObjectSetInteger(Terminal.Get_ID(), szObjectName, OBJPROP_BORDER_COLOR, corBack);
                                ObjectSetInteger(Terminal.Get_ID(), szObjectName, OBJPROP_READONLY, true);
                                if (typename(T) == "string") ObjectSetString(Terminal.Get_ID(), szObjectName, OBJPROP_TEXT, (string)InfoValue); else SetTextValue(szObjectName, (double)InfoValue);
                        };
//+------------------------------------------------------------------+
                void SetTextValue(string szObjectName, double InfoValue, color cor = clrNONE)
                        {
                                color clr;
                                clr = (cor != clrNONE ? cor : (InfoValue < 0.0 ? def_ColorNegative : def_ColoPositive));
                                ObjectSetString(Terminal.Get_ID(), szObjectName, OBJPROP_TEXT, Terminal.ViewDouble(InfoValue < 0.0 ? -(InfoValue) : InfoValue));
                                ObjectSetInteger(Terminal.Get_ID(), szObjectName, OBJPROP_COLOR, clr);
                        };
//+------------------------------------------------------------------+
};
//+------------------------------------------------------------------+
#undef def_ColoPositive
#undef def_ColorNegative
//+------------------------------------------------------------------+
Is that all? Yes, that's all, although it slightly differs from the code that is used in the EA order system. Here we have all we need: a function to put double values which is the type we really use a lot in MQL5; creation of edit type objects Obj_Edit, and one more thing which beginner programmers may find confusing. Take a closer look at the object creation function in the code below:
template < typename T >
void Create(string szObjectName, color corTxt, color corBack, T InfoValue)
Actually, the compiler treats these two lines as one. Do you understand what is going on here? Do you think I am complicating things?
So, when we use 'template < typename T > '. Here T can be replaced with anything else provided it complies with the current naming conventions. This defines a form of overload. It is quite common when we have to create similar functions which will receive different arguments or types of data. This is extremely common. So, to make our lives easier at such moments, we use this syntax. It may seem strange, but it is often used when you don't want to re-write the entire function only because part of data will be different, while the entire inner body of the function is the same.
If you pay attention, you will see that there is only one line at the end of the procedure, which contains an interesting code:
if (typename(T) == "string") ObjectSetString(Terminal.Get_ID(), szObjectName, OBJPROP_TEXT, (string)InfoValue); else SetTextValue(szObjectName, (double)InfoValue);
The code does the following: it checks the type of data informed in the InfoValue variable. Pay attention that I am talking about TYPE not the value, so do not confuse these two concepts.
If the type is a string, then one code will be executed; if the type is different, then another code will be executed, but this is not done by the compiler or linker. This analysis is usually done at RunTime, so we should explicitly tell which data will be processed so that the linker and set up the process correctly. This is done using the lines highlighted in the code.
So, instead of creating two almost identical functions with only one difference, we overload it and tweak where necessary to end up with a lot less work.
This approach was not needed in the EA code, in which the function always works only with the basic type which is double. While now, in addition to double, we will work with strings, and I didn't want to duplicate the code only to implement two types.
If you want to find out more about it, check out template functions. The information will help you understand why function overload is used so often and how to avoid the need to rewrite all you code just because you use different types.
But before we finish this section related to objects, please pay attention to the object that will be at the bottom of the panel. We need to create a background. You don't expect everything to work well without a background, do you? But don't worry, the code for this is very simple. Check it out below:
#property copyright "Daniel Jose"
//+------------------------------------------------------------------+
#include "C_Object_Base.mqh"
//+------------------------------------------------------------------+
class C_Object_BackGround : public C_Object_Base
{
        public:
//+------------------------------------------------------------------+
                void Create(string szObjectName, color cor)
                        {
                                C_Object_Base::Create(szObjectName, OBJ_RECTANGLE_LABEL);
                                ObjectSetInteger(Terminal.Get_ID(), szObjectName, OBJPROP_BORDER_TYPE, BORDER_FLAT);
                                ObjectSetInteger(Terminal.Get_ID(), szObjectName, OBJPROP_CORNER, CORNER_LEFT_UPPER);
                                this.SetColor(szObjectName, cor);
                        }
//+------------------------------------------------------------------+
virtual void SetColor(string szObjectName, color cor)
                        {
                                ObjectSetInteger(Terminal.Get_ID(), szObjectName, OBJPROP_COLOR, cor);
                                ObjectSetInteger(Terminal.Get_ID(), szObjectName, OBJPROP_BGCOLOR, cor);
                        }
//+------------------------------------------------------------------+
};
//+------------------------------------------------------------------+
This code is simple and straightforward, so I don't think it needs any explanation. It will only be used to create the panel background. Anyway, I am showing it here in case anyone wonders how code creating a background looks like.
With this we can end this section. We have already implemented the objects and we have the support structure for the terminal, so we can move on to the next step.
Implementing the main class
So far we have prepared the ground for this step, which is the most exciting of all since here we will actually make the system work. The relevant code is in the header file C_Widget.mqh. Let's start with the initial declarations which are shown below:
#property copyright "Daniel Jose"
//+------------------------------------------------------------------+
#include "Elements\C_Object_Edit.mqh"
#include "Elements\C_Object_BackGround.mqh"
//+------------------------------------------------------------------+
C_Terminal Terminal;
//+------------------------------------------------------------------+
#define def_PrefixName          "WidgetPrice"
#define def_NameObjBackGround	def_PrefixName + "BackGround"
#define def_MaxWidth            80
//+------------------------------------------------------------------+
#define def_CharSymbol          "S"
#define def_CharPrice           "P"
//+------------------------------------------------------------------+
#define macro_MaxPosition (Terminal.GetWidth() >= (m_Infos.nSymbols * def_MaxWidth) ? Terminal.GetWidth() : m_Infos.nSymbols * def_MaxWidth)
#define macro_ObjectName(A, B) (def_PrefixName + (string)Terminal.GetSubWin() + A + "#" + B)
//+------------------------------------------------------------------+
Here we declare the header files that we actually need although there are also others. But we do not need all of them, so these header files are enough as they cover all the rest.
We also declare the terminal class, so that we can use it to create the panel. We also have some declarations and macros to use in this header file C_Widget.mqh. But be very careful with macros as they must be used in the right way. As long as we use them correctly, there will be no big problems, and they will help us a lot.
Once this is done, we declare the class with its initial variables.
class C_Widget
{
        protected:
                enum EventCustom {Ev_RollingTo};
        private :
                struct st00
                {
                        color   CorBackGround,
                                CorSymbol,
                                CorPrice;
                        int     nSymbols,
                                MaxPositionX;
                        struct st01
                        {
                                string szCode;
                        }Symbols[];
                }m_Infos;
This enum will very useful later, although it is not required. It is very useful to have it as it will make things more abstract. You will get the code that is easier to read and to understand. Later we will declare a structure that will help us control a few things. But now you do not have to worry about it, just know that it is here and it is a totally private part of the class, i.e. no outer code will be able to access it.
Now let's move on to the real action, and the first of them is shown below:
void CreateBackGround(void)
{
        C_Object_BackGround backGround;

        backGround.Create(def_NameObjBackGround, m_Infos.CorBackGround);
        backGround.Size(def_NameObjBackGround, Terminal.GetWidth(), Terminal.GetHeight());
}
Here we actually create the panel background. Pay attention that we will use the entire area of the subwindow. We will place the objects here, filling everything with one color. Thus, we will get a uniform background. As I mentioned in the previous chapter, we are creating certain abstraction which allows us to program much less and to receive the results much faster. Now we will move on to more complicated things.
void AddSymbolInfo(const string szArg, const bool bRestore = false)
        {
#define macro_Create(A, B, C)   {                                               \
                edit.Create(A, m_Infos.CorSymbol, m_Infos.CorBackGround, B);    \
                edit.PositionAxleX(A, def_MaxWidth * m_Infos.nSymbols);         \
                edit.PositionAxleY(A, C);                                       \
                edit.Size(A, def_MaxWidth - 1, 22);                             \
                                }

                C_Object_Edit edit;

                macro_Create(macro_ObjectName(def_CharSymbol, szArg), szArg, 10);
                macro_Create(macro_ObjectName(def_CharPrice, szArg), 0.0, 32);
                if (!bRestore)
                {
                        ArrayResize(m_Infos.Symbols, m_Infos.nSymbols + 1, 10);
                        m_Infos.Symbols[m_Infos.nSymbols].szCode = szArg;
                        m_Infos.nSymbols++;
                }
#undef macro_Create
        }
In this function I declare a macro that is only used here. Pay attention that before finishing I delete the macro because it is no used anywhere outside the function.
Here we create an object of type C_Object_Edit, temporarily position it and inform about the size it should have . All this is done within the macro. At these points we use the macro to make the code easy to read, since the whole process is practically the same. Of course, there is the issue with the values, but the function is the same and that is why we use a macro. Again, less typing, more production.
Now let's move on to an important detail. The same function is called when the user deletes the object that should not be deleted. In this case further lines will not be executed. But they are executed during normal creation, where we first allocate the memory, and then we put the name of the symbol in the allocated position and increment it for the next call. Then we can move on to the next call.
The next one in the code is the following interesting function:
inline void UpdateSymbolInfo(const int x, const string szArg)
{
        C_Object_Edit edit;
        string sz0 = macro_ObjectName(def_CharPrice, szArg);
        MqlRates Rate[1];

        CopyRates(szArg, PERIOD_M1, 0, 1, Rate);
        edit.PositionAxleX(macro_ObjectName(def_CharSymbol, szArg), x);
        edit.SetTextValue(sz0, Rate[0].close, m_Infos.CorPrice);
        edit.PositionAxleX(sz0, x);
}
Many people think that we need objects at global level but actually within MetaTrader 5 and when using MQL5. This is not quite so, since all created objects are available for manipulation as needed. To find out the name of the object, check the window with the list of all objects present on the symbol chart. Thus, we can use local access and manipulate the objects existing on the chart, provided that you know their names.
Then we create the name of the object to be able to manipulate it. To make it easier we will use a macro. After that there is another interesting thing. Normally we need to have the asset, which information we want to get, in the Market Watch window. But in our case, when we create a panel, having to open and keep hundreds of assets in Market Watch would make the user unmotivated to use it. To avoid this, we will use another method which, however, has its price. There is nothing free. The price is as follows: during each call of this function, we will copy the last bar to know what happened.
After that, we locate the required objects in the right position and inform the value to plot the object. But remember that with each call we will have a small delay in execution. We will improve this a little later in this article.
The next function is shown below:
bool LoadConfig(const string szFileConfig)
{
        int file;
        string sz0;
        bool ret;

        if ((file = FileOpen("Widget\\" + szFileConfig, FILE_CSV | FILE_READ | FILE_ANSI)) == INVALID_HANDLE)
        {
                PrintFormat("Configuration file %s not found.", szFileConfig);
                return false;
        }
        m_Infos.nSymbols = 0;
        ArrayResize(m_Infos.Symbols, 30, 30);
        for (int c0 = 1; (!FileIsEnding(file)) && (!_StopFlag); c0++)
        {
                if ((sz0 = FileReadString(file)) == "") continue;
                if (SymbolExist(sz0, ret)) AddSymbolInfo(sz0); else
                {
                        FileClose(file);
                        PrintFormat("Ativo na linha %d não foi reconhecido.", c0);
                        return false;
                }
        }
        FileClose(file);
        m_Infos.MaxPositionX = macro_MaxPosition;

        return !_StopFlag;
}
Here we will read a file containing all the assets that will be used in the panel. Note that no extension is required - I just specify the location where the file will be located. Thus, you can give any name to the file to have different files for different things.
But you should take care to use a file with correct data, otherwise you may have some problems. In the attachment, in addition to the full code of the system, I have added a file to demonstrate internal formatting. This file contains all the assets that are currently included in the Ibovespa Index (IBOV). Use this file as a basis to create all others. The same formatting is used in this system and will be used in all other updates and improvements.
If the file is found and it can be opened, we execute a call in order to allocate memory to store the data as it arrives. Then we start reading line by line, until the end of the file or until the user interrupts operation. If any of the lines is empty or does contains no information, make a new reading call. Here is another important moment: the asset will be added only if it exists; if it doesn't exist, an error will be returned indicating in which line it occurred. The error message will be shown in the Toolbox window. Further lines will not be read and an error will be returned. At the end we configure important information for our future so that later we do not have to execute unnecessary calculations.
~C_Widget()
{
        Terminal.Close();
        ObjectsDeleteAll(Terminal.Get_ID(), def_PrefixName);
        ArrayFree(m_Infos.Symbols);
}
This function is the class destructor. It is called automatically when the class is closed. If this happens, the entire system will be closed with it, while all the object created inside the class will be deleted and the allocated memory will be released.
In the following code, we have a class initialization system:
bool Initilize(const string szFileConfig, const string szNameShort, color corText, color corPrice, color corBack)
{
        IndicatorSetString(INDICATOR_SHORTNAME, szNameShort);
        Terminal.Init(ChartWindowFind());
        Terminal.Resize();
        m_Infos.CorBackGround = corBack;
        m_Infos.CorPrice = corPrice;
        m_Infos.CorSymbol = corText;
        CreateBackGround();

        return LoadConfig(szFileConfig);
}
There is not much to tell about, since I already explained every thing that is used here, except the following points. Here we define a short name for our indicator, this name is informed as a parameter, so be aware of this. Now, the code here is used to capture the index of the subwindow used by the indicator. This is important because of the objects - we need to know which subwindow is used otherwise we can put the objects in the wrong place.
And as the last function in this header file, we have the messaging system.
void DispatchMessage(const int id, const long &lparam, const double &dparam, const string &sparam)
{
        static int tx = 0;
        string szRet[];

        switch (id)
        {
                case (CHARTEVENT_CUSTOM + Ev_RollingTo):
                        tx = (int) (tx + lparam);
                        tx = (tx < -def_MaxWidth ? m_Infos.MaxPositionX : (tx > m_Infos.MaxPositionX ? -def_MaxWidth : tx));
                        for (int c0 = 0, px = tx; (c0 < m_Infos.nSymbols); c0++)
                        {
                                if (px < Terminal.GetWidth()) UpdateSymbolInfo(px, m_Infos.Symbols[c0].szCode);
                                px += def_MaxWidth;
                                px = (px > m_Infos.MaxPositionX ? -def_MaxWidth + (px - m_Infos.MaxPositionX) : px);
                        }
                        ChartRedraw();
                        break;
                case CHARTEVENT_CHART_CHANGE:
                        Terminal.Resize();
                        m_Infos.MaxPositionX = macro_MaxPosition;
                        ChartRedraw();
                        break;
                case CHARTEVENT_OBJECT_DELETE:
                        if (StringSubstr(sparam, 0, StringLen(def_PrefixName)) == def_PrefixName) if (StringSplit(sparam, '#', szRet) == 2)
                        {
                                AddSymbolInfo(szRet[1], true);
                                ChartRedraw();
                        }else if (sparam == def_NameObjBackGround)
                        {
                                ObjectsDeleteAll(Terminal.Get_ID(), def_PrefixName);
                                CreateBackGround();
                                for (int c0 = 0; c0 < m_Infos.nSymbols; c0++) AddSymbolInfo(m_Infos.Symbols[c0].szCode, true);
                                ChartRedraw();
                        }
                        break;
        }
}
Most of this code is quite simple: we have two events generated by the platform that are passed to the indicator for processing, but we also have an event type that for many makes no sense because it's a custom event. This type of event is quite common in certain project types, but here it serves more to centralize the processing of messages or events that may occur. Although many do not understand this, the MetaTrader 5 platform and the MQL5 language are event-oriented, which means that we do not work in a procedural way, but work with events and process them as they occur.
To understand how a custom event is generated, we have to see the indicator code. That is why, before explaining (while I believe that many of you may find difficulties understanding precisely this event), let's see the indicator code which will now have a different functional view that differs from what we have seen at the beginning of the article.
#property copyright "Daniel Jose"
#property description "Program for a panel of quotes."
#property description "It creates a band that displays asset prices."
#property description "For details on how to use it visit:\n"
#property description "https://www.mql5.com/ru/articles/10941"
#property link "https://www.mql5.com/ru/articles/10941"
#property indicator_separate_window
#property indicator_plots 0
#property indicator_height 45
//+------------------------------------------------------------------+
#include <Widget\Rolling Price\C_Widget.mqh>
//+------------------------------------------------------------------+
input string    user00 = "Config.cfg";  //Configuration file
input int       user01 = -1;            //Shift
input int       user02 = 60;            //Pause in milliseconds
input color     user03 = clrWhiteSmoke; //Asset color
input color     user04 = clrYellow;     //Price color
input color     user05 = clrBlack;      //Background color
//+------------------------------------------------------------------+
C_Widget Widget;
//+------------------------------------------------------------------+
int OnInit()
{
        if (!Widget.Initilize(user00, "Widget Price", user03, user04, user05))
                return INIT_FAILED;
        EventSetMillisecondTimer(user02);

        return INIT_SUCCEEDED;
}
//+------------------------------------------------------------------+
int OnCalculate(const int rates_total, const int prev_calculated, const int begin, const double &price[])
{
        return rates_total;
}
//+------------------------------------------------------------------+
void OnTimer()
{
        EventChartCustom(Terminal.Get_ID(), C_Widget::Ev_RollingTo, user01, 0.0, "");
}
//+------------------------------------------------------------------+
void OnChartEvent(const int id, const long &lparam, const double &dparam, const string &sparam)
{
        Widget.DispatchMessage(id, lparam, dparam, sparam);
}
//+------------------------------------------------------------------+
void OnDeinit(const int reason)
{
        EventKillTimer();
}
//+------------------------------------------------------------------+
This is something that is rarely used in indicator codes, which is the specification of the indicator window height. But this is not the point. Pay attention to the following details:
When the user defines the value of this parameter, we get data to use as a timer. It is quite true that if possible we should avoid using OnTime events in an indicator. But here, unfortunately, we have no other choice. We need this event. Now pay attention that when the MetaTrader 5 platform triggers the OnTime event, it generates the OnTime event call. Inside this function we have only one line which launches an asynchronous event which means that we don't know for sure when the code will be called. This is a custom event.
Note that the parameters inside the custom event are not the casual ones. They are located there for a very important reason: each of them indicates one thing, but in the end we will have as a result an OnChartEvent call, which will call the function inside the C_Widget class which will process the messages generated by the event.
Now pay attention to the following: When we use the EventChartCustom function, we set an event that will be used as the ID of the OnChartEvent function. This value will be identified in the message processing function. If the message processing function were called directly, the code would be asynchronous, i.e. we would set the rest of the coed in the waiting mode to wait for the return of the message processing function. But since we use the EventChartCustom call, the code will not be in the waiting mode. This avoids the blocking of other indicators with something the duration of which we don't know.
The fact that we implement the call via EventChartCustom has another advantage: this call can come from any point of the code. No matter where we call it from, ChartEvent will always trigger and will call OnChartEvent to ensure the required execution.
This approach will also be used in another article which concerns another but no less interesting topic. I will not talk about it now to keep an intrigue before the article is released.
I hope this part is clear: how the custom event is generated and why I use a custom event instead of directly calling the code that will move the panel. Now let's get back to the code which contains the handling of this custom panel moving event, remembering that there is a parameter specified by the user, which is very important for the movement..
void DispatchMessage(const int id, const long &lparam, const double &dparam, const string &sparam)
{
        static int tx = 0;
        string szRet[];

        switch (id)
        {
                case (CHARTEVENT_CUSTOM + Ev_RollingTo):
                        tx = (int) (tx + lparam);
                        tx = (tx < -def_MaxWidth ? m_Infos.MaxPositionX : (tx > m_Infos.MaxPositionX ? -def_MaxWidth : tx));
                        for (int c0 = 0, px = tx; (c0 < m_Infos.nSymbols); c0++)
                        {
                                if (px < Terminal.GetWidth()) UpdateSymbolInfo(px, m_Infos.Symbols[c0].szCode);
                                px += def_MaxWidth;
                                px = (px > m_Infos.MaxPositionX ? -def_MaxWidth + (px - m_Infos.MaxPositionX) : px);
                        }
                        ChartRedraw();
                        break;
The math involved in the code above may seem confusing, but what I am doing here is using the value provided by the user to move the objects at a certain distance. If the value is positive, move the object from left to right; if the value is negative, the object is moved from right to left; if zero - it will stay where it is. The idea is simple but where are the calculations that cannot be seen? That is why I said that the above code seems confusing. The calculations are performed in these two lines.
You may not fully understand how it is possible, how such a simple calculation does this thing. But if you are attentive enough, you can see that we use limits. When the upper limit is reached, the position is recalculated to the limit immediately connected to it. We close the loop so that when the value is to reach a certain point, it will be adjusted to start at the opposite limit point. To better understand, it would be as if you count from 0 to 99 and could not count beyond these values, what will happen if you try to add 1 to 99? According to the logic we would get 100.
But not in this case. In our case we would get back to 0. If you try to add 3 to 98, you wouldn't get more than 99 - you would get 1. It seems strange but this is how it works. The same applies when we subtract 3 from 2 - we get 99.... Sounds crazy 😵 😵 😵... but it's the basics of the computer's counting system. If you study it, you will see that the computer does not calculates up to infinite numbers. There is a certain limit to the maximum obtained value which applies to another area which is encryption, but this is another story.
Let's get back to the code. You should try to understand what we have just discussed because when we come to the FOR loop, things will get even stranger.
We do the following inside the FOR loop: we don't know where and at how much we should end since the above calculations do not tell us where on the screen something should be displayed. To do this, we need to create a window or rather we will use the limits of the chart window to know what should or should not be displayed.
This part will be very confusing if you do not understand the concept discussed above. The only two information pieces we have is: how many elements we should show and which value is currently being used. Based on this information we should do all the rest. So, let's go from element to element always starting from the zero element, and as we progress, we will add the width of each element to the starting position. At one point we will exceed the limit, either in the upper band or in the lower band. Once exceeded, the value we are using to indicate where the current element would be plotted, should be adjusted accordingly. Once this happens, we will have the deviation of the position so that the information will magically disappear on one side of the screen and will start appearing on the other one.
The cycle repeats until the indicator is closed. So all the information will appear on the screen, no matter how much information we have.
This is much simpler to do and to plan with a pure text. But although the technique is quite similar, usually most people use code that uses a matrix, in which the elements move inside it and each of the cells already has a well-defined position for display. But this would not produce the desired result in our case that is why I had to use a different method where we use a purely mathematical approach to generate smooth and correct movement.
Another detail is that we should avoid using values greater than -1 or 1, because the movement will be half pulsating and it will give a strange impression.
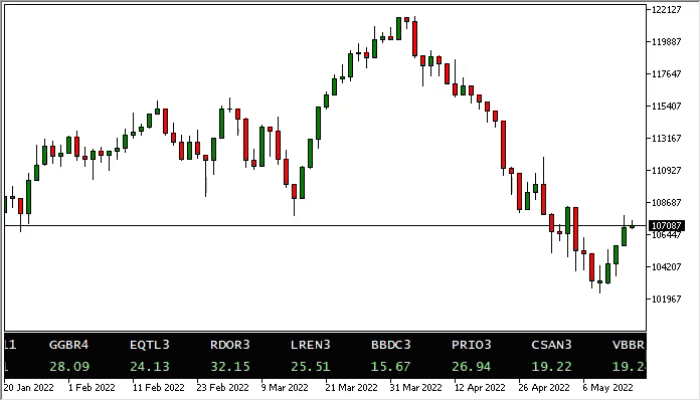
In the video below, you can see the system in action with data from the IBOV (Ibovespa Index) assets. This is only a demonstration of how the system works...
Conclusion
Although this system looks fully finished, there is still room for improvement. In the next article I will show you how to make these improvements in the system. Stay tuned because there are updates to come. The attachment includes the entire code of this article. Use it as you wish.
Translated from Portuguese by MetaQuotes Ltd.
Original article: https://www.mql5.com/pt/articles/10941
Warning: All rights to these materials are reserved by MetaQuotes Ltd. Copying or reprinting of these materials in whole or in part is prohibited.
This article was written by a user of the site and reflects their personal views. MetaQuotes Ltd is not responsible for the accuracy of the information presented, nor for any consequences resulting from the use of the solutions, strategies or recommendations described.

- Free trading apps
- Over 8,000 signals for copying
- Economic news for exploring financial markets
You agree to website policy and terms of use
Congratulations Daniel.
Another great article with a professional level of programming.
It will be very well utilised by the MQL5 community.
Congratulations Daniel!!!!! I am learning a lot from all your posts!!!
Just one question... does it work for currency pairs in Forex, if so, how to make it use only specific pairs and or assets and not everything !!!
Congratulations Daniel!!!!! I'm learning a lot from all your posts!!!
Just one question... does it work for currency pairs on Forex, if so, how do you make it use only specific pairs and or assets and not everything!!!
Yes, it is possible. Although this article was published recently, it's quite old. Since then I've changed the way I write articles and the focus of each one. If you follow along, you'll notice this over time. But let's get to your question:
You may have noticed that the system uses an external file. This was mentioned during the explanation of the article:
Here we will read the file, which contains all the assets to be used in the sign,note that I am not forcing any kind of extension, just a location for the file to be found, this way you will be free to give any name to the file, thus being able to have different files for different things.
You should be careful to point to a file containing correct data, otherwise you may experience some problems, but in the annex where the complete system code will also be, I will place a file to demonstrate a form of internal formatting, in this file you will be able to find all the assets currently present in the Ibovespa Index ( IBOV ), use this file as a basis for creating all the others, because when improvements are implemented in this system, I will use the same formatting as in the file in the annex.
In this file, on each of the lines you put the name of the asset, and the name must be the same as the one you will see in the market observation window. Save the file and the rest is up to Letreiro. You don't need to change anything in the code, absolutely NOTHING. Just edit the file indicated in the article and be happy.
There is one limitation, regardless of what you do: You cannot watch currency pairs and the stock market at the same time in the same MetaTrader 5 execution instance. The reason is that there is a separation between these two types of market. But apart from that, you won't have any problems.😁👍
That is very nice!
Thanks for the article.