YFX Advanced EMA
- Indicateurs
- Richard Yancy
- Version: 6.0
- Mise à jour: 12 juin 2020
- Activations: 5
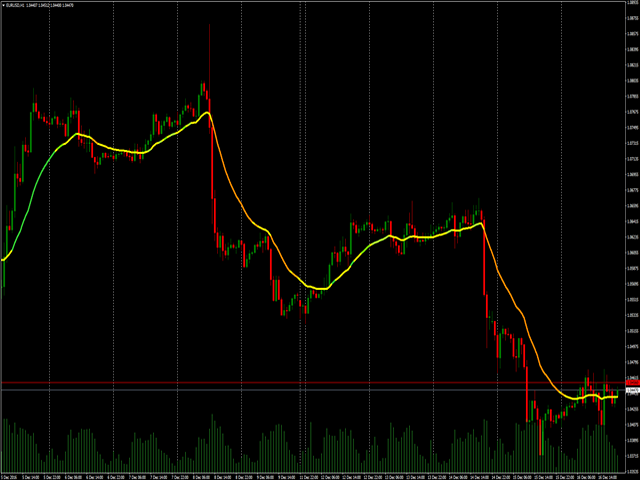
The Advanced EMA indicator implements an exponential moving average with many additional features. First, EMA is color-coded to indicate distance between the price and EMA. This Advanced EMA has many features and configurations that set it far above standard EMA indicators used most platforms.
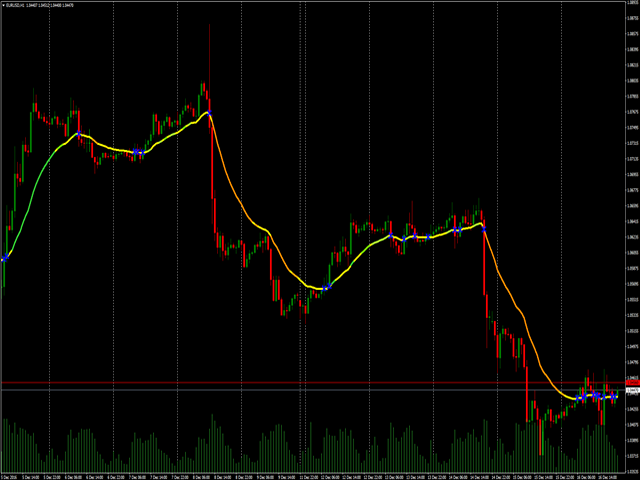
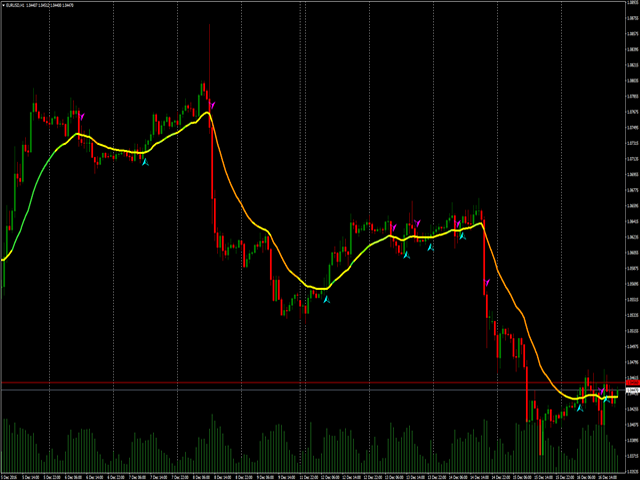
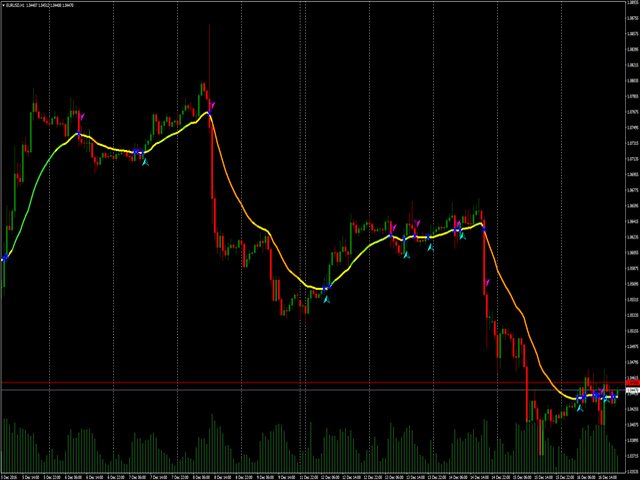
There are 3 types of indications in the indicator. The EMA is color-coded. Secondly, cross points of price and EMA are marked. Thirdly, BUY/SELL signals are shown. Color-coding the EMA allows you to easily determine the distance between price and EMA. This marks the significance of the current price action. Levels of significance are measured by level:
- Weak
- Medium
- Strong
Each level is measured on the up or down side. The second indication is the marking of cross points between price and EMA. The third indication is to indicate a change in price direction.
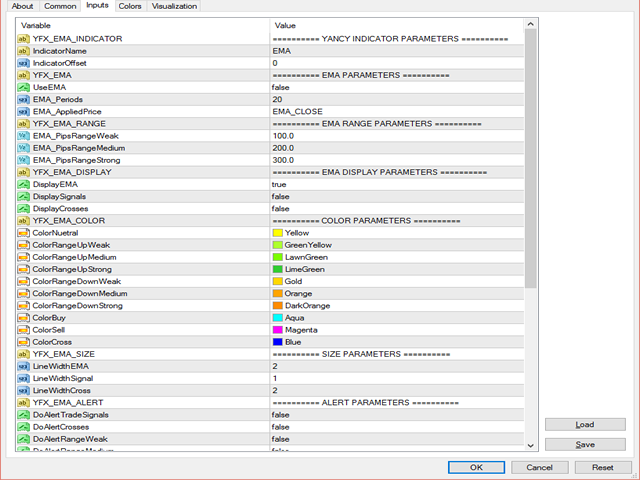
Parameters
Yancy Indicator Parameters
- Indicator Name – Indicator name that is displayed in the chart data window
- Indicator Offset – Change offset to force calculations to be made based on previous bars
- Only Load Visible Data – If true, then indicator will only perform calculations for data visible on the chart
EMA Parameters
- Enable EMA Module – Other YFX indicators can use data in the Advanced EMA indicator
- EMA Periods – The default number of periods to use when calculating the EMA
- EMA Price Series – Choose which price to use for EMA calculations
EMA Range Parameters
- Weak Range Points – Smallest measurable distance between the price and EMA is called a Weak Range. Distance is specified in number of points. The value can be changed but should be lower than the medium and strong ranges
- Medium Range Points – Next measurable distance level above Weak Range is the Medium Range. Value should be greater than the Weak Range value but lower than the Strong Range value
- Strong Range Points – Largest measurable distance between the price and EMA is called a Strong Range. Value should be greater than both Weak and Medium Range values
EMA Display Parameters
- Display EMA Line – The actual display of the EMA can be configured. Changing the value to ‘false’ will disable the EMA display
- Display Trade Signals – Setting the value to ‘true’ will cause signals to be displayed
- Display Cross Markers – Setting the parameter to ‘true’ will cause the markers to be shown
Color Parameters
- Neutral Color – EMA is displayed in this color
- Up Weak Range Color– Display Weak Range in this color for uptrend EMA
- Up Medium Range Color– Display Medium Range in this color for uptrend EMA
- Up Strong Range Color– Display Strong Range in this color for uptrend EMA
- Down Weak Range Color– Display Weak Range in this color for downtrend EMA
- Down Medium Range Color– Display Medium Range in this color for downtrend EMA
- Down Strong Range Color– Display Strong Range in this color for downtrend EMA
- BUY Trade Signal Color – Display BUY signals in this color
- SELL Trade Signal Color – Display SELL signals in this color
- Cross Marker Color – Display crosses in this color
Size Parameters
- EMA Line Width – Primary EMA line width
- Trade Signal Marker Width – Signals line width
- Cross Marker Width – Cross mark line width
Alert Parameters
- Alert Trade Signals – Alerts can be generated for new BUY/SELL signals
- Alert Crosses – Alerts can be generated when the price crosses the EMA
- Alert Weak Range – Alerts can be generated when the indicator enters the Weak Range
- Alert Medium Range – Alerts can generated when the indicator enters the Medium Range
- Alert Strong Range – Alerts can generated when the indicator enters the Strong Range
Message Parameters
- Show Comments – Messages can be displayed in comment section
- Show Alerts – Messages can be displayed in Alert popup window
- Send Email – Messages can be emailed to users
- Send Push Notifications – Messages can be pushed to user’s mobile phone application
- Print to Journal – Messages can be written to terminal’s journal
- Print to Output File – Messages can be written to external file
- Name of Output File – File name of message file
Quiet Time Parameters
- Enable Quiet Time – Quiet time process can be enabled or disable.
- Quiet Time Start (local time zone) – Start time of quiet period
- Quiet Time End (local time zone) – End time of period
- Enable Debugging Mode – Debugging can be enabled
- Level of Debug Information to Log – The amount of debugging information
- Use Date Names for Log Files – Code the debug file name with th date

