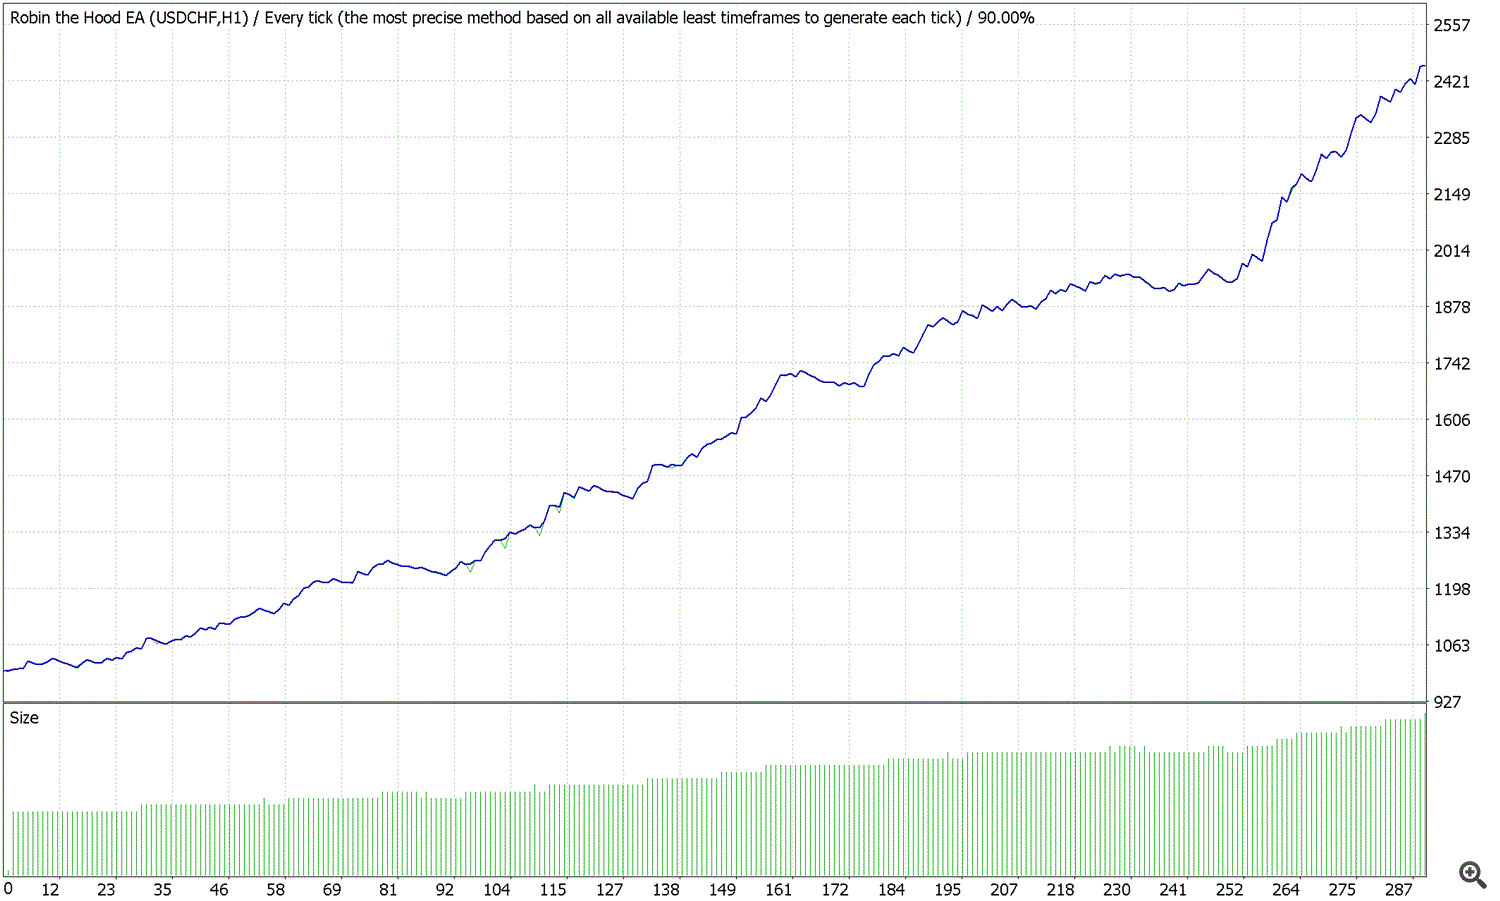
Friends, in this blog we will demonstrate testing the robot on different currency pairs and different timeframes. If you are interested in how a robot trades, check out this post.
At the very beginning, we will demonstrate testing the robot on the GBPUSD base currency pair. This is the main currency pair we recommend to trade.
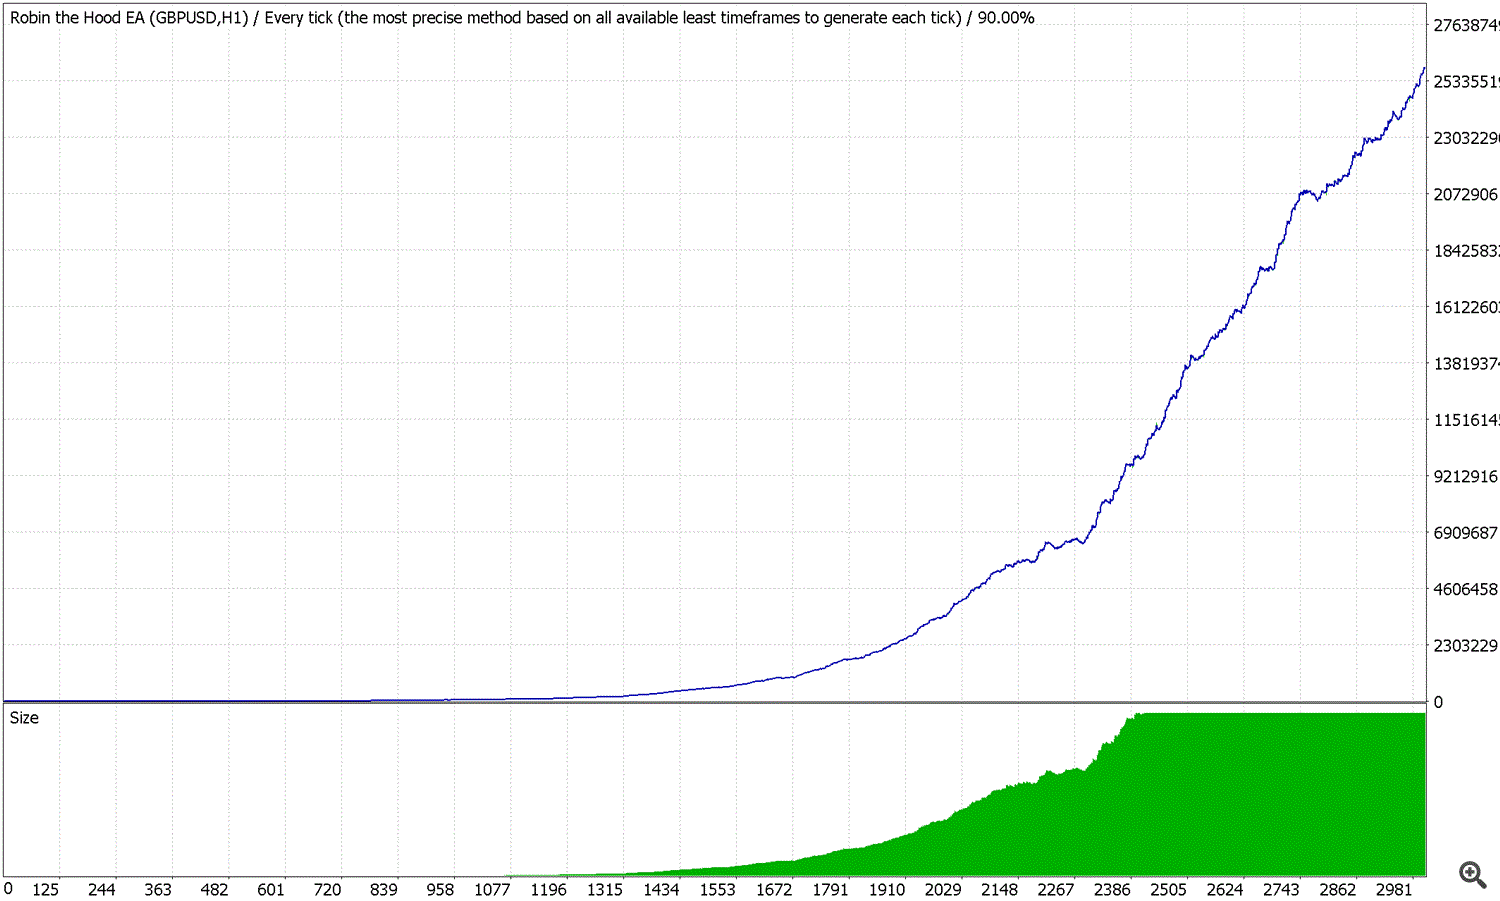
This is the test result for 3 years on the GBPUSD currency pair, H1 timeframe. The initial testing deposit is $ 1000. Now let's take a look at the video of how the testing was carried out and what trades the robot opened:
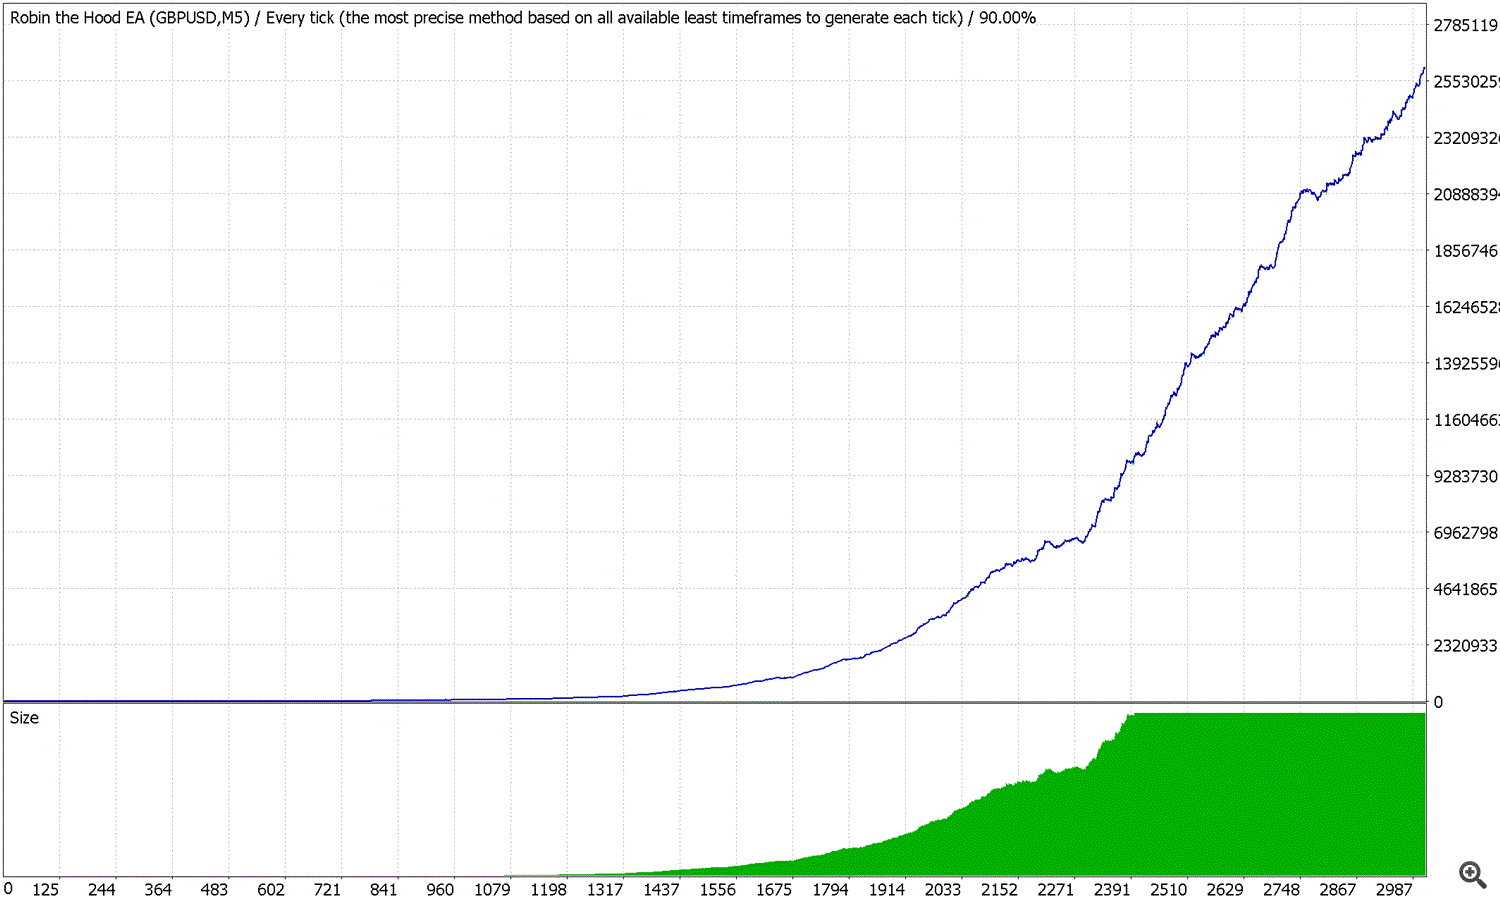
Now let's test the robot on the same GBPUSD currency pair, but take the M5 timeframe. Let's see the result.
As you can see from the screenshots above, the test results are almost the same, but on the M5 timeframe, the robot opened more deals and got a slightly better result. Therefore, we can conclude that it does not matter for the robot on which timeframe to trade.
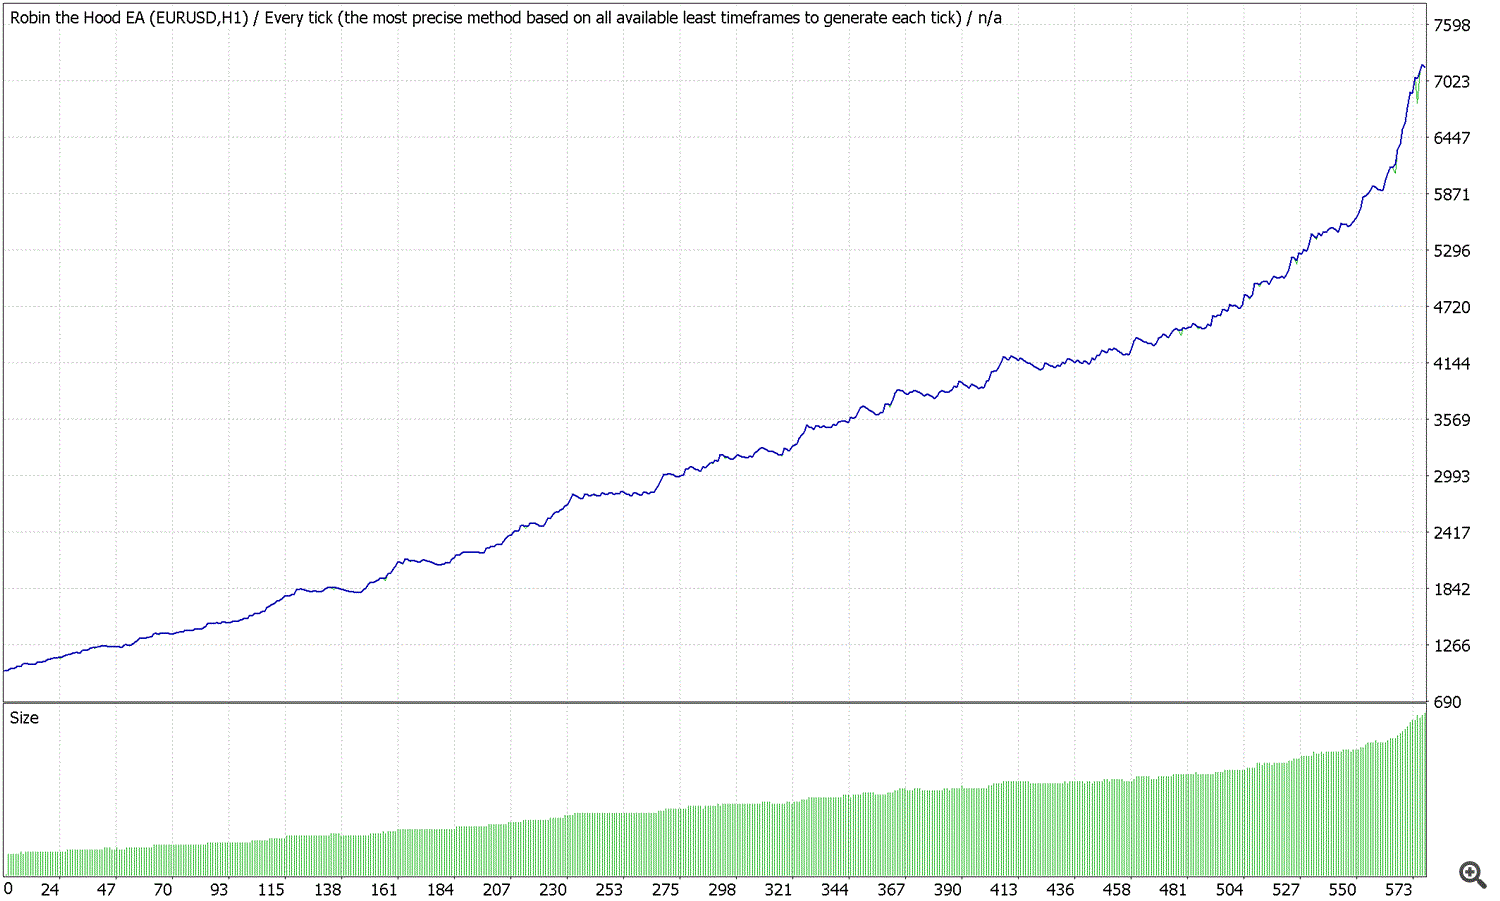
Now let's test the robot on EURUSD H1. This is another major currency pair and it is interesting how the robot will trade on it.
Now let's see the testing process on video:
As you can see in the video, we did not load all the quotes into the terminal for the EURUSD pair, but the robot still showed good results. They are worse than on GBPUSD, but still worthy.
Now let's test the robot on USDJPY and see how much the results differ from EURUSD.
As you can see, the robot opens few deals on this currency pair. Let's watch this video:
These are the results we got for USDCHF.
