Trade Assistant B90
- Утилиты
- Mohammadbagher Ramezan Akbari
- Версия: 24.2
- Обновлено: 24 января 2024
- Активации: 10
Trade Assistant B90 is designed for manual trading so that it helps us to manage capital and position well.
This expert has the ability to change the default inputs of the expert as desired before use.
You can see the expert entries in the photo below, each of which we explain below.
1. Background Color : With this entry, you can change the assistant's background
Color
2. Font size: You can change the size of the fonts used in the assistant.
3. Button color: Change the color of assistant buttons.
4. Button color: Change the text color of assistant buttons.
5. Line color: Change the color of the lines.
6. Text color: Changing the color of the texts that will appear on the chart.
7. Text font size: Changing the font of the texts that will appear on the chart.
8. Stop loss color: Changing the color of the square that appears on the chart to determine the loss limit.
9. Take profit color: Changing the color of the square that appears on the chart to determine the profit limit.
10. SL (pip): set default stop loss based on the currency pair and time frame you are trading.
11. TP (pip): Set default profit limit based on the currency pair and time frame you are trading.
12. Risk free (pip): By clicking on the Risk free button, the loss limit will be a few pips higher than the profit entry point (By default, we have considered 2 pips). For example, by clicking on the risk-free button, the loss limit will be moved 2 pips into profit, and by clicking the risk-free button again, 2 pips more than the loss limit will be moved into profit.
13. One Click Trading: If you set this input to false, a message will appear on the graph before you click on a button from the assistant, asking you if you are sure you want to do this, and by clicking yes or no, you will respond to the desired action. But if you want it to run without asking when you click on the buttons, you can set this entry to true.
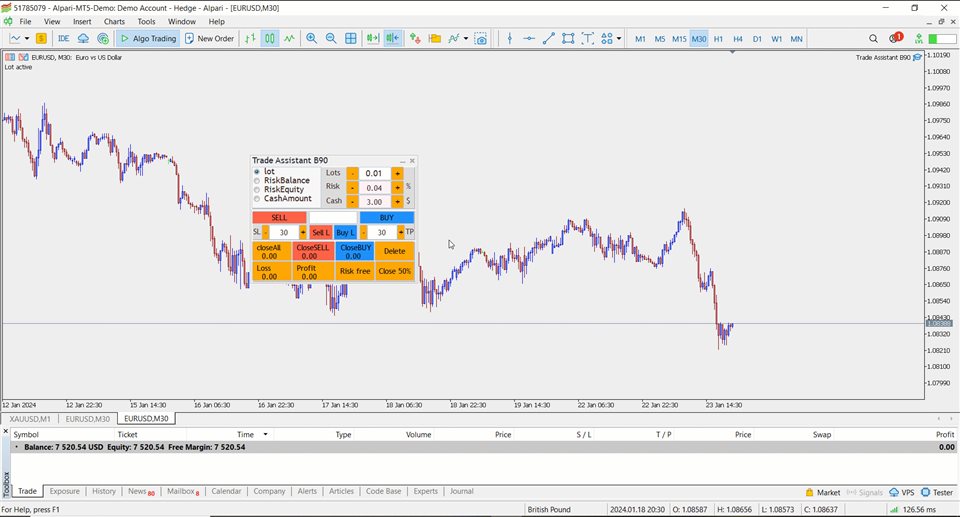
After the changes you made on the inputs, the appearance will be adjusted to your taste. For example, as shown below.
In the following, we explaining each of the components of the assistant.
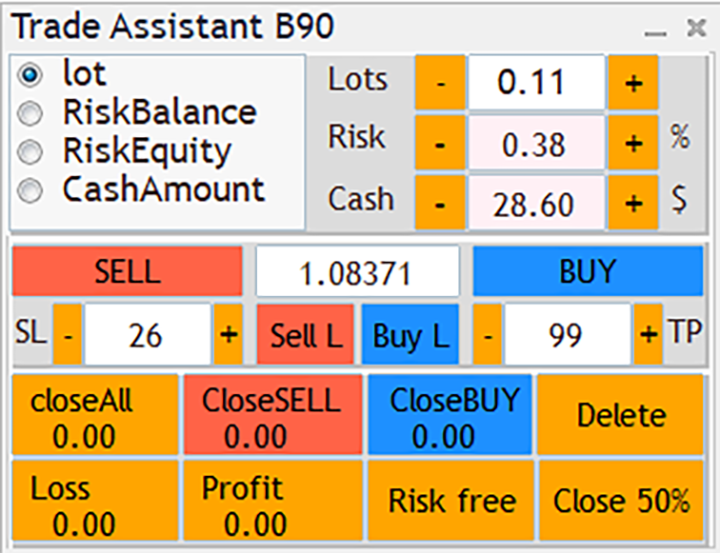
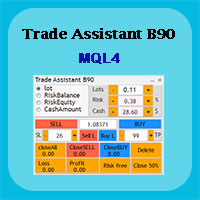
We can determine the volume of transactions with this assistant in3 ways.
• Volume based on lot
• Risk percentage: For the risk percentage, we can consider the account balance or account equity as the basis. When you choose one of these methods, you must have a loss limit. Because for risk percentage calculations, the loss limit distance has a great impact on determining the volume of transactions. The smaller the loss limit is, the larger the trading volume is, and the further the loss limit is from the entry point, the smaller it is.
• Cash: You can also determine the volume of transactions based on the amount. For example, in this method, you can determine the amount of 100 dollars for your loss limit. Then determine the distance of the stop loss from the entry point.
In this method, the distance between the loss limit and the entry point is important, and the shorter the distance, the higher the transaction volume. And the further it is, the volume of the transaction decreases, but the minimum amount is the same as you set
In this example $100
It is recommended that if you want to use methods 2 and 3 to determine the volume of transactions, you must determine the limit using the lines that appear on the chart with this assistant. For this, you can use the line S and line B buttons.
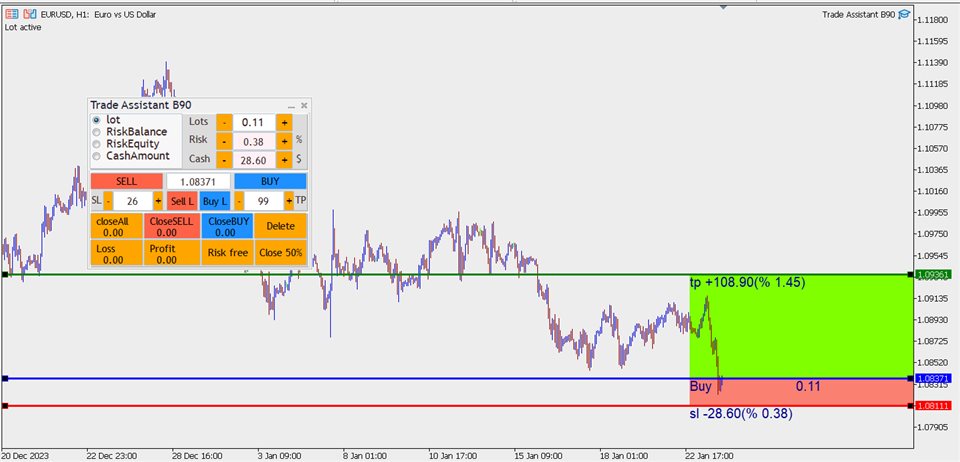
Line B: When you click on this button, lines will appear on the chart, which by default specify the entry price as Ask and the profit limit and loss limit based on the profit and loss limit that you set from the expert or assistant entry. Then you can change the profit and loss limits by moving the lines and see the percentage of profit and loss as well as its amount before entering the position.
Line S: This button works like the line B button with the difference that it considers the Bid as the entry price and prepares the profit and loss limit for selling positions by default. But you can provide a buy position by moving the loss limit lower.
SELL: With this button, you can enter the sell position and set the default profit and loss limit. But before pressing this button, it is recommended to see the position of profit and loss limit and the percentage of profit and loss on the chart first, then enter the position knowing this.
You can also enter a buy position with this button, and all the tips we said for the SeIl button apply to it.
In addition to buying and selling, you can also take pending positions, and based on the position of the lines on the chart, the text of the Sell and Buy button changes to Buy Limit, Buy Stop, Sell Limit, and Sell Stop, and you can place an order by clicking on it.
We have determined 8 buttons to manage positions, which we will explain each one below.
Close All: This button shows the amount of profit and loss of all buy and sell positions on the currency pair on which the expert is executed. By clicking on this button, all the positions of the desired currency pair will be closed.
Profit: This button shows the amount of positions that are in profit. By clicking on this button, all positions will be closed in profit.
Loss: This button shows the amount of positions that are in loss. By clicking on this button, all losing positions will be closed.
Delete: If you have a pending position on the currency pair on which the expert has been executed, by clicking on this button, all of them will be deleted from the chart.
Close BUY: This button shows the amount of profit and loss of purchase positions of the desired currency pair. By clicking on this button, all purchase positions will be closed.
Close SELL: This button shows the amount of profit and loss of selling positions of the desired currency pair. By clicking on this button, all sales positions will be closed.
Risk free: If your positions are in profit, by clicking on this button, the loss limit will be on the entry point (Of course, several more pips in profit). You have already determined this amount from the expert inputs. By default, we put 2 pips and by clicking on this button, the loss limit will be 2 pips in profit. Then, if you press this button again, if it is in profit, the loss limit will be moved to profit by another 2 pips.
Close 50%: This button is designed to save profit. So it will only work when your positions are in profit. By clicking on this button, 50% of the position volume will be closed. By pressing the button again, another 50% of the volume of positions in profit will be closed. Note that if the size of the position is reduced to a minimum, for example, 0.01, this button will no longer work.
