Breaker Block and Void Indicator MT4
- Indicadores
- Eda Kaya
- Versión: 1.11
- Activaciones: 10
Breaker Block and Void Indicator MT4
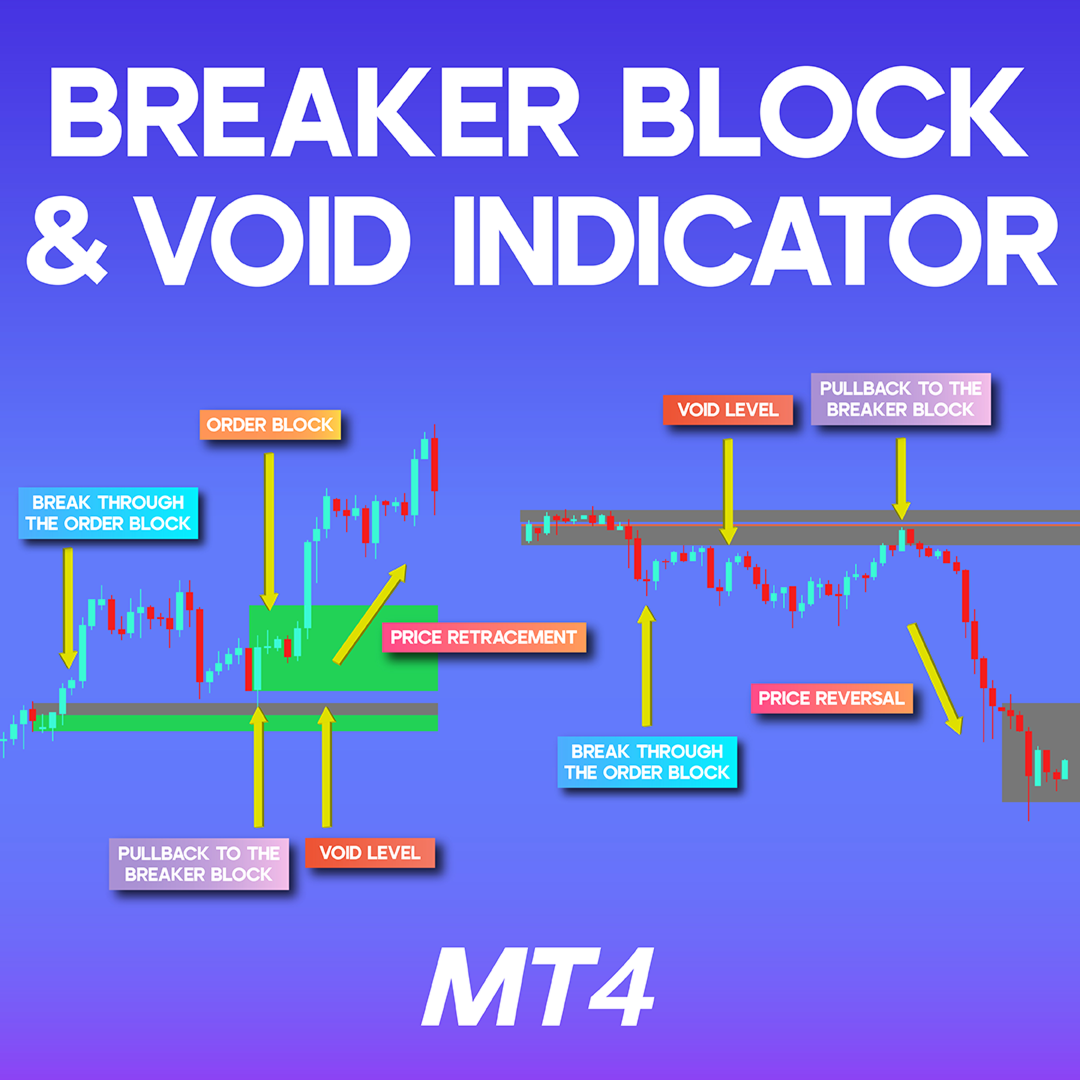
The Breaker Block + Void Indicator is a valuable tool in MetaTrader 4, designed to pinpoint crucial price levels. A breaker block refers to a specific type of Order Block that initially gets breached by price action, later turning into a significant pullback zone.
This indicator visually represents bullish breaker blocks in green and bearish breaker blocks in red, while those that have already been consumed are marked in gray for clarity.
«Indicator Installation & User Guide»
MT4 Indicator Installation | Breaker Block and Void Indicator MT5 | ALL Products By TradingFinderLab | Best MT4 Indicator: Refined Order Block Indicator for MT4 | Best MT4 Utility: Trade Assistant Expert TF MT4 | TP & SL Tool: Risk Reward Ratio Calculator RRR MT4 | Money Management: Easy Trade Manager MT4
Indicator Specifications Table
Below is an overview of the key specifications of the Breaker Block + Void Indicator:
| Category | ICT - Smart Money - Price Action |
| Platform | MetaTrader 4 |
| Skill Level | Beginner |
| Indicator Type | Continuation - Reversal |
| Time Frame | Multi Time Frame |
| Trading Style | Intraday Trading |
| Market | Forex - Crypto - Stocks - Commodities |
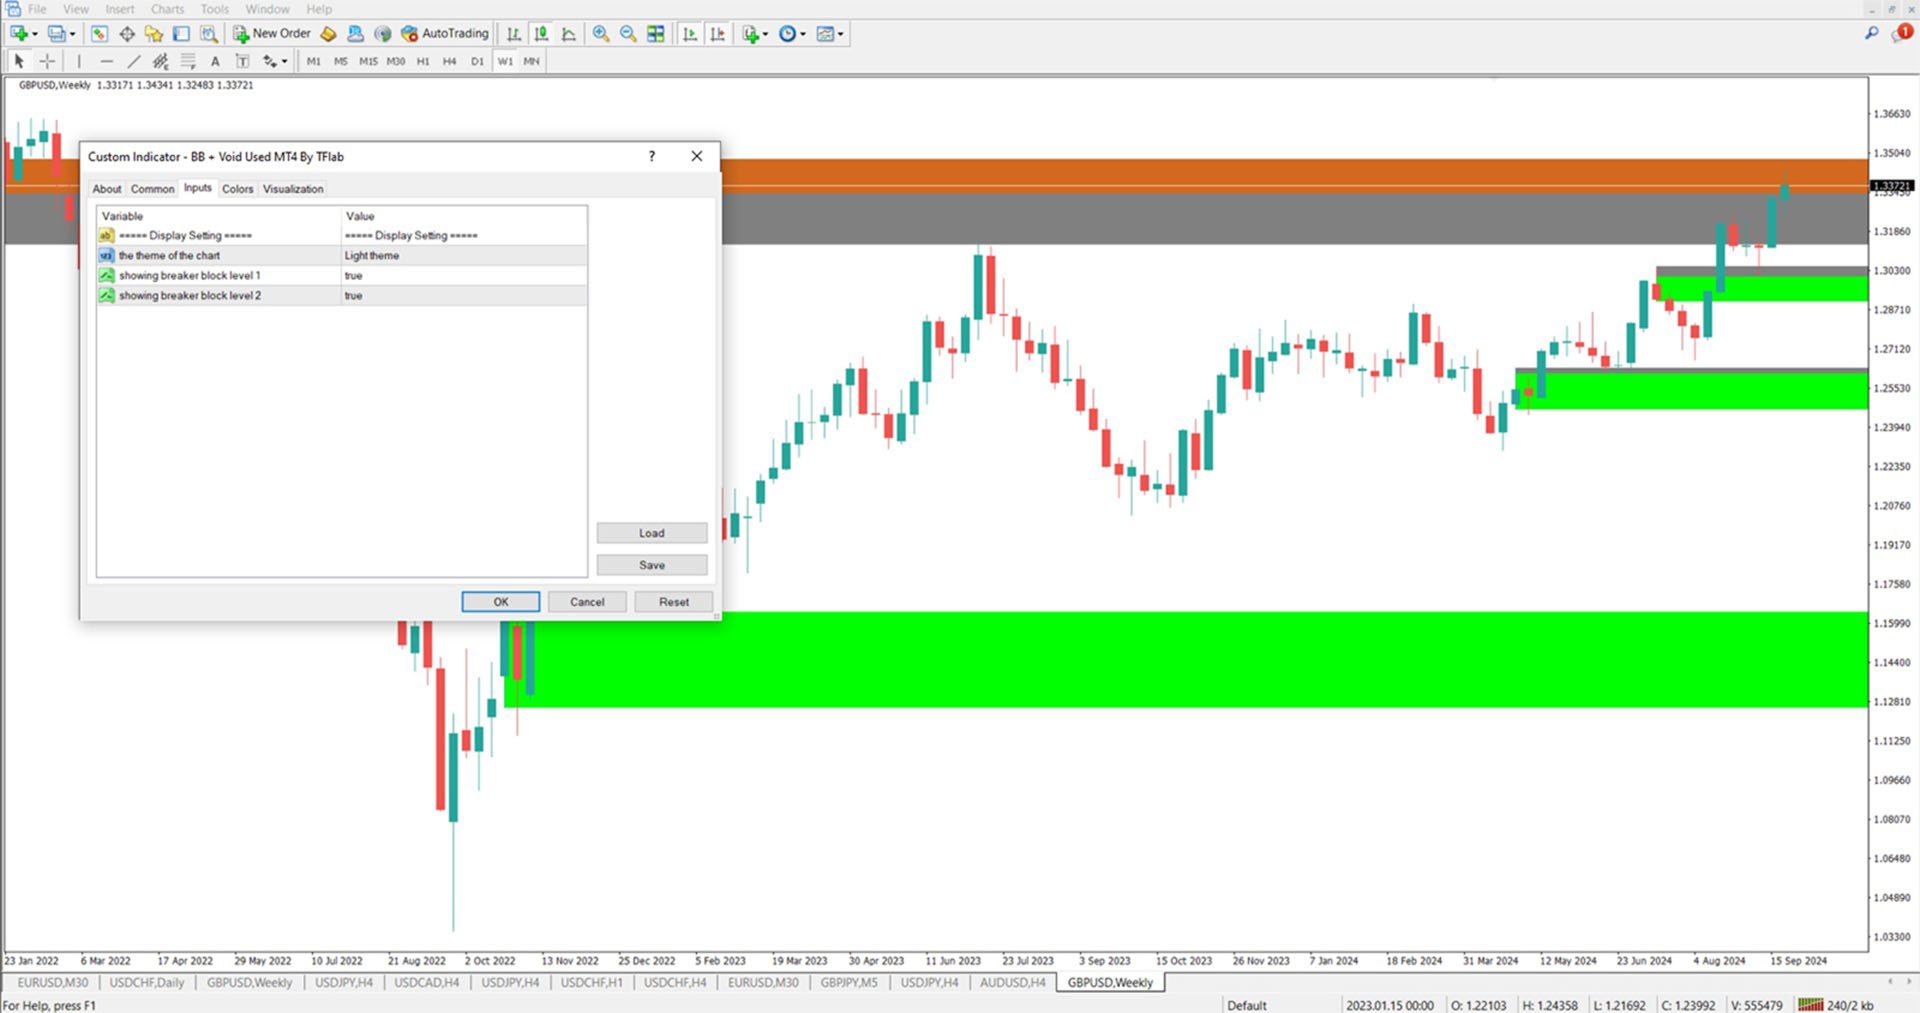
Breaker Block + Void Indicator in an Uptrend
The following image illustrates the GBP/USD price chart on a daily time frame. Initially, the price establishes an order block, followed by a slight price retracement. After the pullback, the price resumes its upward trend, converting the zone into a breaker block. Consequently, the price experiences an increase after revisiting the zone.
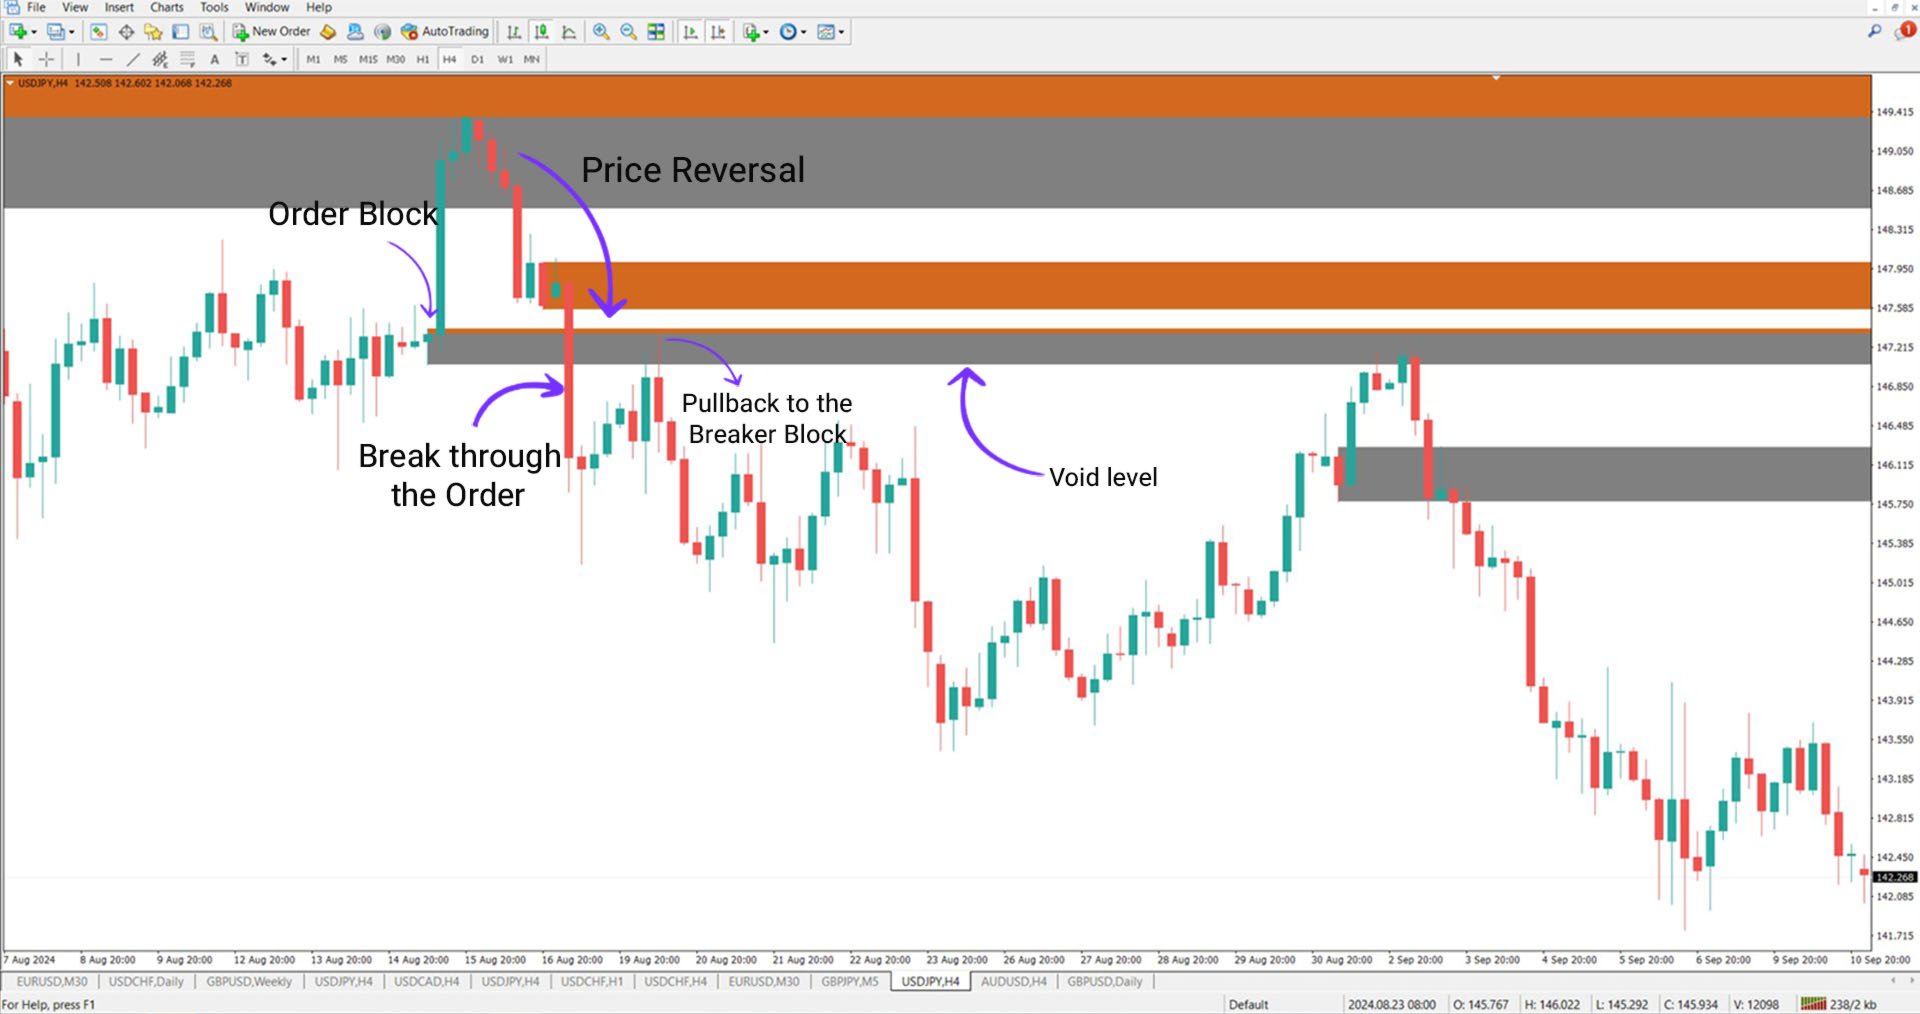
Breaker Block + Void Indicator in a Downtrend
In the next image, the USD/JPY price chart is depicted on a 4-hour time frame. The price initially forms an order block, then rises before encountering a correction that transforms the order block into a breaker block. After a pullback to this area, the price resumes its downward movement, continuing the corrective trend.
Indicator Settings
- Bar count – Defines the number of candles for calculation
- Hide intersection – Hides overlapping areas
- Showing breaker block level 1 – Displays the first breaker block level
- Last show for breaker block level 1 – Controls the final appearance of level 1
- Last number show for breaker block level 1 – Defines display mode for level 1
- Show mode for breaker block level 1 – Sets the appearance mode for level 1
- Used show mode for breaker block level 1 – Assigns display settings for level 2
- Showing breaker block level 2 – Activates the second breaker block level
- Last show for breaker block level 2 – Determines the final display of level 2
- Last number show for breaker block level 2 – Adjusts the last number shown for level 2
- Show mode for breaker block level 2 – Configures the display settings for level 2
- Used show mode for breaker block level 2 – Defines the mode for level 2
- Opposite color – Changes color for opposing zones
- Support zone – Specifies support zone color
- Resistance zone – Specifies resistance zone color
Conclusion
The Breaker Block + Void Indicator helps traders identify critical areas where price action breaks through an order block and later retouches the same level, turning it into support or resistance. Traders employing ICT, Smart Money, and Price Action strategies frequently use this tool to refine their stop-loss placements, ensuring positions are protected beyond these crucial levels.