Job finished
Specification
Outside Daily Bar EA
UPDTATE - BETTER EXPLINATION
2nd Post
Rules buy setup
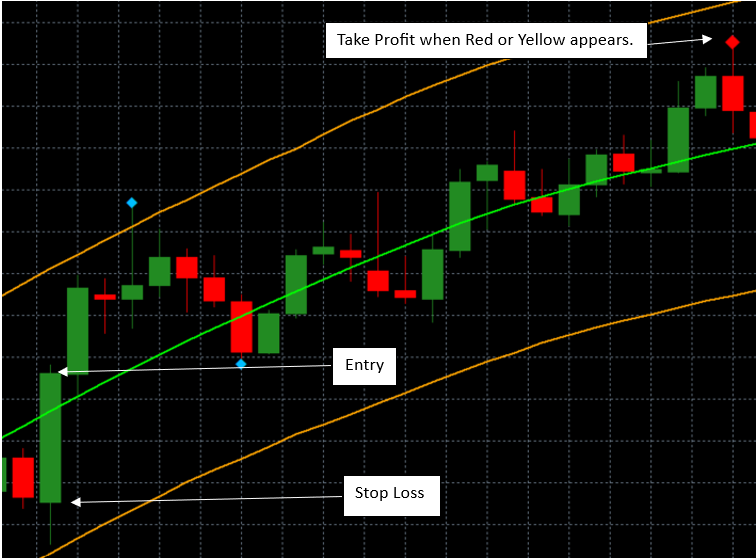
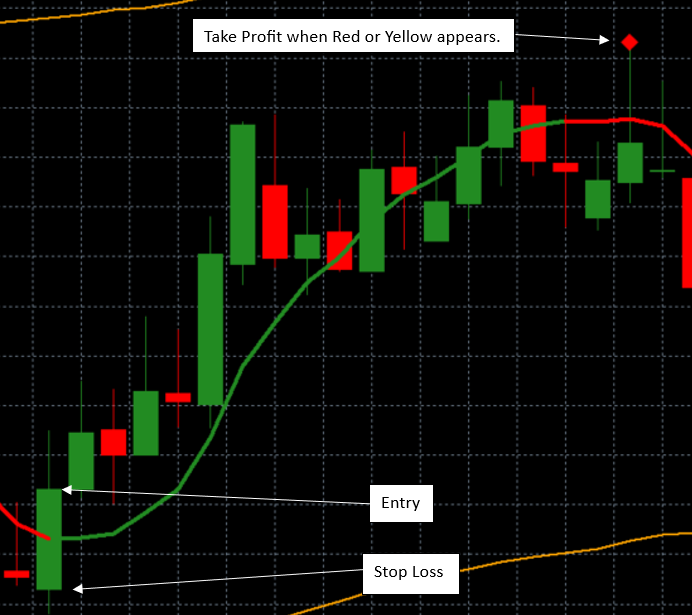
Entry: Buy at the close of the candle if price forms a bullish outsidebar candle
Stop: Low of the lower wick of the outsidebar candle – spread (if low of the wick is 1.5022 and spread is 2 pips, it makes the stop 1.5020.)
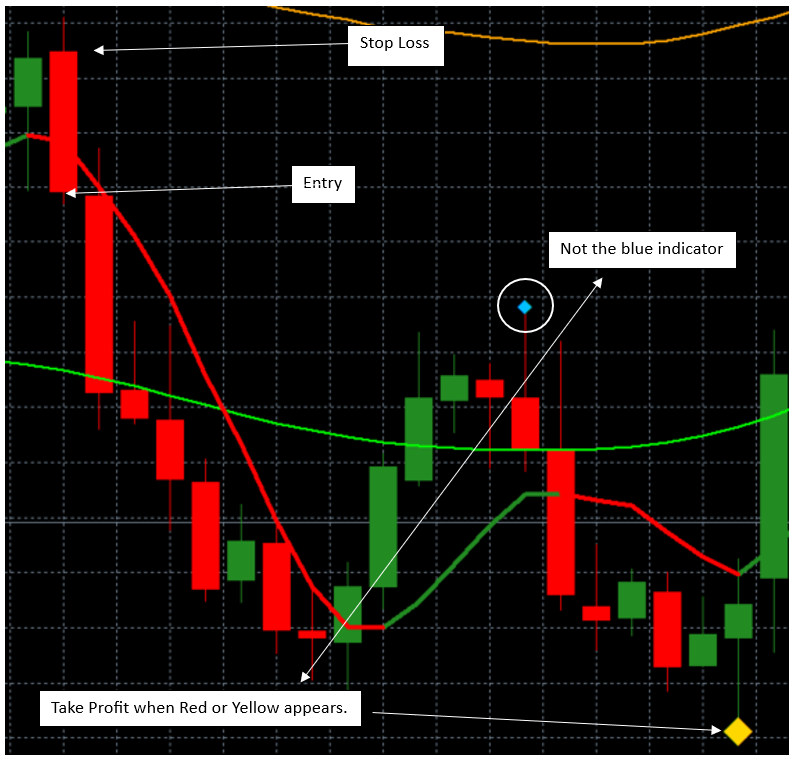
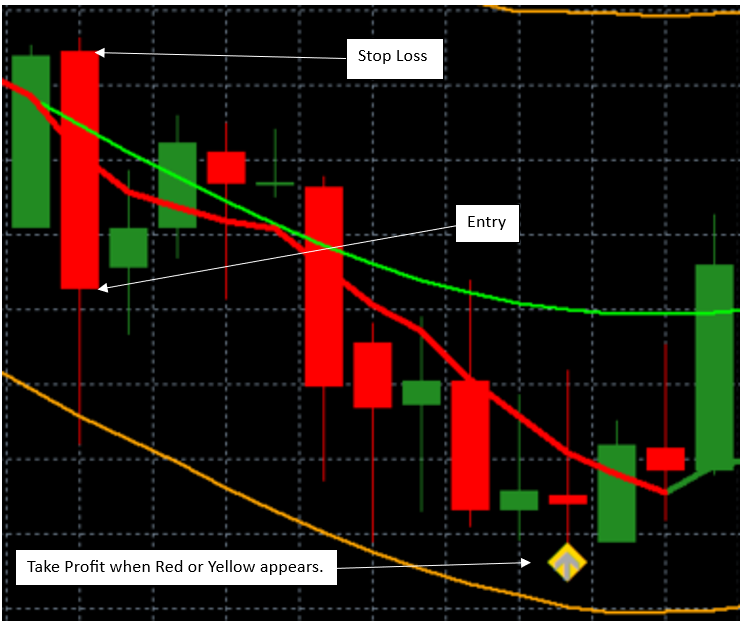
Take profit: When the indicator gives a red or yellow signal.
Bullish outsidebar explanation:
The outsidebar is a candle with a low lower than the previous candle’s low. The outsidebar is a candle where the body close above the previous candle’s high.
Rules sell setup:
Entry: Sell at the close of the candle if price forms a bearish outsidebar candle
Stop: High of the higher wick of the outsidebar candle – spread (if high of the wick is 1.5022 and spread is 2 pips, it makes the stop 1.5024.)
Take profit: When the indicator gives a red or yellow signal.
Bearish outsidebar explanation:
The outsidebar is a candle with a high higher than the previous candle’s high. The outsidebar is a candle where the body close below the previous candle’s low.
General rules:
The EA should take every outsidebar setup. So, if there is already a position open, it should also take the next one.
Risk = x% of the balance.
Indicator is supplied.
See next page for examples.
The pictures with example show a stoploss arrow not exactly to the high or low of the outsidebar. Keep that in mind. The stop is based on the rules mentioned above.
____________________________________________________________________________________________________________________________________________________________________
First Post
· Trigger when the outside bar completely engulfs the previous day’s bar including the wick. Direction for a buy or sell will be determined with the colour of the bar, green would be a buy, red for a sell position.
· Bullish
Takes out the previous day’s low with the wick.
Closes with the body above the previous day’s high (including wick).
· Bareish
Takes out the previous day’s high with the wick.
Closes with the body below the previous day’s low (including wick).
· A pre-determined lot size to be applied, e.g., 0.005/1.00/2.00 etc.
· Stop is placed at the opposite end of the bar from the direction. Bottom side for a buy, top side for a sell.
· TP when a red or yellow ZZ indicator appears, not the blue. (Indicator's supplied)
I am aware it re-paints on the examples, yellow or red when it first appears.
· Multiple positions can be opened if the outside bar pattern appears.