Discussing the article: "News Trading Made Easy (Part 2): Risk Management"
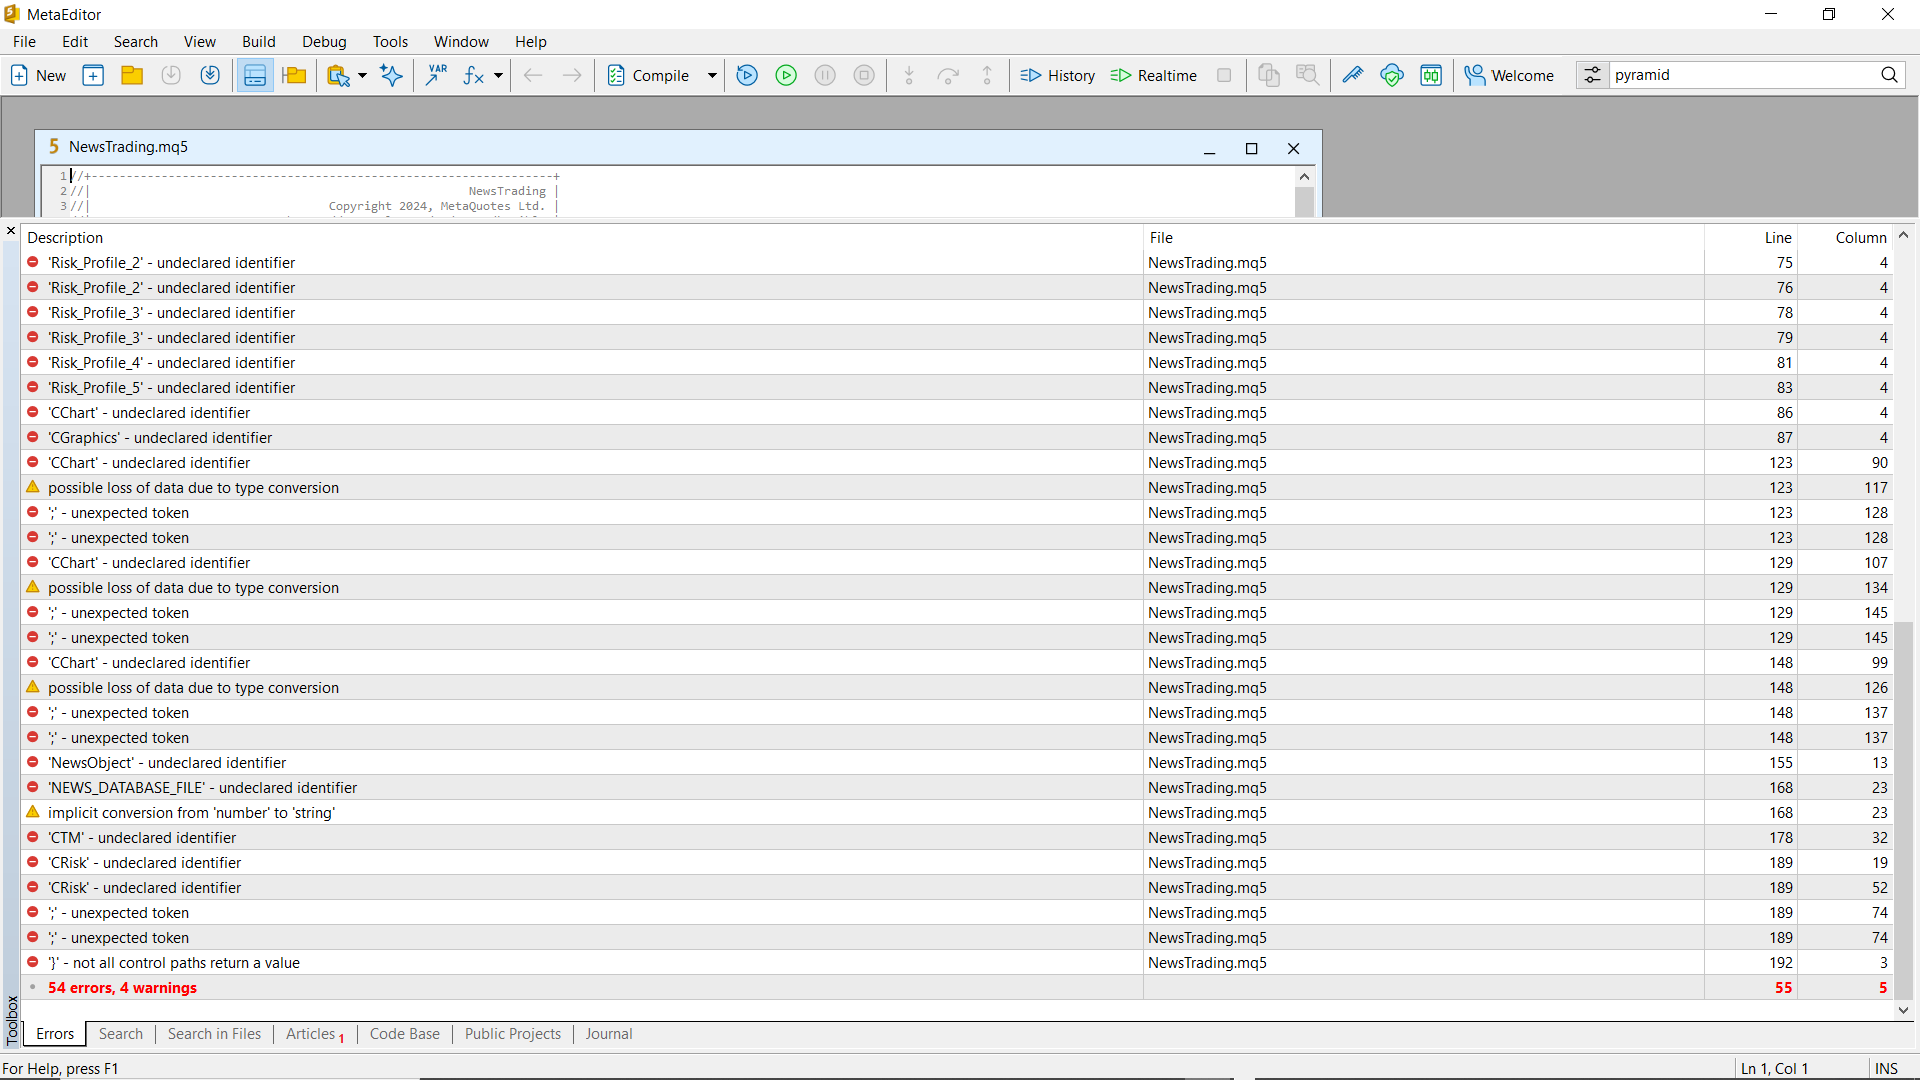
Was trying to test it but i don't know where to put al the files, so the newstrading is not compiling
Jermaine Wedderburn #:
Was trying to test it but i don't know where to put al the files, so the newstrading is not compiling
Step 1: Move the NewsTrading folder into the Experts Folder

Step 2:Open The NewsTrading Project File.

Step 3: Click on the NewsTrading mq5 file and open it.

Step 4: Compile the Application.

You are missing trading opportunities:
- Free trading apps
- Over 8,000 signals for copying
- Economic news for exploring financial markets
Registration
Log in
You agree to website policy and terms of use
If you do not have an account, please register
Check out the new article: News Trading Made Easy (Part 2): Risk Management.
In this article, inheritance will be introduced into our previous and new code. A new database design will be implemented to provide efficiency. Additionally, a risk management class will be created to tackle volume calculations.
A quick refresher for the previous article in the News Trading Made Easy series. In part 1, we went through the concept of DST(Daylight Savings Time) and the various versions for different countries that essentially change their time zones by an hour ahead and behind during a financial year. This will change trading schedules for the related brokers using DST. The reasons for creating a database and the benefits were addressed. A database was created to store the news events from the MQL5 Economic Calendar with subsequent changes to the event time data to reflect the broker's DST schedule for accurate back-testing in the future. In the project files, an SQL script results in an Excel format was provided for all the unique events accessible through the MQL5 Calendar for all the different countries.
However, in this article, we will make a few changes to our previous code in part 1. Firstly by implementing inheritance to the existing code and upcoming new code, the previous news/calendar database will get a revamp into something more useable and practical. Additionally, we will tackle risk management and create different risk profiles to choose from for users with different risk appetites or preferences.
Author: Kabelo Frans Mampa