Background
Please find this blogpost about the initiative of creating this solution --- a python EA.
In this blog post, I would like to share the steps of installation of the proxy python EA.
Installation steps --- The library
You can download and use the backtest version for free from here.
Once you download successfully, the library file will appear under the market folder:

You will need to move it back to the Libraries folder and rename it to Py3_Proxy_Interface.ex4

Installation steps --- MT4 proxy EA

According to the above image, you will need the following files:
- /Include/DCLib/Network/IWinSocketWrapper.mqh
- /Include/DCLib/Network/WinSocketWrapper.mqh
- /Include/DCLib/EALibs/Py3_Proxy_EA/Py3_Proxy_Interface.mqh
- /Experts/DCEA/Py3_Proxy_EA.mq4 --- you can transform it to your desired EA
- /Libraries/Py3_Proxy_Interface.ex4 --- you can download the free version from MQL5 market
Please find the attached zip file which contains source code with the predefined locations. You can directly apply the files to your local MT4 system and compile them throug the IDE.
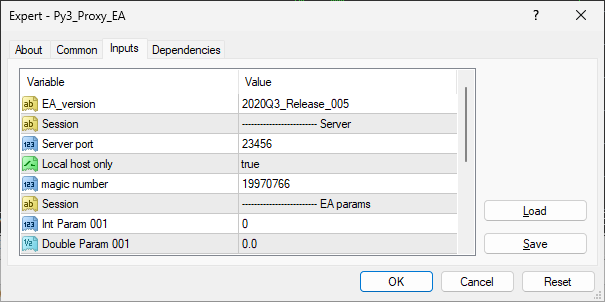
For the file, Py3_Proxy_EA.mq4, you can change the file name and customize the input parameters in the Oninit function
//+------------------------------------------------------------------+
//| Expert initialization function                                   |
//+------------------------------------------------------------------+
int OnInit()
{
    g_win_soc = new WinSocketWrapper();

    pyAddInput_Int("Int Param 001", in_int_param_001);
    pyAddInput_Double("Double Param 001", in_double_param_001);
    pyAddInput_Datetime("Datetime Param 001", in_datetime_param_001);
    pyAddInput_String("String Param 001", in_string_param_001);
    pyAddInput_Bool("Bool Param 001", in_bool_param_001);

    return pyOnInit(g_win_soc, ServerPort, isLocalHostOnly, magicNum);
}
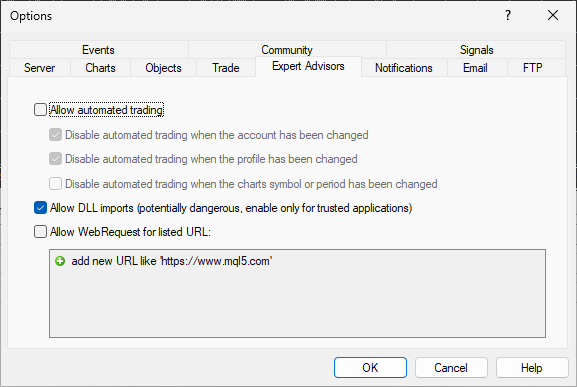
Once you finish the setup and the compilation, you can start the EA in the strategy tester. Don't forget to allow dll before you use the EA.

If everything goes right, your EA should wait for client connections for 10 seconds.

You also need to confirm the correctness of the port number:

Installtion steps --- Python EA
To complete this step, you will need files:
- MT4ClientEA.py --- this is a runnable example linking with MT4, you need to select the correct port
You also need to have a valid python 3.8 runnable environment. To keep things simple, I will suggest conda on windows.
$ conda create --name py3.8 python=3.8
$ conda activate py3.8
========================================
(py3.8) $ pip install pysailfish
(py3.8) $ python MT4ClientEA.py

# or you can use poetry solution

(py3.8) $ pip install poetry
(py3.8) $ poetry init
(py3.8) $ poetry add pysailfish
(py3.8) $ poetry run python MT4ClientEA.py
If your installation is complete without errors, you should see output from the python console:
2023-05-02 10:28:15,430 [INFO] [MT4DemoEA_logger] [ThreadClass.py:_main:39] [Thread-1:2688] Start
2023-05-02 10:28:15,758 [INFO] [MT4DemoEA_logger] [MT4ClientEA.py:_OnInit:9] [Thread-1:2688] {'Lots': '0.10000000', 'MaximumRisk': '0.02000000', 'DecreaseFactor': '3.00000000', 'MovingPeriod': '12', 'MovingShift': '6'}
Limitation & Notice
There are limitations of this solution.
- This is not a bug free library. Users are encouraged to test out their EAs through the free version provided on the marketplace amid the backtesting phases. There is no support guarantee but you can put down the bugs or suggestions you have in the comments.
- Not all of the functions in MQL4 are supported. You can find the list of supported functions within the file --- function_list.txt
- The callback frequence is not tick by tick, that is based on bar, for example 1M, 5M, etc...
If you like this library and would you like to use it for live trading, feel free to subscribe it through the marketplace. Please only do this after you tested and confirm it works for your use case.
There is no guarantee of profits by this tool. It is just a bridge tool between MT4 and python.

