
Mastering ONNX: The Game-Changer for MQL5 Traders

"The ability to export and import AI models in ONNX format streamlines the development process, saving time and resources when integrating AI into diverse language ecosystems."
Introduction
It is undeniable that we are in the age of AI and machine learning, on every single day, there is a new AI-based technology deployed in finance, arts and gaming, education, and many more aspects of life.
To us traders learning to harness the power of Artificial Intelligence could give us an edge over the market, letting us detect patterns and relationships that we couldn't see with the human eye.
Despite AI seeming cool and magical, behind the models, there are complex mathematical operations that require a huge amount of work and a high degree of accuracy and focus to figure out and implement right if you were to implement these machine learning models from scratch, something which you don't have thanks to open-source.
Nowadays, you don't even need to be a math and programming genius to build and implement AI models, You need a basic understanding of a certain programming language or tools you want to use for your project, and a pc in some cases you don't even have to own a pc thanks to services like Google Colab, you can code, build and, run AI models for free using python.
As easy as it is to implement Machine Learning models using Python and other popular and matured programming languages, it is not that easy to do it in MQL5, to be honest. Unless you want to reinvent the wheel by creating Machine Learning models in MQL5 from scratch something we do in this article series, I would strongly advise using ONNX to integrate AI models built in python to MQL5. ONNX is now supported in MQL5, I'm so excited, I believe you should too.

A basic understanding of Artificial Intelligence and Machine Learning is required to understand the content of this Article, kindly refer to >> post, post
What is ONNX?
ONNX, which stands for Open Neural Network Exchange, is an open-source format for representing machine learning and deep learning models. It allows you to convert models trained in one deep learning framework into a common format that can be used in other frameworks, making it easier to work with models across different platforms and tools.
This means you can build machine learning models using any language that supports it other than MQL5, then convert that model into ONNX format, this ONNX model can then be used inside your MQL5 program.
In this post, I will be using Python to build Machine Learning since I am familiar with it, I am told you can use other languages too, I'm unsure. By the way, the entire ONNX documentation seems to be Python-based, I believe at the moment ONNX is made for Python, It makes sense because I don't think there is any language other than Python with advanced AI-based libraries and tools.
Basic Concepts in ONNX:
Before diving into ONNX, you should be familiar with some key concepts:
- ONNX Model: An ONNX model is a representation of a machine learning model. It consists of a computation graph where nodes represent operations (e.g., convolution, addition) and edges represent data flow between operations.
- Nodes: Nodes in an ONNX graph represent operations or functions applied to input data. These nodes can be operations like convolution, addition, or custom operations.
- Tensors: Tensors are multi-dimensional arrays that represent the data flowing between nodes in the computation graph. They can be inputs, outputs, or intermediate data.
- Operators: Operators are functions applied to tensors in ONNX. Each operator represents a specific operation, like matrix multiplication or element-wise addition.
Building Models in Python and Deploying in MQL5 using ONNX
To Successfully build a machine learning model in Python deploy that model inside your EA, indicator, or Script in MQL5; It requires more than just Python code for the model, Below are the crucial steps to follow so that you end up not only with an ONNX model but with a model that does give accurate predictions you want;
- Data Collection
- Data Normalization on the MQL5 side
- Building the Models in Python
- Getting the Built ONNX model in MQL5
- Running the Model in real time
01: Data Collection
Data collection is the first thing that has to be done right inside your MQL5 program, I believe it is best to collect all the data inside your MQL5 program to be consistent with the way we collect the training data and the data that is used during live trading or running the model in real-time Bear in mind that data collection could vary based on the nature of the problem you are trying to solve in this article we'll be trying to solve a regression problem. We are going to use OHLC(Open, High, Low, Close) market information as our primary dataset, where Open, High, and Low are will be used as independent variables while Close price values will be used as the target variable.
Inside ONNX get data.mq5
matrixf GetTrainData(uint start, uint total)
 {
   matrixf return_matrix(total, 3);

   ulong last_col;


    OPEN.CopyRates(Symbol(), PERIOD_CURRENT, COPY_RATES_OPEN, start, total);
    HIGH.CopyRates(Symbol(), PERIOD_CURRENT, COPY_RATES_HIGH, start, total);
    LOW.CopyRates(Symbol(), PERIOD_CURRENT, COPY_RATES_LOW, start, total);
    CLOSE.CopyRates(Symbol(), PERIOD_CURRENT, COPY_RATES_CLOSE, start, total);

    return_matrix.Col(OPEN, 0);
    return_matrix.Col(HIGH, 1);
    return_matrix.Col(LOW, 2);


    csv_name_ = Symbol()+"."+EnumToString(Period())+"."+string(total_bars);


      x_vars = "OPEN,HIGH,LOW";


       return_matrix.Resize(total, 4); //if we are collecting the train data collect the target variable also

       last_col = return_matrix.Cols()-1; //Column located at the last index is the last column

       return_matrix.Col(CLOSE, last_col); //put the close price information in the last column of a matrix


       csv_name_ +=".targ=CLOSE";

       csv_header = x_vars + ",CLOSE";

       if (!WriteCsv("ONNX Datafolder\\"+csv_name_+".csv", return_matrix, csv_header))
         Print("Failed to Write to a csv file");
       else
         Print("Data saved to a csv file successfully");


   return return_matrix;
 }
What this function does is that it collects the independent variables OHL and the target variable CLOSE, In supervised machine learning the target variable needs to be specified and given to the model so that it can learn upon that and understand the patterns in between the target variable and the rest of the variables, in our case the model will try to understand how does these indicator readings lead to bullish movement or bearish movement.
When deploying the model, we need to collect the data the same way except this time we'll be collecting without the target variable because that is something we want our trained model to figure out. To predict, so to speak.
That' why there is a different function named GetLiveData, for loading new data for fluent predictions in the market.
Inside ONNX mt5.mq5
matrixf GetLiveData(uint start, uint total)
 {
   matrixf return_matrix(total, 3);


    OPEN.CopyRates(Symbol(), PERIOD_CURRENT,COPY_RATES_OPEN, start, total);
    HIGH.CopyRates(Symbol(), PERIOD_CURRENT,COPY_RATES_HIGH, start, total);
    LOW.CopyRates(Symbol(), PERIOD_CURRENT,COPY_RATES_LOW, start, total);

    return_matrix.Col(OPEN, 0);
    return_matrix.Col(HIGH, 1);
    return_matrix.Col(LOW, 2);


   return return_matrix;
 }
Collecting the Training Data
    matrixf dataset = GetTrainData(start_bar, total_bars);

    Print("Train data\n",dataset);
Outputs:
DK      0       23:10:54.837    ONNX get data (EURUSD,H1)       Train data
PR      0       23:10:54.837    ONNX get data (EURUSD,H1)       [[1.4243405,1.4130603,1.4215617,1.11194]
HF      0       23:10:54.837    ONNX get data (EURUSD,H1)        [1.3976599,1.3894916,1.4053394,1.11189]
RK      0       23:10:54.837    ONNX get data (EURUSD,H1)        [1.402994,1.3919021,1.397626,1.11123]
PM      0       23:10:54.837    ONNX get data (EURUSD,H1)        [1.3848507,1.3761013,1.3718294,1.11022]
FF      0       23:10:54.837    ONNX get data (EURUSD,H1)        [1.3597701,1.3447646,1.3545419,1.1097701]
CH      0       23:10:54.837    ONNX get data (EURUSD,H1)        [1.3461626,1.3522644,1.3433729,1.1106]
NL      0       23:10:54.837    ONNX get data (EURUSD,H1)        [1.3683074,1.3525325,1.3582669,1.10996]
Getting the Live Data
Getting the current bar Information OHL.
matrixf live_data = GetLiveData(0,1);

Print("Live data\n",live_data);
Outputs:
MN      0       23:15:47.167    ONNX mt5 (EURUSD,H1)    Live data
KS      0       23:15:47.167    ONNX mt5 (EURUSD,H1)    [[-0.21183228,-0.23540309,-0.20334835]]
The way live data is loaded may be slightly different when preparing the data for timeseries forecasting models, like RNN, GRU and, LSTM
error 2023.09.18 18:03:53.212 ONNX: invalid parameter size, expected 1044480 bytes instead of 32640
02: Data Normalization on The MQL5 Side
Data normalization is among the most crucial things that need to be done right for a dataset that is going to be used by a machine learning model.
Bear in mind that the normalization technique that is used to prepare the training data needs to be the same that is used to prepare the testing and the live data. This means that if the technique used was MinMaxScaler, the min and max values which are the fundamental variables in the MinMaxScaler equation, that were used in preparing the train data have to be used to keep normalizing the new data that is going to be handled by the model elsewhere. To achieve this consistency we have to save the variables for each normalization technique to a csv file:
Data normalization is for independent variables only, it doesn't matter what kind of problem you are trying to solve, you don't have to normalize the target variable
We are going to be using the Preprocessing class found here.
Inside ONNX get data.mq5 script
 //--- Saving the normalization prameters

 switch(NORM)
   {
    case  NORM_MEAN_NORM:

       //--- saving the mean

       norm_params.Assign(norm_x.mean_norm_scaler.mean);
       WriteCsv(normparams_folder+csv_name_+".mean_norm_scaler.mean.csv",norm_params,x_vars);

       //--- saving the min

       norm_params.Assign(norm_x.mean_norm_scaler.min);
       WriteCsv(normparams_folder+csv_name_+".mean_norm_scaler.min.csv",norm_params,x_vars);

       //--- saving the max

       norm_params.Assign(norm_x.mean_norm_scaler.max);
       WriteCsv(normparams_folder+csv_name_+".mean_norm_scaler.max.csv",norm_params,x_vars);

      break;

    case NORM_MIN_MAX_SCALER:

       //--- saving the min

       norm_params.Assign(norm_x.min_max_scaler.min);
       WriteCsv(normparams_folder+csv_name_+".min_max_scaler.min.csv",norm_params,x_vars);

       //--- saving the max

       norm_params.Assign(norm_x.min_max_scaler.max);
       WriteCsv(normparams_folder+csv_name_+".min_max_scaler.max.csv",norm_params,x_vars);


       break;

    case NORM_STANDARDIZATION:

       //--- saving the mean

       norm_params.Assign(norm_x.standardization_scaler.mean);
       WriteCsv(normparams_folder+csv_name_+".standardization_scaler.mean.csv",norm_params,x_vars);

       //--- saving the std

       norm_params.Assign(norm_x.standardization_scaler.std);
       WriteCsv(normparams_folder+csv_name_+".standardization_scaler.std.csv",norm_params,x_vars);

       break;
   }
Outputs:

When Standardization Scaler was used inside the csv files the parameters looked like this;
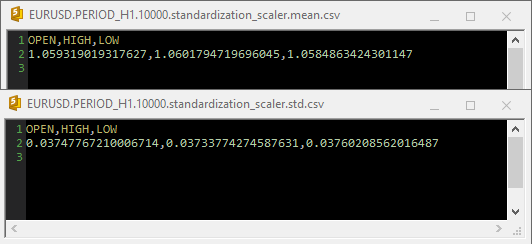
Notice that the normalization is also integrated inside the GetData function, since normalization is so important, each data matrix returned by both of the functions responsible for collecting data must be a matrix with normalized price values.
Inside ONNX get data.mq5 script
matrixf GetTrainData(uint start, uint total)
 {
   matrixf return_matrix(total, 3);

   ulong last_col;


    OPEN.CopyRates(Symbol(), PERIOD_CURRENT, COPY_RATES_OPEN, start, total);
    HIGH.CopyRates(Symbol(), PERIOD_CURRENT, COPY_RATES_HIGH, start, total);
    LOW.CopyRates(Symbol(), PERIOD_CURRENT, COPY_RATES_LOW, start, total);
    CLOSE.CopyRates(Symbol(), PERIOD_CURRENT, COPY_RATES_CLOSE, start, total);

    return_matrix.Col(OPEN, 0);
    return_matrix.Col(HIGH, 1);
    return_matrix.Col(LOW, 2);

    matrixf norm_params = {};

    csv_name_ = Symbol()+"."+EnumToString(Period())+"."+string(total_bars);


      x_vars = "OPEN,HIGH,LOW";

       while (CheckPointer(norm_x) != POINTER_INVALID)
         delete (norm_x);

       norm_x = new CPreprocessing<vectorf, matrixf>(return_matrix, NORM);


 //--- Saving the normalization prameters

 switch(NORM)
   {
    case  NORM_MEAN_NORM:

       //--- saving the mean

       norm_params.Assign(norm_x.mean_norm_scaler.mean);
       WriteCsv(normparams_folder+csv_name_+".mean_norm_scaler.mean.csv",norm_params,x_vars);

       //--- saving the min

       norm_params.Assign(norm_x.mean_norm_scaler.min);
       WriteCsv(normparams_folder+csv_name_+".mean_norm_scaler.min.csv",norm_params,x_vars);

       //--- saving the max

       norm_params.Assign(norm_x.mean_norm_scaler.max);
       WriteCsv(normparams_folder+csv_name_+".mean_norm_scaler.max.csv",norm_params,x_vars);

      break;

    case NORM_MIN_MAX_SCALER:

       //--- saving the min

       norm_params.Assign(norm_x.min_max_scaler.min);
       WriteCsv(normparams_folder+csv_name_+".min_max_scaler.min.csv",norm_params,x_vars);

       //--- saving the max

       norm_params.Assign(norm_x.min_max_scaler.max);
       WriteCsv(normparams_folder+csv_name_+".min_max_scaler.max.csv",norm_params,x_vars);


       break;

    case NORM_STANDARDIZATION:

       //--- saving the mean

       norm_params.Assign(norm_x.standardization_scaler.mean);
       WriteCsv(normparams_folder+csv_name_+".standardization_scaler.mean.csv",norm_params,x_vars);

       //--- saving the std

       norm_params.Assign(norm_x.standardization_scaler.std);
       WriteCsv(normparams_folder+csv_name_+".standardization_scaler.std.csv",norm_params,x_vars);

       break;
   }

       return_matrix.Resize(total, 4); //if we are collecting the train data collect the target variable also

       last_col = return_matrix.Cols()-1; //Column located at the last index is the last column

       return_matrix.Col(CLOSE, last_col); //put the close price information in the last column of a matrix


       csv_name_ +=".targ=CLOSE";

       csv_header = x_vars + ",CLOSE";

       if (!WriteCsv("ONNX Datafolder\\"+csv_name_+".csv", return_matrix, csv_header))
         Print("Failed to Write to a csv file");
       else
         Print("Data saved to a csv file successfully");


   return return_matrix;
 }
Lastly, The data was saved inside a CSV so that It could be shared with Python code.
03: Building the Models in Python
I will be building a Multi-Layer Perceptron neural network, but you can build any model of your choice. You are not restricted to this specific type of model. Start by installing Python in your system if you haven't After that install virtualenv by running the following commands from Windows CMD, not to be confused with Powershell!!
$ pip3 install virtualenv
After that run,
$ virtualenv venv
This will create a Python virtual environment for your Windows machine, which I believe most of us are on Windows, the process may be a bit different for Mac users and Linux folks, After that start a virtual environment by running this command
$ venv\Scripts\activate
After that install all the dependencies used in this tutorial by running
It is always important to isolate the project by creating a virtual environment to avoid conflicts between the modules and Python versions and to make the project easy to share
Importing and Initializing MT5
import MetaTrader5 as mt5

if not mt5.initialize(): #This will open MT5 app in your pc

   print("initialize() failed, error code =",mt5.last_error())

   quit()

# program logic and ML code will be here


mt5.shutdown() #This closes the program

# Getting the data we stored in the Files path on Metaeditor

data_path = terminal_info.data_path

dataset_path = data_path + "\\MQL5\\Files\\ONNX Datafolder"
We need to check if the path exists, if it doesn't exist that means we haven't collected the data on the MT5 side of things.
import os if not os.path.exists(dataset_path):

print("Dataset folder doesn't exist | Be sure you are referring to the correct path and the data is collected from MT5 side of things")
quit()
Building A Multi-Layer Perceptron Neural Network(MLP)
We are going to wrap a MLP NN inside a class to make our code into readable sections;
01: Class Initialization
Data is collected and split into training and testing samples, whilst important variables are declared to be available for the whole class to use,
class NeuralNetworkClass():
    def __init__(self, csv_name, target_column, batch_size=32):

    # Loading the dataset and storing to a variable Array
        self.data = pd.read_csv(dataset_path+"\\"+csv_name)

        if self.data.empty:
            print(f"No such dataset or Empty dataset csv = {csv_name}")
            quit() # quit the program


        print(self.data.head()) # Print 5 first rows of a given data

        self.target_column = target_column
        # spliting the data into training and testing samples

        X = self.data.drop(columns=self.target_column).to_numpy() # droping the targeted column, the rest is x variables
        Y = self.data[self.target_column].to_numpy() # We convert data arrays to numpy arrays compartible with sklearn and tensorflow


        self.train_x, self.test_x, self.train_y, self.test_y = train_test_split(X, Y, test_size=0.3, random_state=42) # splitting the data into training and testing samples

        print(f"train x shape {self.train_x.shape}\ntest x shape {self.test_x.shape}")

        self.input_size = self.train_x.shape[-1] # obtaining the number of columns in x variable as our inputs

        self.output_size = 1 # We are solving for a regression problem we need to have a single output neuron

        self.batch_size = batch_size

        self.model = None # Object to store the model

        self.plots_directory = "Plots"
        self.models_directory = "Models"
Outputs:

02: Building the Neural Network model
Our single layered neural network is defined with given number of neurons.
    def BuildNeuralNetwork(self, activation_function='relu', neurons = 10):

        # Create a Feedforward Neural Network model
        self.model = keras.Sequential([
            keras.layers.Input(shape=(self.input_size,)),  # Input layer
            keras.layers.Dense(units=neurons, activation=activation_function, activity_regularizer=l2(0.01), kernel_initializer="he_uniform"),  # Hidden layer with an activation function
            keras.layers.Dense(units=self.output_size, activation='linear', activity_regularizer=l2(0.01), kernel_initializer="he_uniform")
        ])

        # Print a summary of the model's architecture.
        self.model.summary()
Outputs:

03: Training and Testing the Neural Network Model
    def train_network(self, epochs=100, learning_rate=0.001, loss='mean_squared_error'):

        early_stopping = EarlyStopping(monitor='val_loss', patience=10, restore_best_weights=True) # Early stoppage mechanism | stop training when there is no major change in loss in the last to epochs, defined by the variable patience

        adam = optimizers.Adam(learning_rate=learning_rate) # Adam optimizer >> https://machinelearningmastery.com/adam-optimization-algorithm-for-deep-learning/

        # Compile the model: Specify the loss function, optimizer, and evaluation metrics.
        self.model.compile(loss=loss, optimizer=adam, metrics=['mae'])

        # One hot encode the validation and train target variables

        validation_y = self.test_y
        y = self.train_y

        history = self.model.fit(self.train_x, y, epochs=epochs, batch_size=self.batch_size, validation_data=(self.test_x, validation_y), callbacks=[early_stopping], verbose=2)

        if not os.path.exists(self.plots_directory): #create plots path if it doesn't exist for saving the train-test plots
            os.makedirs(self.plots_directory)

        # save the loss and validation loss plot

        plt.figure(figsize=(12, 6))
        plt.plot(history.history['loss'], label='Training Loss')
        plt.plot(history.history['val_loss'], label='Validation Loss')
        plt.xlabel('Epochs')
        plt.ylabel('Loss')
        plt.legend()
        title = 'Training and Validation Loss Curves'
        plt.title(title)
        plt.savefig(fname=f"{self.plots_directory}\\"+title)


        # use the trained model to make predictions on the trained data

        pred = self.model.predict(self.train_x)

        acc = metrics.r2_score(self.train_y, pred)

        # Plot actual & pred
        count = [i*0.1 for i in range(len(self.train_y))]

        title = f'MLP {self.target_column} - Train'

        # Saving the plot containing information about predictions and actual values

        plt.figure(figsize=(7, 5))
        plt.plot(count, self.train_y, label = "Actual")
        plt.plot(count, pred,  label = "forecast")
        plt.xlabel('Actuals')
        plt.ylabel('Preds')
        plt.title(title+f" | Train acc={acc}")
        plt.legend()
        plt.savefig(fname=f"{self.plots_directory}\\"+title)

        self.model.save(f"Models\\lstm-pat.{self.target_column}.h5") #saving the model in h5 format, this will help us to easily convert this model to onnx later


    def test_network(self):
        # Plot actual & pred

        count = [i*0.1 for i in range(len(self.test_y))]

        title = f'MLP {self.target_column} - Test'


        pred = self.model.predict(self.test_x)

        acc = metrics.r2_score(self.test_y, pred)


        # Saving the plot containing information about predictions and actual values

        plt.figure(figsize=(7, 5))
        plt.plot(count, self.test_y, label = "Actual")
        plt.plot(count, pred,  label = "forecast")
        plt.xlabel('Actuals')
        plt.ylabel('Preds')
        plt.title(title+f" | Train acc={acc}")
        plt.legend()
        plt.savefig(fname=f"{self.plots_directory}\\"+title)

        if not os.path.exists(self.plots_directory): #create plots path if it doesn't exist for saving the train-test plots
            os.makedirs(self.plots_directory)

        plt.savefig(fname=f"{self.plots_directory}\\"+title)

        return acc
Outputs:
Epoch 1/50
219/219 - 2s - loss: 1.2771 - mae: 0.3826 - val_loss: 0.1153 - val_mae: 0.0309 - 2s/epoch - 8ms/step
Epoch 2/50
219/219 - 1s - loss: 0.0836 - mae: 0.0305 - val_loss: 0.0582 - val_mae: 0.0291 - 504ms/epoch - 2ms/step
Epoch 3/50
219/219 - 1s - loss: 0.0433 - mae: 0.0283 - val_loss: 0.0323 - val_mae: 0.0284 - 515ms/epoch - 2ms/step
Epoch 4/50
219/219 - 0s - loss: 0.0262 - mae: 0.0272 - val_loss: 0.0218 - val_mae: 0.0270 - 482ms/epoch - 2ms/step
Epoch 5/50
...
...
Epoch 48/50
219/219 - 0s - loss: 0.0112 - mae: 0.0106 - val_loss: 0.0112 - val_mae: 0.0121 - 490ms/epoch - 2ms/step
Epoch 49/50
219/219 - 0s - loss: 0.0112 - mae: 0.0106 - val_loss: 0.0112 - val_mae: 0.0109 - 486ms/epoch - 2ms/step
Epoch 50/50
219/219 - 1s - loss: 0.0112 - mae: 0.0106 - val_loss: 0.0112 - val_mae: 0.0097 - 501ms/epoch - 2ms/step
219/219 [==============================] - 0s 2ms/step
C:\Users\Omega Joctan\OneDrive\Documents\onnx article\ONNX python\venv\Lib\site-packages\keras\src\engine\training.py:3079: UserWarning: You are saving your model as an HDF5 file via `model.save()`. This file format is considered legacy. We recommend using instead the native Keras format, e.g. `model.save('my_model.keras')`.
  saving_api.save_model(
94/94 [==============================] - 0s 2ms/step
Test accuracy = 0.9336617822086006

The Neural network model had a 93% accuracy during Training and about 95% during testing, could be overfitted but we are going to proceed with it anyway.
04: Saving the ONNX model.
It is generally a good practice to save a model once the training is successfully done and you are satisfied with the performance of the model in both training and out-of-sample validation, We need to add ONNX runtime code to save the model during the train_network function in our class. First of all, we need to install two libraries onnx, and tf2onnx
def train_network(self, epochs=100, learning_rate=0.001, loss='mean_squared_error'):
# at the end of this function
# ....

    self.model.save(f"Models\\MLP.REG.{self.target_column}.{self.data.shape[0]}.h5") #saving the model in h5 format, this will help us to easily convert this model to onnx later
    self.saveONNXModel()


def saveONNXModel(self, folder="ONNX Models"):

    path = data_path + "\\MQL5\\Files\\" + folder

    if not os.path.exists(path): # create this path if it doesn't exist
        os.makedirs(path)

    onnx_model_name = f"MLP.REG.{self.target_column}.{self.data.shape[0]}.onnx"
    path +=  "\\" + onnx_model_name


    loaded_keras_model = load_model(f"Models\\MLP.REG.{self.target_column}.{self.data.shape[0]}.h5")

    onnx_model, _ = tf2onnx.convert.from_keras(loaded_keras_model, output_path=path)

    onnx.save(onnx_model, path )

    print(f'Saved model to {path}')
Outputs:

You might have noticed that I chose to save the ONNX model under the Files parent directory, why this directory? This is because it is easier to include the ONNX file as a resource inside our MQL5 program such as an Expert advisors, or an indicator.
04: Getting the Built ONNX model in MQL5
#resource "\\Files\\ONNX Models\\MLP.REG.CLOSE.10000.onnx" as uchar RNNModel[]
This does Import the ONNX model and stores it inside the RNNModel uchar array.
The next thing we need to do is to define the ONNX handle as a global variable and create the handle inside the OnInit function.
Inside ONNX mt5.mq5 EA
long mlp_onnxhandle;

#include <MALE5\preprocessing.mqh>
CPreprocessing<vectorf, matrixf> *norm_x;

int inputs[], outputs[];

vectorf OPEN,
       HIGH,
       LOW;

//+------------------------------------------------------------------+
//| Expert initialization function                                   |
//+------------------------------------------------------------------+
int OnInit()
  {
//---

  if (!LoadNormParams()) //Load the normalization parameters we saved once
    {
      Print("Normalization parameters csv files couldn't be found \nEnsure you are collecting data and Normalizing them using [ONNX get data.ex5] Script \nTrain the Python model again if necessary");
      return INIT_FAILED;
    }

//--- ONNX SETTINGS

  mlp_onnxhandle = OnnxCreateFromBuffer(RNNModel, MQLInfoInteger(MQL_DEBUG) ? ONNX_DEBUG_LOGS : ONNX_DEFAULT); //creating onnx handle buffer | rUN DEGUG MODE during debug mode

  if (mlp_onnxhandle == INVALID_HANDLE)
    {
       Print("OnnxCreateFromBuffer Error = ",GetLastError());
       return INIT_FAILED;
    }

//--- since not all sizes defined in the input tensor we must set them explicitly
//--- first index - batch size, second index - series size, third index - number of series (only Close)

   OnnxTypeInfo type_info; //Getting onnx information for Reference In case you forgot what the loaded ONNX is all about

   long input_count=OnnxGetInputCount(mlp_onnxhandle);
   Print("model has ",input_count," input(s)");
   for(long i=0; i<input_count; i++)
     {
      string input_name=OnnxGetInputName(mlp_onnxhandle,i);
      Print(i," input name is ",input_name);
      if(OnnxGetInputTypeInfo(mlp_onnxhandle,i,type_info))
        {
          PrintTypeInfo(i,"input",type_info);
          ArrayCopy(inputs, type_info.tensor.dimensions);
        }
     }

   long output_count=OnnxGetOutputCount(mlp_onnxhandle);
   Print("model has ",output_count," output(s)");
   for(long i=0; i<output_count; i++)
     {
      string output_name=OnnxGetOutputName(mlp_onnxhandle,i);
      Print(i," output name is ",output_name);
      if(OnnxGetOutputTypeInfo(mlp_onnxhandle,i,type_info))
       {
         PrintTypeInfo(i,"output",type_info);
         ArrayCopy(outputs, type_info.tensor.dimensions);
       }
     }

//---

   if (MQLInfoInteger(MQL_DEBUG))
    {
      Print("Inputs & Outputs");
      ArrayPrint(inputs);
      ArrayPrint(outputs);
    }

   const long input_shape[] = {batch_size, 3};

   if (!OnnxSetInputShape(mlp_onnxhandle, 0, input_shape)) //Giving the Onnx handle the input shape
     {
       printf("Failed to set the input shape Err=%d",GetLastError());
       return INIT_FAILED;
     }

   const long output_shape[] = {batch_size, 1};

   if (!OnnxSetOutputShape(mlp_onnxhandle, 0, output_shape)) //giving the onnx handle the output shape
     {
       printf("Failed to set the input shape Err=%d",GetLastError());
       return INIT_FAILED;
     }

//---

   return(INIT_SUCCEEDED);
  }
Outputs:
PR      0       18:57:10.265    ONNX mt5 (EURUSD,H1)    ONNX: Creating and using per session threadpools since use_per_session_threads_ is true
CN      0       18:57:10.265    ONNX mt5 (EURUSD,H1)    ONNX: Dynamic block base set to 0
EE      0       18:57:10.266    ONNX mt5 (EURUSD,H1)    ONNX: Initializing session.
IM      0       18:57:10.266    ONNX mt5 (EURUSD,H1)    ONNX: Adding default CPU execution provider.
JN      0       18:57:10.269    ONNX mt5 (EURUSD,H1)    ONNX: Use DeviceBasedPartition as default
QK      0       18:57:10.269    ONNX mt5 (EURUSD,H1)    ONNX: Saving initialized tensors.
GR      0       18:57:10.269    ONNX mt5 (EURUSD,H1)    ONNX: Done saving initialized tensors
RI      0       18:57:10.269    ONNX mt5 (EURUSD,H1)    ONNX: Session successfully initialized.
JF      0       18:57:10.269    ONNX mt5 (EURUSD,H1)    model has 1 input(s)
QR      0       18:57:10.269    ONNX mt5 (EURUSD,H1)    0 input name is input_1
NF      0       18:57:10.269    ONNX mt5 (EURUSD,H1)       type ONNX_TYPE_TENSOR
PM      0       18:57:10.269    ONNX mt5 (EURUSD,H1)       data type ONNX_TYPE_TENSOR
HI      0       18:57:10.269    ONNX mt5 (EURUSD,H1)       shape [-1, 3]
FS      0       18:57:10.269    ONNX mt5 (EURUSD,H1)       0 input shape must be defined explicitly before model inference
NE      0       18:57:10.269    ONNX mt5 (EURUSD,H1)       shape of input data can be reduced to [3] if undefined dimension set to 1
GD      0       18:57:10.269    ONNX mt5 (EURUSD,H1)    model has 1 output(s)
GQ      0       18:57:10.269    ONNX mt5 (EURUSD,H1)    0 output name is dense_1
LJ      0       18:57:10.269    ONNX mt5 (EURUSD,H1)       type ONNX_TYPE_TENSOR
NQ      0       18:57:10.269    ONNX mt5 (EURUSD,H1)       data type ONNX_TYPE_TENSOR
LF      0       18:57:10.269    ONNX mt5 (EURUSD,H1)       shape [-1, 1]
KQ      0       18:57:10.269    ONNX mt5 (EURUSD,H1)       0 output shape must be defined explicitly before model inference
CO      0       18:57:10.269    ONNX mt5 (EURUSD,H1)       shape of output data can be reduced to [1] if undefined dimension set to 1
GR      0       18:57:10.269    ONNX mt5 (EURUSD,H1)    Inputs & Outputs
IE      0       18:57:10.269    ONNX mt5 (EURUSD,H1)    -1  3
CK      0       18:57:10.269    ONNX mt5 (EURUSD,H1)    -1  1
Getting Live Data
As I said earlier, the live data must be obtained from the market and normalized the same way it was normalized when collecting the data for training.
Inside ONNX mt5.mq5 EA
matrixf GetLiveData(uint start, uint total)
 {
   matrixf return_matrix(total, 3);


    OPEN.CopyRates(Symbol(), PERIOD_CURRENT,COPY_RATES_OPEN, start, total);
    HIGH.CopyRates(Symbol(), PERIOD_CURRENT,COPY_RATES_HIGH, start, total);
    LOW.CopyRates(Symbol(), PERIOD_CURRENT,COPY_RATES_LOW, start, total);

    return_matrix.Col(OPEN, 0);
    return_matrix.Col(HIGH, 1);
    return_matrix.Col(LOW, 2);

     if (!norm_x.Normalization(return_matrix))
        Print("Failed to Normalize");

   return return_matrix;
 }
For the norm_x class instance to work, it was declared inside the LoadNormParams() function inside OnInit, This function loads the saved normalization parameters from a respective CSV file.
Inside ONNX mt5.mq5 EA
bool LoadNormParams()
 {
    vectorf min = {}, max ={}, mean={} , std = {};

    csv_name_ = Symbol()+"."+EnumToString(Period())+"."+string(total_bars);

    switch(NORM)
      {
       case  NORM_MEAN_NORM:

          mean = ReadCsvVector(normparams_folder+csv_name_+".mean_norm_scaler.mean.csv"); //--- Loading the mean
          min = ReadCsvVector(normparams_folder+csv_name_+".mean_norm_scaler.min.csv"); //--- Loading the min
          max = ReadCsvVector(normparams_folder+csv_name_+".mean_norm_scaler.max.csv"); //--- Loading the max

          if (MQLInfoInteger(MQL_DEBUG))
              Print(EnumToString(NORM),"\nMean ",mean,"\nMin ",min,"\nMax ",max);

          norm_x = new CPreprocessing<vectorf,matrixf>(max, mean, min);

          if (mean.Sum()<=0 && min.Sum()<=0 && max.Sum() <=0)
              return false;

         break;

       case NORM_MIN_MAX_SCALER:

          min = ReadCsvVector(normparams_folder+csv_name_+".min_max_scaler.min.csv"); //--- Loading the min
          max = ReadCsvVector(normparams_folder+csv_name_+".min_max_scaler.max.csv"); //--- Loading the max


          if (MQLInfoInteger(MQL_DEBUG))
              Print(EnumToString(NORM),"\nMin ",min,"\nMax ",max);

          norm_x = new CPreprocessing<vectorf,matrixf>(max, min);


          if (min.Sum()<=0 && max.Sum() <=0)
            return false;

          break;

       case NORM_STANDARDIZATION:

          mean = ReadCsvVector(normparams_folder+csv_name_+".standardization_scaler.mean.csv"); //--- Loading the mean
          std = ReadCsvVector(normparams_folder+csv_name_+".standardization_scaler.std.csv"); //--- Loading the std

          if (MQLInfoInteger(MQL_DEBUG))
              Print(EnumToString(NORM),"\nMean ",mean,"\nStd ",std);

           norm_x = new CPreprocessing<vectorf,matrixf>(mean, std, NORM_STANDARDIZATION);

          if (mean.Sum()<=0 && std.Sum() <=0)
            return false;

          break;
      }

   return true;
 }
05: Running the Model in Real-time
To use the model inside the OnTick Function, You just need to call the OnnxRun function and pass to it the ONNX handle, a vector, or a matrix of float values for both inputs and predictions and that's it.
Inside ONNX mt5.mq5 EA
void OnTick()
  {
//---
   matrixf input_data = GetLiveData(0,1);
   vectorf output_data(1); //It is very crucial to resize this vector or matrix


   if (!OnnxRun(mlp_onnxhandle, ONNX_NO_CONVERSION, input_data, output_data))
     {
       Print("Failed to Get the Predictions Err=",GetLastError());
       ExpertRemove();
       return;
     }

   Comment("inputs_data\n",input_data,"\npredictions\n",output_data);
}
The output data vector or float matrix needs to be resized to avoid Error code 5805 which stands for ERR_ONNX_INVALID_PARAMETER. Since I only have one output in the neural network that's why I have resized this vector to have the size of 1 If, I were to use a matrix then, I was supposed to resize it to 1 row and 1 column.
Outputs:

Great, Everything is working just fine. We are now using a Neural Network model made and trained using Python inside MetaTrader5. The process isn't that difficult though, Cheers.
Advantages of Using ONNX in MQL5
- Interoperability: ONNX provides a common format for representing deep learning models. This format allows models trained in one deep learning framework (such as TensorFlow, PyTorch, or scikit-learn) to be used in MQL5 without the need for extensive model reimplementation. This could us save a lot of time as we no longer have to hard code models from scratch to get them working in MQL5
- Flexibility: ONNX supports a wide range of deep-learning model types, from traditional feedforward neural networks to more complex models like recurrent neural networks (RNNs) and convolutional neural networks (CNNs). This flexibility makes it suitable for various applications.
- Efficiency: ONNX models can be optimized for efficient deployment on different hardware and platforms. This means you can deploy models on edge devices, mobile devices, cloud servers, and even specialized hardware accelerators.
- Community Support: ONNX has gained substantial community support. Major deep learning frameworks, like TensorFlow, PyTorch, and scikit-learn, support exporting models to ONNX format, and various runtime engines, like ONNX Runtime, make it easy to deploy ONNX models.
- Broad Ecosystem: ONNX is integrated into various software packages, and there are extensive tools for working with ONNX models. You can convert, optimize, and run models in the ONNX format using these tools.
- Cross-Platform Compatibility: ONNX is designed to be cross-platform, meaning models exported in ONNX format can run on different operating systems outside and hardware without modification.
- Model Evolution: ONNX supports model versioning and evolution. You can improve and extend your models over time while maintaining compatibility with previous versions.
- Standardization: ONNX is becoming a de facto standard for interoperability between different deep learning frameworks, making it easier for the community to share models and tools.
Final thoughts
ONNX is especially valuable in scenarios where you need to leverage models across different frameworks, deploy models on a variety of platforms, or collaborate with others who might be using different deep learning tools. It simplifies the process of working with deep learning models, and as the ecosystem continues to grow, ONNX's advantages become even more significant. In this article we have seen the 5 important steps one needs to follow to get started with a working model to say the least, you can extend this code to fit your needs. Also for the program to work on the strategy tester the normalization CSV files needs to be read inside a tester, something I haven't covered in this article.
Best regards
| File | Usage |
|---|---|
| neuralnet.py | The main python script file, contains all the neural network implementation in python language |
| ONNX mt5.mq5 | An expert advisor, showing how to use the ONNX model in trading situations |
| ONNX get data.mq5 | A script for collecting and preparing data to be shared with the python script |
 Launching MetaTrader VPS: A step-by-step guide for first-time users
- Free trading apps
- Over 8,000 signals for copying
- Economic news for exploring financial markets
You agree to website policy and terms of use
Omega J Msigwa appreciate your detailed article.
This article calculates a set of normalization parameters of all the historical data, then normalises the data with it for training, and applies the same normalization parameters to the live data; which is very logical, because the model was trained like so. There are a few doubts which I hope you can clarify please?
01:Good question: the data experiences new higher max or lower min, you might need to retrain the model to make it more relevant
02: I would say according to ML theory the normalization calculation that was applied in this article is the correct one, and it makes sense. Normalizing for different parameters for every sample isn't acceptable (not my words)
Is it possible to retrain the model from inside your expert advisor? So that it can optimize itself as it walks forward?
Training is done from the python side of things and its where the trained model is saved, so the answer is No.
Hi, very very good article
I wonder if it is possible to export the data for a certain period, like by 2018 to 2020
thank you!
Hi, very very good article
I wonder if it is possible to export the data for a certain period, like by 2018 to 2020
thank you!